5. TV Menu Settings 41
Video Menu Options
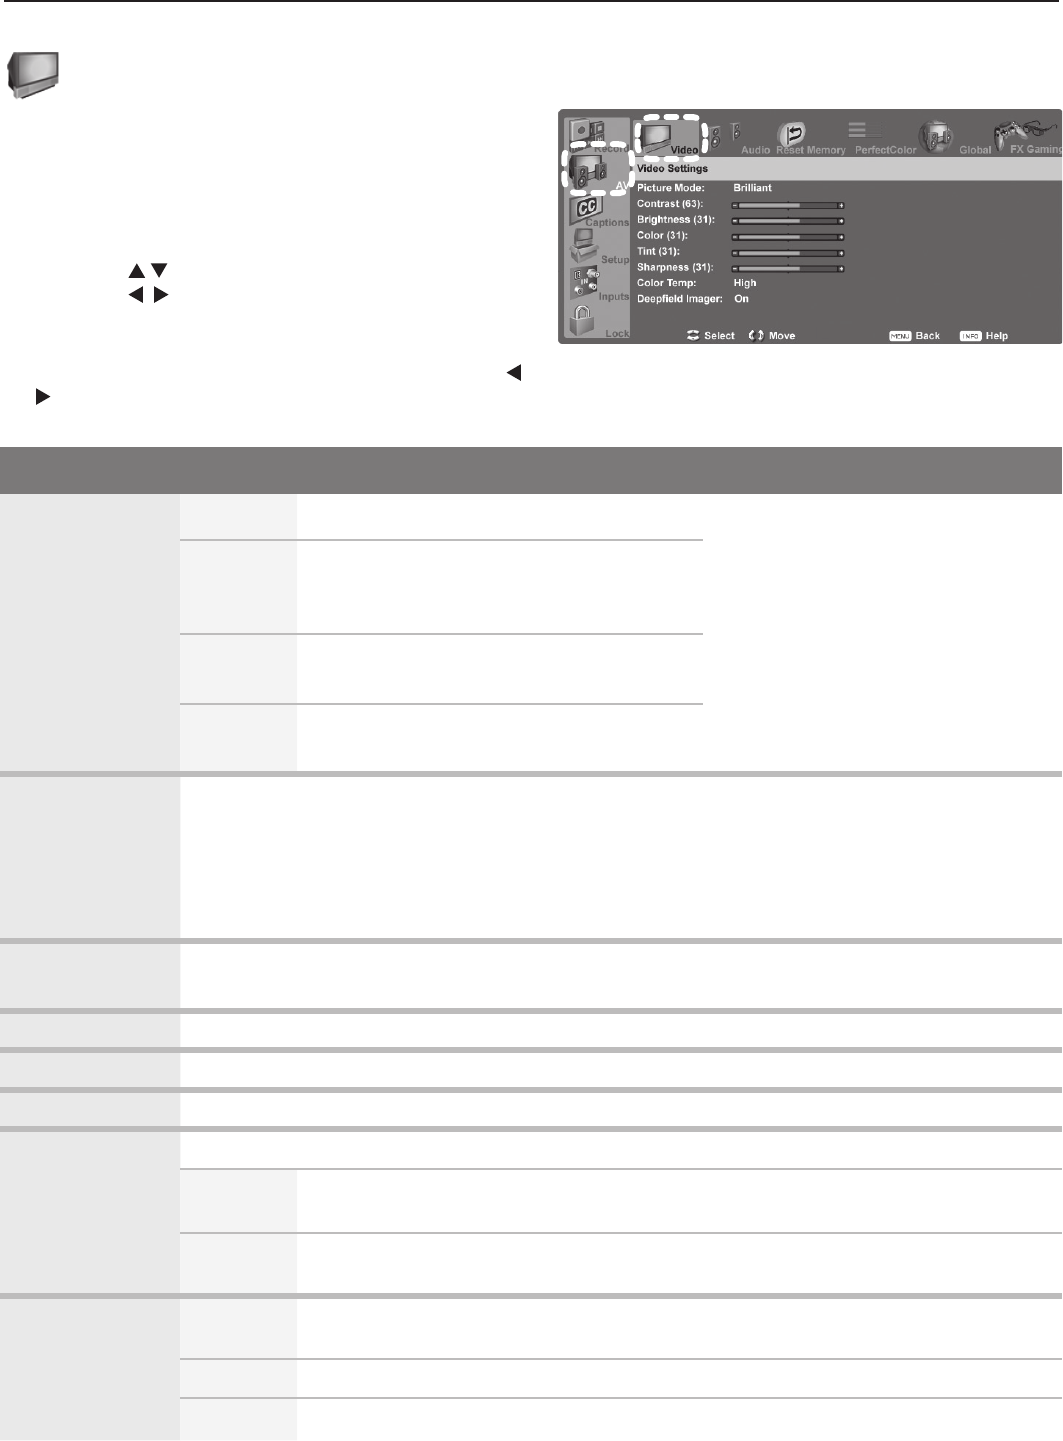
Picture Mode Brilliant
For use under strong light
Set the Picture Mode first before
changing other video settings, as
some are stored independently for
each Picture Mode. Use Picture
Modes to optimize the image for dif-
ferent conditions.
Game
Optimize picture and video processing for
gaming consoles. Available only when
the name of the input is
Game or PC.
Bright For most daytime viewing and x.v.Color
sources
Natural For most nighttime viewing and x.v.Color
sources
Contrast • Adjust the white-to-black level
• Low contrast shows a variety of shades in darker images
• In most home lighting situations, medium contrast looks best.
• High contrast shows darker images more uniformly black and makes colors appear more
vibrant. High contrast is good for brightly lit environments.
• Settings are stored independently for each Picture Mode.
Brightness • Adjust overall picture brightness
• Settings are stored independently for each Picture Mode.
Color Adjust overall color intensity
Tint Adjust the red-to-green ratio.
Sharpness Adjust picture detail and clarity.
Color Temp Adjust the white balance. Settings are stored independently for each Picture Mode.
High Give white images a cool cast. May provide the most realistic picture under
bright lighting.
Low Give white images a warm cast. Natural/Color Temp at the low setting displays
video at approximately the 6500K industry standard for NTSC pictures.
Deep Field
Imager
On With DeepField™ Imager On, black levels are dynamically enhanced in portions
of the screen to provide strong contrast with detail over mixed screen content.
Off Contrast is adjusted uniformly across the entire screen.
Demo Display a split picture to show on (right side) or off (left side).
AV menu, Video options
Note: See chapter 2, “TV Setup,” for additional adjust-
ments available for images from a computer.
Video Menu
Mitsubishi recommends you assign names to TV inputs
before
making video adjustments (use
the Inputs > Name menu)
.
Otherwise, adjustments will be reset to the defaults if you
name inputs afterwards.
To make video adjustments:
• From the Video menu:
1. Press to highlight an option.
2. Press to display the submenu and adjust.
3. Pre
ss
MENU
to return to the AV menu.
• While watching TV: Press the
VIDEO
key repeatedly to
display the video option you want to change. Press
to change settings.


