ENGLISH
ESPAÑOL
2929
Initial Setting : Display Menu Setting
Ajuste inicial:
ajuste del menú Pantalla
Adjusting the LCD Screen (LCD Bright/ LCD Colour)
Ajuste de la pantalla LCD <LCD Bright>(Brillo LCD) / <LCD Colour>(Color LCD)
✤ Adjusting the LCD Screen works in <Camera>/<Player>/<M.Cam>/
<M.Player> modes. ➥page 19
✤ Your Camcorder is equipped with a 2.5 inch (VP-D963(i) only) / 2.7
inch wide (VP-D964W(i)/D965W(i) only) colour Liquid Crystal Display
(LCD) Screen, which enables you to view what you are recording or
playing back directly.
✤ Depending on the conditions under which you are using the
Camcorder (indoors or outdoors for example), you can adjust;
- <LCD Bright>
- <LCD Colour>
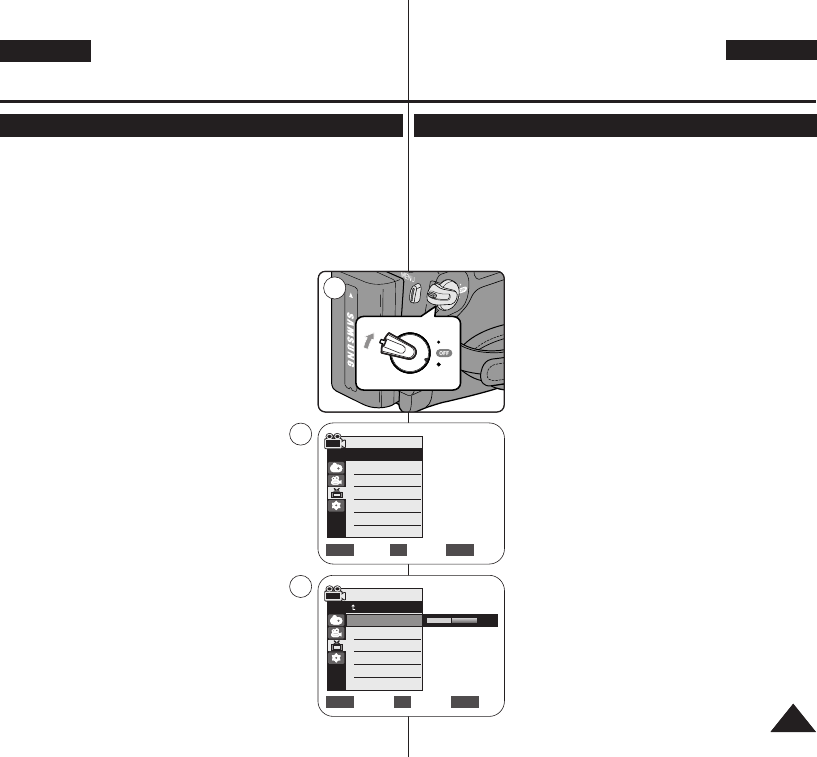
1. Set the [Power] switch to [CAMERA] or [PLAYER].
2. Set the [Mode] switch to [TAPE] or [MEMORY].
3. Press the [MENU] button.
■
The menu list will appear.
4. Move the [Zoom] lever up or down to select
<Display>, then press the [OK] button.
5. Move the [Zoom] lever up or down to select
the item you want to adjust <LCD Bright> or
<LCD Colour>, then press the [OK] button.
6. Move the [Zoom] lever up or down to adjust the
value of the selected item
<LCD Bright> or <LCD Colour>, then press the
[OK] button.
■
You can set values for <LCD Bright> and
<LCD Colour> between <0> ~ <35>.
7. To exit, press the [MENU] button.
■
Adjusting the LCD Screen does not affect
the brightness and colour of the image to be
recorded.
✤ El ajuste de la pantalla LCD está operativo en los modos <Camera>
(Cámara)/<Player>(Modo Player)/<M.Cam>(Modo M.Cam)/
<M.Player>(Modo M.Play). ➥pág. 19
✤ La videocámara está equipada con una pantalla de cristal líquido
(LCD) en color de 2,5 pulg. (sólo VP-D963(i)) / 2,7 pulg.
(sólo VP-D964W(i)/D965W(i)), que permite ver directamente lo que
está grabando o reproduciendo.
✤ Según las condiciones de grabación (por ejemplo
exteriores o interiores), es posible ajustar:
- <LCD Bright> (Brillo LCD)
- <LCD Colour> (Color LCD)
1. Coloque el interruptor [Power] en [CAMERA] o
[PLAYER].
2. Coloque el interruptor [Mode] en [TAPE] o
[MEMORY].
3. Pulse el botón [MENU].
■
Aparecerá la lista de menús.
4. Mueva la palanca [Zoom] arriba o abajo para
seleccionar <Display> (Pantalla) y pulse el
botón [OK].
5. Mueva la palanca de [Zoom] arriba o abajo hasta
seleccionar la opción que desea ajustar.
<LCD Bright> (Brillo LCD) o <LCD Colour>
(Color LCD) y pulse el botón [OK].
6. Mueva la palanca [Zoom] arriba o abajo para
ajustar el valor de la opción seleccionada <LCD
Bright> (Brillo LCD) o <LCD Colour> (Color
LCD) y pulse el botón [OK].
■
Puede ajustar los valores de <LCD Bright>
(Brillo LCD) y < LCD Colour> (Color LCD)
entre <0> y <35>.
7. Para salir, pulse el botón [MENU].
■
El ajuste de la pantalla LCD no afecta al brillo
ni al color de la imagen que se grabe.
Adjust Select Exit
MENUOKZOOM
6
[18]
QUICK
MENU
P
L
A
Y
E
R
C
A
M
E
R
A
C
A
M
E
R
A
P
L
A
Y
E
R
P
L
A
Y
E
R
C
A
M
E
R
A
C
A
M
E
R
A
P
L
A
Y
E
R
1
Move Select Exit
MENUOKZOOM
Camera Mode
√Display
LCD Bright
LCD Colour
Date/Time
TV Display
4
√Off
√On
Camera Mode
Back
LCD Bright
LCD Colour
Date/Time
TV Display
01040F VPD963 UK+ESP~042 9/21/06 2:36 PM Page 29


