


Install the mounting rails
You can install the drive tray into an industry-standard cabinet.
There must be a minimum depth of 76 cm (30 in.) between the front EIA support rails and the
rear EIA support rails.
1. Position the mounting rails in the cabinet.
– If you are installing the mounting rails above an existing tray, position the mounting
rails directly above the tray.
– If you are installing the mounting rails below an existing tray, allow 8.9-cm (3.5-in.)
vertical clearance for the controller-drive tray.
2. Starting with the left mounting rail, use a flat-blade screwdriver to loosen the two flat-
head rail adjustment screws. Hold the front of the left mounting rail against the inside of
the front cabinet-mounting flange, and then extend the rear of the mounting rail until it
makes contact with the rear cabinet-mounting flange. The alignment pins at the rear of
the mounting rail should slide into the holes at the rear of the cabinet.
1
2
3
4
1
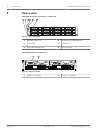
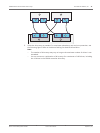
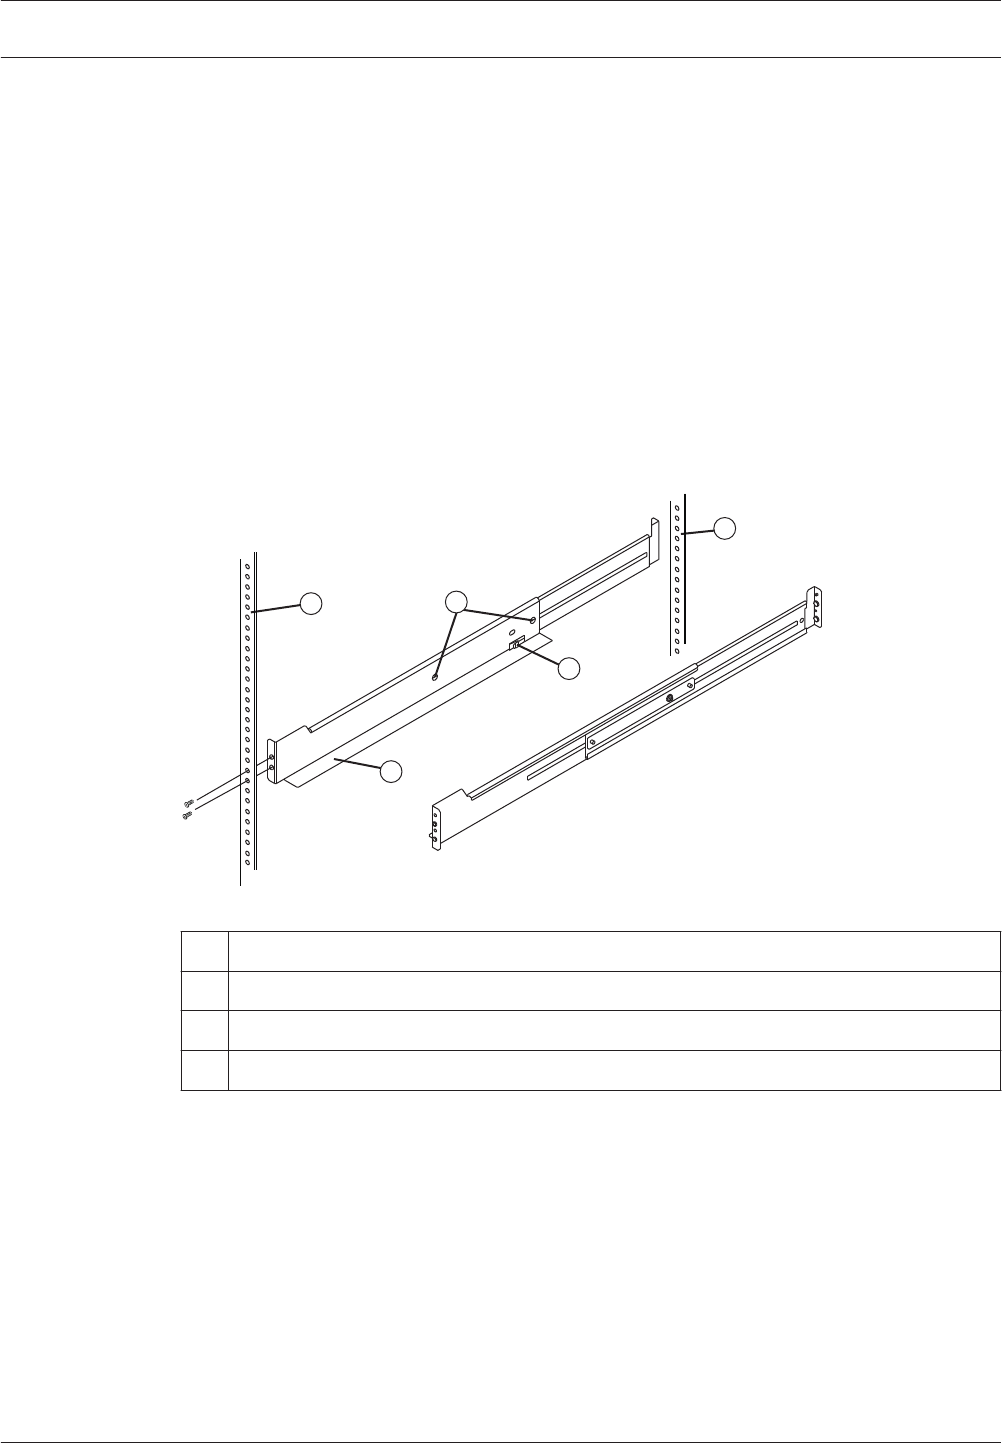
Figure 3.1: Mounting Rails
1
Mounting Holes on the Industry-Standard Cabinet
2 Adjustment Screws for Locking the Length of the Mounting Rail
3 Mounting Rail
4 Clip for Securing the Rear of the Controller-Drive Tray
3. From the front of the cabinet, with the mounting-rail flanges inside of the cabinet’s
mounting rail assemblies, use the Phillips screwdriver to loosely tighten only the lower
screw.
4. From the rear of the cabinet, use the Phillips screwdriver to loosely tighten the two
screws. Do not completely tighten the screws until you have installed the controller-drive
tray in the cabinet.
5. Repeat step 1 through step 4 for the right mounting rail.
6. Tighten the fl at-head rail adjustment screws on both mounting rails.
3
E2600 DSA E-Series iSCSI Disk Arrays Install the mounting rails | en 7
Bosch Sicherheitssysteme GmbH Quick Install Guide 07/2012 | V1 |