


33
651/751BDazur
ENGLISH
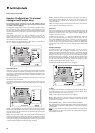
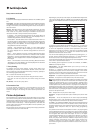
Network Setup
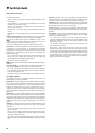
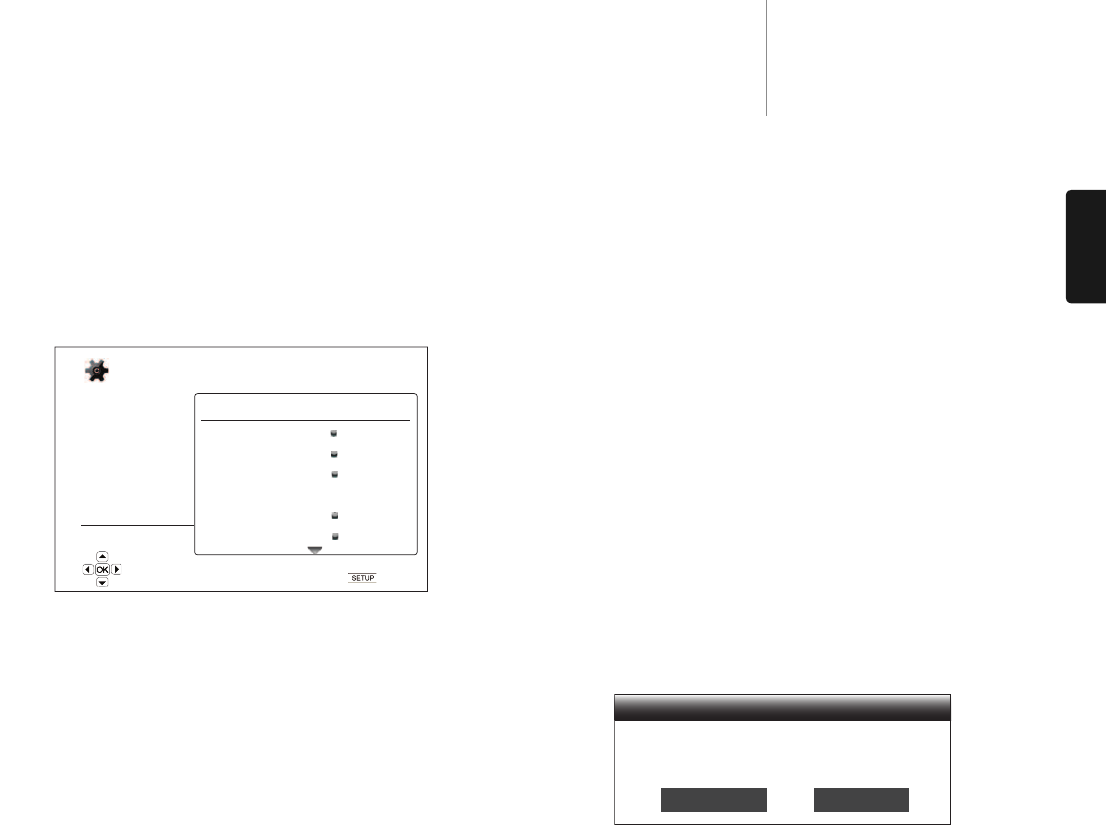
The "Network Setup" section of the Setup Menu system allows you to
configure the parameters for the Internet connection of the player, test
the connection and restrict BD-Live access. The menu items in this
section are:
MMeennuuss SSeettttiinnggss
Connection Information
BD-Live Network Access ..............................On
Limited
Off
My Network...................................................On
Off
Internet Connection.....................................Ethernet
Wireless
Off
Wireless Setting
IP Setting ......................................................Auto (DHCP)
Manual
Proxy Setting.................................................On
Off
Connection Test
1. Connection Information
To display the current internet connection information, such as
connection type, IP address, Ethernet MAC, Wireless MAC, etc.
2. BD-Live Network Access
To restrict BD-Live content access. The available options are:
On – BD-Live access is permitted.
Limited – BD-Live access is permitted only for contents that have a valid
content owner certificate. Internet access is prohibited if the BD-Live
contents do not have a certificate. This option ensures that you are
accessing only authentic content, although it may block your access to
smaller independent content providers.
Off – BD-Live access is prohibited.
3. My Network
To set the My Network (in-home media sharing) client option. My Network
option enables the player to receives streaming audio, video and photo
from UPnP media servers on the home network. The available options
are:
On (default) – Enable the My Network client. The available media servers
are listed in the “My Network” option of Home menu.
Off – Disable the My Network client. No media servers will be shown in
“My Network” option, and a warning message will show after you enter
“My Network” option.
4. Internet Connection
To select the internet connection type. The available options are:
Ethernet (default) – Connect to internet through the Ethernet cable,
please refer to the connection instructions of the manual. Choosing this
will make the “Wireless Setting” option grey and un-selectable.
Wireless – Connect to internet through the external wireless adaptor,
please refer to the connection instructions of the manual. Choosing
“Wireless” will start the wireless setting procedure, and also make the
“Wireless Setting” option in the next row selectable.
Off – Internet access is prohibited. This will make all the remaining
options in Network Setup screen grey and un-selectable.
5. Wireless Setting
Note: The 751BD includes a wireless adaptor. The 651BD does not. If you
wish to use the 651BD wirelessly, contact your Cambridge Audio dealer
to obtain a Cambridge Audio wireless adaptor. Other wireless adaptor will
not work.
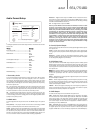
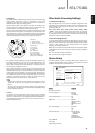
To start the wireless setting procedure. The wireless setting procedure
can be started either by selecting the “Wireless Setting” option, or by
selecting “Wireless” in “Connection Method” option, the procedure is
described as follows:
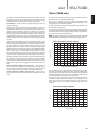
The player first searches for the last successful wireless settings. If any
exist, a message will pop up as below:
Use Previous – To use the last successful wireless setting. A summary of
the previous wireless setting will pop up showing information like SSID
(Service Set Identifier), Security Mode and Security Key (in asterisk *).
Then a connection test will be automatically performed and the test result
shown on the screen.
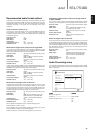
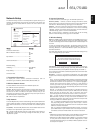
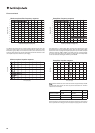
Start New – To start a new wireless configuration. The 651/751BD
supports three wireless configuration methods and the available options
are:
Scan – To scan for available wireless networks. The player automatically
scans for any available wireless networks nearby and the search results
are listed in a window. You can press the / buttons to highlight a
network then press the Enter button to select it. If this network is
secured, you need to input the security key using the remote control.
Then a connection test will be automatically performed and the test
result is shown on the screen.
Manual – To manually set the information for a wireless network. You
need to use the remote control to input the SSID, select the Security
Mode and input the Security Key. Then a connection test will be
automatically performed and the test result is shown on the screen.
WPS – To start the Wi-Fi Protected Setup. 651/751BD supports the
WPS standard to provide an easy and secure establishment of a
wireless home network. If you have a router/wireless access point that
also support WPS. The available options are:
PIN – To configure the WPS using a Personal Identification Number.
The player will generate a PIN and you need to input it into the
software control panel of your wireless router or access point. Please
follow the on-screen instruction.
PBC - To configure the WPS using Push Button Control. You need to
push a PBC button on your wireless router or access point to initiate
the wireless connection. Please follow the on-screen instruction.
Note:
– SSID is short for Service Set Identifier. It is an identifier for each wireless
router or access point, and is also referred as a network name.
– WPS is short for Wi-Fi Protected Setup (WPS). It is the latest standard
for easy and secure wireless home network configuration. It is also
named Wi-Fi Simple Config. To use WPS, a WPS compatible router or
access point is required.
P
layback Setup
Video Setup
Audio Format Setup
A
udio Processing
Device Setup
N
etwork Setup
E
xit
Connection Information
B
D-Live Network Access
My Network
Internet Connection
Wireless Setting
IP Setting
Proxy Setting
Off
On
E
thernet
A
uto (DHCP)
O
ff
Setup Menu
Exit
Display connection information
Your previous wireless settings have been found
Do you want to use them or start with new settings?
Use Previous Start New
Scan
Manual
WPS
Scan for available wireless hot spots
Wireless Setting