


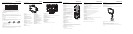


Play Operation
Play Operation
Preparation:
After all connections have been made, Press the POWER button to switch on the unit and then press
MODE button to select DVD mode.
Under DVD mode , the following disc can be read by the player : DVD/ CD /MP3/ JPEG.
NOTE: To set the unit into standby mode, press the POWER button . In standby mode the unit
is supplied with main voltage but not active. In this condition you can switch on the unit using
the POWER button.
Disc Loading Steps:
1. Put the disc slightly into the disc tray.
2. The disc will be taken automatically into the tray. "read"will be highlighted on the screen and
playback will begin.
Warning: Do not play poor quality discs that may damage the player's lens.
DVD Playback
MENU
Normally there is a selecting menu for DVD discs. Press direction button to move to the desired item
and press OK to confirm
During DVD playback, press menu button to get to the DVD start menu
TITLE & CHAPTER
Normally there are several titles in a DVD disc, and several chapters (sections) in a title.
AUDIO
Press the AUDIO button on the remote control to select a language for multi-language DVD disc.
There can be up to 8 audio languages on a DVD disc.
Press the SUBTITLE button to select different subtitles for multi-subtitle disc.
ANGLE
Press the ANGLE button repeatedly until the desired perspective is shown.The movies on some DVDs
have been recorded from various camera positions. This lets you enjoy the same scene from different
perspectives. In this case you'll usually find a marking on the DVD sleeve.
VOLUME
During playback, press the VOL+ button to increase the volume and press the VOL- button to
decrease the volume.
19
Play Operation
CD Playback
The player will play all tracks on a CD disc by default.
MP3 Playback
1. Load a MP3 disc into the disc tray.
2. Press the direction button to select the folder, use the OK button to enter it.
3. Press the direction button to select the track, press the OK or the PLAY/PAUSE button for playback.
4. Press the STOP button to stop playback. Press it once to have a stop, it will resume from where it
was stoped. Press it twice to have a stop, it will resume from the beginning.
JPEG Playback
JPEG is a common picture format that requires small amounts of storage per image and has low loss
in resolution. Hundreds of pictures can be stored on a disc in this format. In order to view JPEG photo
albums, you can ask your film development company to make a "PICTURE CD" when they develop
your film.
Normal Playback
1. Load a JPEG disc in.
2. Press up/down direction button to select a submenu and press OK to confirm
3. Press the up/down direction button to select the contents. Many discs have other contents besides
pictures.
Picture Rotation
This can be used only when the picture is normally displayed. Once another picture is selected,
rotation will be cancelled automatically.
There are four kinds of rotational modes: Inversion, Enantiomorphism, rotate left and rotate right. You
can use direction buttons to select:
"UP" ----- Inversion/Normal
"DOWN" ----- Enantiomorphism/Normal
"LEFT" ----- Rotate left
"RIGHT" ----- Rotate right
Zoom and Move of Picture
The ZOOM button is used to turn on/off the zoom function and the move function.
During zooming status, you can use the direction buttons to move the picture.
During playback, press the STOP button to return to the previous menu.
NOTE: Depending on how the disc was made, a JPEG disc may allow playback , but not rotation or
zooming of the images.
20
AV Function
FUNCTION Setup
1. Press direction button to highlight the Function menu. And press OK button to confirm .
2. Press direction button to highlight the desired option from Noise Reduce/input Source, and press
OK to confirm the selection.
Noise Reduction: press direction button to chose option from ON/ OFF, and press OK to confirm.
If ON is selected, the image will be shown clearly, but with unclear background.
If OFF is selected, both image and background are displayed normally.
Input Source: a certain input mode has been marked to indicate current situation
Press direction button to change the desired mode and press OK to confirm.
3. To exit function setup, highlight EXIT and press OK button.
Picture Parameters setup (VIDEO MODE)
1. Under the VIDEO mode, press the LCD SETUP button once on remote control to access picture
parameters setup menu, the screen will display as below:
2. Press up/down direction button, it appears SYSTEM setup menu , FUNCTION setup menu and
EXTRA setup menu.
3. To exit the menu, press LCD SETUP button again, or press direction button to highlight the EXIT
and then press OK to confirm
Refer to the section of "Picture Parameters setup (S-VIDEO/COMPONENT MODE)' of AV Function on
page 14 for how to work with IMAGE setup menu, SYSTEM setup menu and FUNCTION setup menu
Refer to section of EXTRA SETUP of TV function on page 12 ,13 for how to work with extra setup menu
.
15
PC Function
PC Function
You can use the unit's TFT LCD as your computer's monitor. Access the computer setup menu and
take the steps shown as below:
1. Please turn off the power of the unit and the computer. Connect the unit to the computer VGA jack
with the VGA cable.
2. Turn on power of this unit and the computer. If the unit is in standby mode, press the POWER button
to switch on. Press the MODE button on the remote control to select the "VGA" mode.
Picture Parameters setup
1. Press the LCD SETUP button under the VGA mode to access picture parameters setup menu, the
screen will display as below:
2. Press up/down direction button, it appears in succession IMAGE setup menu , FUNCTION setup
menu, OSD Setup menu as well as MISCELLANEOUS setup menu.
3. To exit the menu, press LCD SETUP button again, or press direction button to
highlight the EXIT and then press OK to confirm
COLOR Setup
1. Press up/down direction button to highlight the COLOR setup menu. And press OK to confirm.
2. Press up/down direction button to highlight the desired option and press OK to confirm.
See Table 2 as below for detailed descriptions.
16
IMAGE
EXIT
FUNCTION
EXIT
NOISE REDUCTION
INPUT SOURCE
EXIT
COLOR
EXIT
COLOR
EXIT
Item Adjust Range Instruction
Contrast
Brightness
Gamma Correct
Color adjust
0-100
0-100
4 grades (0,1,2,3)
9300K: R (54), G(69), B (62)
6500K: R (59), G(62), B (49)
User: R (0-100), G (0-100), B (0-100)
Adjust the contrast to your satisfaction
adjust the brightness to your satisfaction
Correct the brightness to your satisfaction
Adjust the color Temp to your
satisfaction.
(Table 2)
PC Function
IMAGE Setup
1. Press up/down direction button to highlight the IMAGE setup menu. And press OK to confirm.
2. Press up/down direction button to highlight the desired option and press OK to confirm.
See Table 3 as below for detailed descriptions.
FUNCTION Setup
1. Press up/down direction button to highlight the FUNCTION setup menu. And press OK to confirm.
2. Press up/down direction button to select the desired item from Auto Adjust /audio /input Source.
and press OK to confirm.
Auto Adjust : Adjust the horizontal and vertical position
Audio: Press up/down direction button to select the item from Standard/Classic/Rock
/Jazz/Pop. And press OK to confirm.
Input Source: A certain input mode has been marked to indicate current status
Press direction button to change the mode from DVD VGA/VIDEO/S-VIDEOEO/TV/
COMPONENT. And press OK to confirm.
17
H.POSITION
V.POSITION
PHASE
CLOCK
EXIT
IMAGE
EXIT
FUNCTION
EXIT
Item Adjustment Instruction
H.Position
V.Position
Phase
Clock
Press left/right direction button to remove the position to left/right
Press left/right direction button to remove the position to down/up
Range from 0 to 100
Range from 0 to 100
Adjust the horizontal position to your satisfaction
Adjust the vertical position to your satisfaction
Adjust the picture quality
Enlarge or reduce the display zone horizontally
(Table 3)
PC Function
OSD SETUP
1. Press up/down direction button to highlight the OSD setup menu. And press OK to confirm.
2. Press up/down direction button to highlight the desired option and press OK to confirm.
See Table 4 as below for detailed descriptions.
MISCELLANEOUS SETUP
1. Press up/down direction button to highlight the OSD setup menu. And press OK to confirm.
2. Press up/down direction button to highlight the desired option and press OK to confirm.
See Table 5 as below for detailed descriptions.
NOTE:
When the Reset function is activated, the initial settings for all models will be reset.
18
OSD MENU
EXIT
MISCELLANEOUS
EXIT
Item Adjustment Instruction
OSD Timer
Translucent
Press up/down direction to select ON or OFF
Press up/down direction to select ON or OFF
When ON is selected, the OSD will automatically
disappear after 8 seconds.
When OFF is selected, the OSD can be closed just
after selecting the Exit Submenu.
When ON is selected, the OSD will be translucent.
(Table 4)
Item Instruction
Model Select Under the DOS mode, select resolution 640x400 or 720x400 for OSD
Reset Select Reset to get to the factory setting.
(Table 5)
CONTRAST
BRIGHTNESS
SATURATION
SHARPNESS
HUE
EXIT
CONTRAST
BRIGHTNESS
GAMMA CORRECT
COLOR ADJUST
EXIT
CONTRAST
BRIGHTNESS
GAMMA CORRECT
COLOR ADJUST
EXIT
AUTO ADJUST
AUDIO
INPUT SOURCE
EXIT
OSD TIMER
TRANSLUCENT
EXIT
MODE SELECT
RESET
EXIT