


12
ADDITIONAL USER SETTINGS
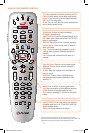
Once your DVR box is connected to your TV, press Cable on your remote control to ensure that the remote is
in cable mode. You can verify this by pressing the Power key to see if the DVR turns on and off.
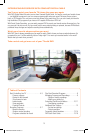
Important safety instructions
The DVR box has an internal hard disk drive. To help reduce the potential for damage, it must be handled in
much the same way as a computer. Your DVR box has been designed to operate reliably in a well-ventilated
household environment.
1. Position the DVR in an open space that allows airflow around the unit (there should be at least 2 inches of
space on all sides).
• DonotplacetheDVRinanenclosedentertainmentunitorcabinet.
• DonotplacetheDVRonabed,sofa,rug,orsimilarsurface.
2. Ensure that the DVR is not near any external heat source that could raise the temperature around the unit.
3. Plug the DVR into a surge protector along with your TV and other audio/video equipment.
Set your set-top box settings
To achieve optimal picture quality on your TV, your Motorola DVR box must have the appropriate settings for
your TV. In most cases, a Comcast technician will optimize these settings for you. However, you may decide
to modify the settings for various reasons, such as getting a new TV. To access and change your settings, go
to User Settings on your TV by following these steps:
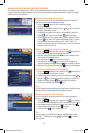
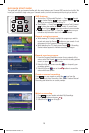
Step 1: Access the User Settings Menu
1. To access the User Settings Menu, power On your TV and power Off the DVR box.
2. Press the Menu button on either your remote or the front of your DVR box to call up the on-screen menu.
You may use either the DVR front panel or remote to navigate the menu.
3. Press the
buttons on your remote to select the setting you wish to change. Press the
buttons to
select an option for that setting. To exit the setting and move to another setting, use the
buttons.
Tip
If the on-screen menu does not appear on your TV screen, your TV may not support the default setting. Use
the DVR front panel LED display to view and change your settings. Use the
buttons to navigate.
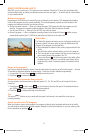
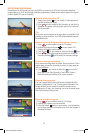
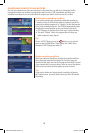
Step 2: Set your preference for watching wide-screen TV
The first user setting, referred to as “TV Type,” tells the DVR box what type of TV you have and how you
prefer to watch wide-screen programming.
For standard-screen TVs, choose either of the following options:
• 4:3PanScan(wide-screenprogrammingiscroppedtollyourscreen).
• 4:3Letterbox(wide-screenprogrammingwillappearinitsentiretywithblackbandsonthetopand
bottom of the TV screen). For wide-screen TVs, choose 16:9.
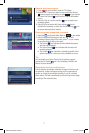
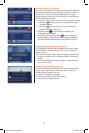
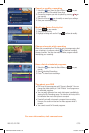
Step 3: Set picture resolution from DVR box to TV
The next setting is referred to as Y Pb Pr OUTPUT and indicates the picture resolution output from the DVR
box to your TV. The choices are 480i, 480p, 720p, and 1080i. For most standard TVs, the appropriate
setting is 480i. Choose 480p for enhanced-definition TVs. For HDTVs, choose either 720p or 1080i. Refer
to your TV owner’s manual and choose the setting that indicates the highest input picture resolution your
television will support.
Step 4: Set 4:3 override
This setting provides the ability to specify how 4:3 standard-definition programs are displayed on your TV.
The choices are OFF, 480i, 480p, or stretch. For most standard TVs, this should be set to OFF (the DVR will
default to the resolution selected in the previous setting). For HDTVs, the appropriate setting is either 480i,
480p, or stretch. If you have a wide-screen TV and select the stretch setting, 4:3 programs will automatically
be stretched to a wide-screen 16:9 aspect ratio and display video in the format you specified in Step 3.
Consult your HDTV owner’s manual to determine the appropriate setting.
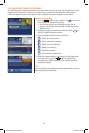
Step 5: Save your settings
Press the Power button on your DVR or your remote to exit the menu and save your settings.
Tip
If you purchase an HDTV in the future and already have a Motorola HD cable box, call Comcast to have your
HDTV channels authorized. You will probably need to modify these settings.
MO-A25.2-2-DVR-10.indd 12 12/7/09 5:01 PM