Domain Name System (DNS)
STEP 5 Activating DNS
Once you have completed the above sections, you are able to operate your DVR remotely. The sections
below allow you to take advantage of additional features including the ability to access your DVR using a
conventional domain name and having your system send out e-mail alerts. To access these functions, you
will have to access your router to obtain your DNS (Domain Name Server) number. Because you will need
to be at your computer – connected to the same router as the DVR – to access your router, the following
instructions will allow you to make your DNS settings using the Web Client software.
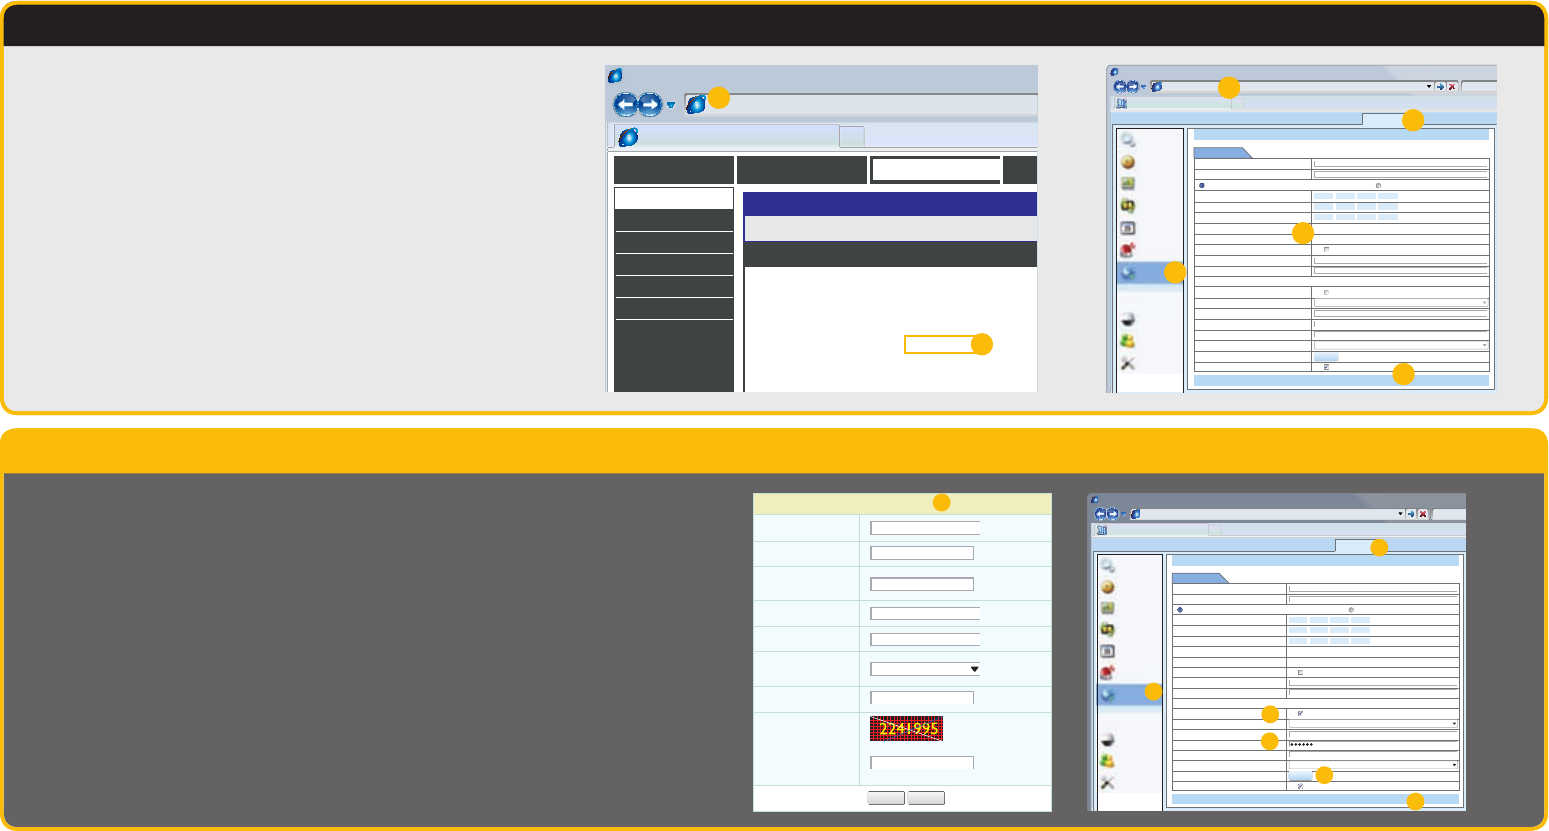
A. Open up an Internet Explorer browser window and enter the Gateway address (Item #3 which you wrote
down in Step 1 Obtain an IP Address.)
B. Locate your router’s status window (may also be named “Information” or “Info”, it will list the DNS
number – copy this down.
C. Open or switch to the Web Client window in Internet Explorer
D. Click on the Config tab
E. Click on the Network icon in the menu on the left of the screen.
F. Enter the DNS number from Step B in the section marked Preferred DNS Server. You do not need to have
an alternate server.
G. Click Apply to save your settings.
Browser - Windows Internet Explorer
Router
hp://81.919.622.24
SETTINGS
STATUS
DEVICE INFORMATION
All of your Internet and network connecon details are displayed on this page.
WAN
MAC Address :
IP Address :
Subnet Mask :
Default Gateway :
Primary DNS Server :
Secondary DNS Server :
Advanced DNS :
00:24:01:77:f9:00
81.919.622.249
255.255.255.0
81.919.622.24
10.6.196.6
(null)
Disabled
DEVICE INFO
LOGS
STATISTICS
INTERNET SESSIONS
ROUTING
WIRELESS
Browser - Windows Internet Explorer
Web Client
hp://10.6.196.6
LIVE SEARCH BACKUP TOOLS INFOCONFIG
Apply Default
Apply Default
Network Setup
HTTP Port
Server Port
Obtain an IP Address Automacally Use the Following IP Address
IP Address
Subnet Mask
Gateway
Preferred DNS Server
Alternate DNS Server
PPPoE
User Name
Password
DDNS
DDNS Server
User Name
Password
Host Domain
DDNS Update [Hours]
UPnP
80
6083
081 . 919 . 622 . 249
255 . 255 . 255 . 000
081 . 919 . 622 . 024
010 . 006 . 192 . 006
000 . 000 . 000 . 000
myq-see.com
3
Test
Test
Local config
Basic
Live
Record
Schedule
Alarm
Network
Network
Sub-stream
Email
P.T.Z
Advanced
Users
C
D
E
F
G
A
B
Dynamic Domain Name Service (DDNS)
This is an optional step which allows you to take advantage of Dynamic Domain Name Service, or DDNS. Not to be confused
with DNS above, DDNS allows you to enter a conventional web address when remotely logging into your DVR from outside
of your network. It also allows you to avoid having to repeat Steps 4 and 5 when/if your ISP reassigns IP addresses. Q-See
offers DDNS service for free at www.MyQ-See.com and your DVR is configured accept account information from that site.
For convenience, we will continue to use the Web Client software for the following instructions. These settings may also be
made on the DVR itself, in the Network window after obtaining the DDNS domain name (Steps A and B, below).
A. Keeping the Web Client window open, open another browser window and go to www.MyQ-See.com
B. Register with the website and follow the instructions for creating a domain name. The website will display
your pubic IP address and your domain name which will look like this: http://example.myq-See.com
C. Switching back to the Web Client page, click on the Config tab at the top of the page.
D. Select Network from the list along the left side of the page.
E. Check the DDNS box and select MyQ-See.com in the DDNS server pull-down menu.
F. Enter your account information – password and domain name.
G. Click the Test button
H. If successful, you will see a message confirming your settings in a pop-up window. Close the pop-up and
click on Apply at the bottom of the Web Client window to save your settings.
Browser - Windows Internet Explorer
Web Client
hp://10.6.196.6
LIVE SEARCH BACKUP TOOLS INFOCONFIG
Apply Default
Apply Default
Network Setup
HTTP Port
Server Port
Obtain an IP Address Automacally Use the Following IP Address
IP Address
Subnet Mask
Gateway
Preferred DNS Server
Alternate DNS Server
PPPoE
User Name
Password
DDNS
DDNS Server
User Name
Password
Host Domain
DDNS Update [Hours]
UPnP
80
6083
081 . 919 . 622 . 249
255 . 255 . 255 . 000
081 . 919 . 622 . 024
010 . 006 . 192 . 006
000 . 000 . 000 . 000
myq-see.com
John Q Public
http://example.myq-see.com
3
Test
Test
Local config
Basic
Live
Record
Schedule
Alarm
Network
Network
Sub-stream
Email
P.T.Z
Advanced
Users
NEW USER REGISTRATION
EMAIL ADDRESS
PASSWORD
FIRST NAME
LAST NAME
ANSWER
SECURITY
QUESTION..
CONFRIM
YOU’RE HUMAN
PASSWORD
CONFIRM
Submit
Submit
Reset
Reset
My first phone number
New Captcha
Enter the text you see above
A-B
C
D
E
F
G
H
