


Using the remote control 15
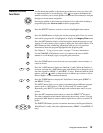
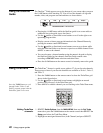
Code Scanning
To use the Code Scanning method:
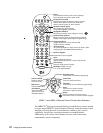
1. Repeatedly tap the top part of the
CHANNEL (CH) button.
2. Continue to step through the codes until the component turns off, indicating
you have found the correct component code. If you accidentally pass a code
that responds or realize you may not have been aiming the remote control at
the component, tap the lower part of the
CHANNEL (CH) button to step
backward through the codes.
3. Press the remote control
POWER button to verify the proper code by
turning the device on and off.
4. Press the device button (in this example,
TV) again to lock in the code.
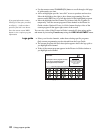
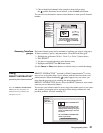
Changing the Remote ID
If you are using multiple satellite receivers in the same room, you may want to
change the remote control ID to avoid interference or “cross talk.” The remote
control ID can be a number from “001” to “008”.
If you change remote IDs, set your remote control to that ID number first.
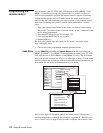
Use this procedure to set the remote control to use a different remote ID:
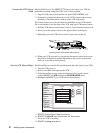
1. From the
MAIN MENU, highlight the System Setup menu tab. Press
SELECT.
2. Highlight
Remote menu tab to access Remote Control Settings.
3. Highlight the Remote ID menu button.
4. Press and hold the remote control SAT button.
5. Press and release the
MUTE button.
6. Release the
SAT button. It should remain lit. If it does not, repeat steps 4-6.
7. Enter desired number (001 to 008).
8. Press the
SAT button to lock in the code.
9. Point the remote control at the receiver. Press
SELECT.
The number to the right of the highlighted Remote ID menu button will change
to the new code. Check that the ID has been successfully set by testing the
remote control to see that it controls that satellite receiver.
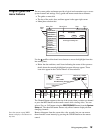
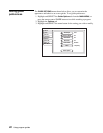
Installing remote control
batteries
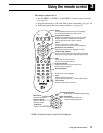
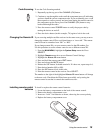
To install or replace the remote control batteries:
1. Locate the battery compartment on the back of the remote control.
2. Remove the battery compartment cover.
3. Insert two “AAA” size batteries as shown, observing the correct polarity.
4. Replace the battery compartment cover.
P
A
G
E
CH