


DX-DRTVM112
5
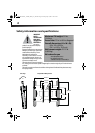
Installation instructions
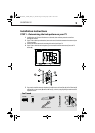
STEP 1 - Determining the hole pattern on your TV
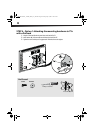
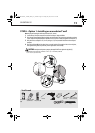
1 Carefully place your TV screen face down on a cushioned, clean surface to protect the screen from
damage and scratches.
2 If your TV has a table top stand attached, remove the stand. See the documentation that came with your
TV for instructions.
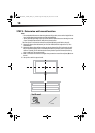
3 Measure the distance between the mounting holes on the back of your TV.
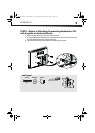
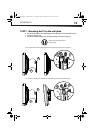
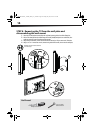
4 If your TV has a 200 x 200 mm hole pattern, you must install the bracket extensions (C) onto the TV
bracket (A).
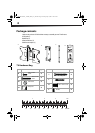
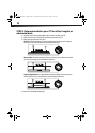
5 If you need to install the extension brackets (C), install them on the front (flat side) of the TV bracket (A)
with four M6 x 14 mm screws (K) and four M6 nuts (L), as shown, using the phillips screwdriver and the
adjustable wrench.
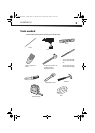
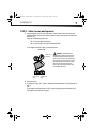
You’ll need
100 mm
100 mm
75 mm
75 mm
200 mm
200 mm
100 mm
100 mm
75 mm
75 mm
200 mm
200 mm
L
K
C
A
L (4)
K (4)
Phillips screwdriver
Screws
Nuts
TV bracket (A)
Adjustable wrench
C (2)
DX-DRTVM112_13-0668_MAN_V1_ENG.fm Page 5 Friday, July 19, 2013 10:37 AM