


12
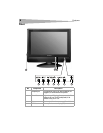
Setting up your TV
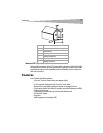
Setting up your TV
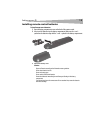
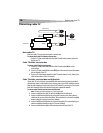
Selecting a location
• Place your TV on an open table or bench in a location where light does not shine
directly on the screen.
• Make sure that your TV is far enough from walls to allow for correct ventilation.
Inadequate ventilation may cause overheating, which may damage your TV.
• For information about mounting your TV on a wall, contact Dynex.
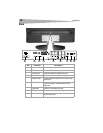
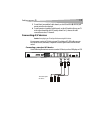
3 PICTURE Press to select the picture mode.
4 Numbers Press to enter channel numbers.
5 Press to select digital channels. For example, press 3,
press this button, then press 1 to select digital channel
3.1.
6 Press to make selections or change options in the OSD.
7 ENTER Press to confirm a selection in the OSD or to return to a
previous OSD menu.
8 VOL+ and VOL– Press to increase or decrease the volume.
9 CCD Press to select a closed caption mode.
10 MTS/SAP Press to select the sound mode. You can select Mono,
Stereo, or SAP (second audio program).
11 Power indicator Lights when you press a button.
12 INPUT Press to select the video mode. You can select TV, Video,
S-Video, Component, HDMI, or VGA.
13 ZOOM Press to select the aspect ratio. You can select Auto,
Normal, Letterbox, or Panorama.
14 AUDIO Press to select the sound mode. You can select Rock,
Pop, Live, Dance, Techno, Classic, or Soft.
15 GUIDE For ATSC tuners, press to display an electronic program
guide (EPG).
16 DISPLAY Press to show video source.
17 EXIT Press to close the on-screen display (OSD).
18 MENU Press to open the on-screen display (OSD).
19 RECALL Press to go to the previously viewed channel.
20 CH+ and CH– Press to go to the next higher or lower channel.
21 TIME Press to display the current time.
22 SLEEP Press to set the sleep timer.
No. Button Description