LAMP REPLACEMENT
If the lamp fails to come on and the lamp monitor on the projector light is orange, you must replace the bulb.
•For continued safety, replace with a lamp assembly of the same type.
•Allow the projector to cool for at least 45 minutes before you open the lamp cover, The inside of the
projector can become very hot.
•Do not drop the lamp module or touch the glass bulb I The glass can shatter and cause injury.
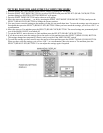
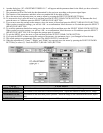
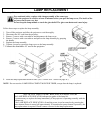
Follow these steps to replace the lamp assembly.
1. Turn off the projector and allow the projector to cool thoroughly.
2. Disconnect the AC cord from the projector.
3. Remove 2 screws with a screwdriver and disconnect the lamp cover.
4. Remove 2 screws with a screwdriver and pull out the lamp assembly by grasping
the handle.
5. Replace the lamp assembly.
6. Tighten 4 screws to secure the lamp cover to the lamp assembly.
7. Connect the detachable AC cord to the projector.
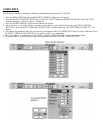
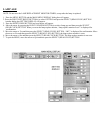
8. Reset the lamp replacement monitor timer. (See “LAMP AGE” section on page 49.)
NOTE: Do not reset the LAMP REPLACEMENT MONITOR TIMER, except after the lamp is replaced.
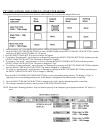
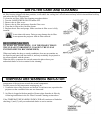
NOTE ON THE LAMP REPLACE INDICATOR
The LAMP REPLACE INDICATOR indicates the guide of the lamp life.
It is unnecessary to replace the lamp immediately if the projector is operating normally with the
indicator on.
If the LAMP REPLACE INDICATOR is lit and the power is not be turned on by pressing the
power button (Power is turned off approximately 20 seconds after power button is pressed.), the
lam
p
re
p
lacement is re
q
uired. Please contact a service for the lam
p
re
p
lacement.


