


18 Setting Up the Projector
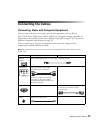
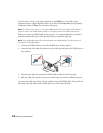
For best results, connect your video equipment to the HDMI port, if possible. If your
equipment doesn’t support HDMI, connect it to either the
Component (for high quality,
component video) or
Video (for composite video) port.
Note: You need to use a version 1.4 or higher HDMI cable to use the projector’s 3D features. If
you aren’t sure if your HDMI cable is version 1.4 or higher, contact your cable manufacturer.
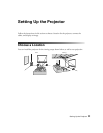
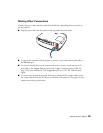
When you connect an HDMI cable to the projector, it is recommended that you fasten it
with the included cable clip. Follow the steps below to install the cable clip.
Note: The included cable clips will fit most standard, round HDMI cables. The clips may not fit
non-round or thick HDMI cables.
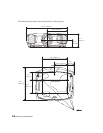
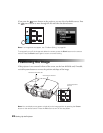
1. Connect the HDMI cable to one of the HDMI ports on the projector.
2. Insert the end of the cable clip anchor into the cable clip hole above the HDMI port, as
shown below.
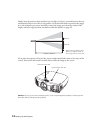
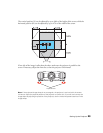
3. Place the open cable clip around the HDMI cable, but don’t lock it into place.
4. Slide the cable clip towards the projector and lock the clip onto the HDMI connector.
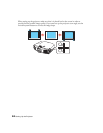
To remove the cable clip, unlock the clip and disconnect the HDMI cable. Then pinch the
side of the cable clip anchor and carefully pull it out of the cable clip hole.