


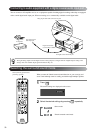


58
Image page
When the color mode is set to “Auto”, you cannot make the setting. sp. 25
Signal page
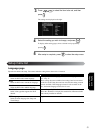
Setting Item Setting Contents
Brightness Adjusts the image brightness.
Contrast Adjusts the difference between light and shade in the images.
Color Saturation Adjusts the color saturation for the images. (This is not displayed
when a computer is connected.)
Tint Adjusts the image tint. (This is not displayed when the external
video or computer connected is not NTSC.)
Sharpness Adjusts the image sharpness.
Color Temp. Adjusts the entire image tint.
High: Makes the image bluish.
Low: Makes the image reddish.
Auto Iris Adjusts the light intensity according to the brightness of the
displayed image.
On: Activates Auto Iris.
Off: Deactivates Auto Iris.
Setting Item Setting Contents
Keystone You can correct keystone distortion in the vertical directions.
sp. 21
Auto Keystone On: Performs Auto Keystone.
Off: Deactivates Auto Keystone.
Zoom Adjusts the image size.
Wide: Enlarges the image.
Tele: Reduces the image.
Power Consumption
When the color mode is set to “Auto”, you
cannot make the setting. sp. 25
You can set the Lamp brightness to “ECO” or “Normal”.
Select “ECO” if the images being projected are too bright such as
when projecting images in a dark room or onto a small screen.
When “ECO” is selected, the amount of electricity consumed and
the lamp’s operation life are changes as follows, and fan rotation
noise during projection is reduced. Electrical consumption: about
16% decrease, lamp life: about 1.2 times longer
Resolution When set to “Auto”, the resolution of the input signal is
automatically identified. If the images cannot be projected correctly
when set to “Auto”, such as when some of the image is missing,
adjust to “Wide” depending on the connected computer for wide
screens, or set to “Normal” for “4:3” or “5:4” screens.
Video Signal
Sets the signal format of the video equipment
connected to the Video input port.
Only displayed when “Video” is selected as the source.
At the time of purchase, this is set to “Auto” so the video signal is
recognized automatically. If interference appears in the projected
images or no images appear when you select “Auto”, select the
appropriate signal manually.
Ceiling Projection On: Projects images onto the ceiling using the optional Ceiling
Reflector Kit.
Off: Deactivates the ceiling projection.
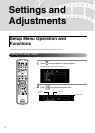
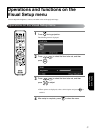
Visual Setup menu