39
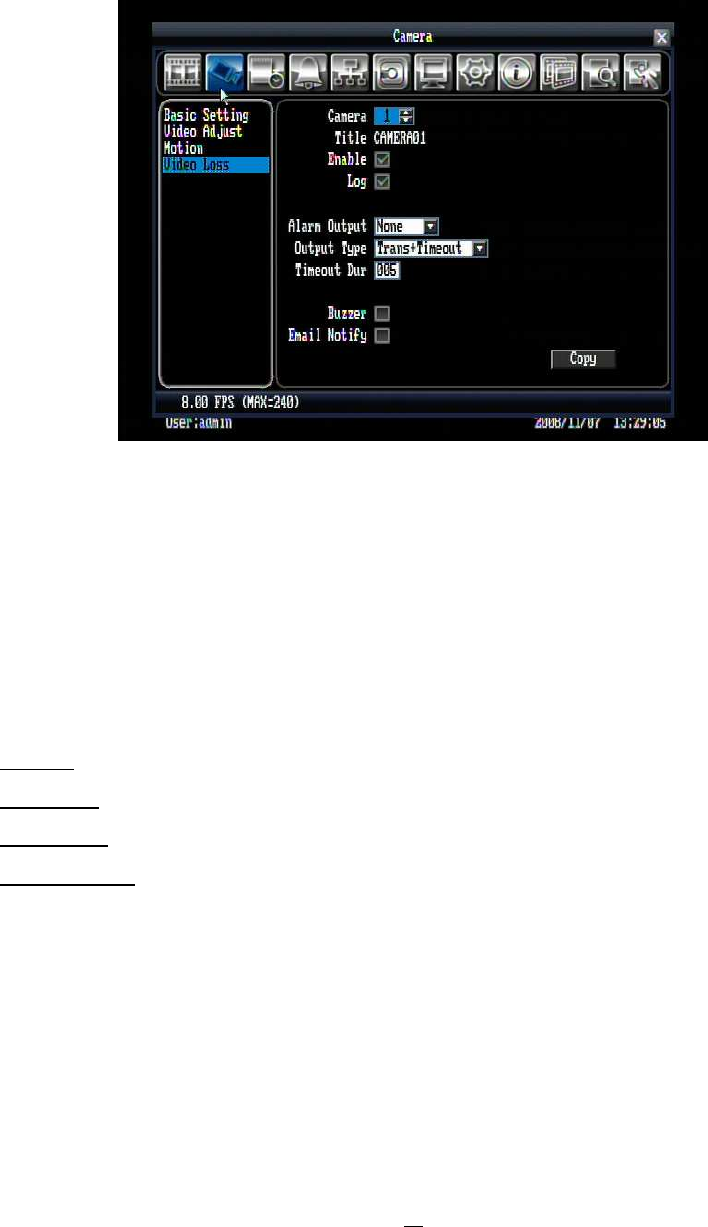
5.3.4 Video Loss
Figure 5.8 (Camera Menu – Video Loss)
Camera: Select the camera you wish to adjust, “Title” will change to the title name of the selected camera.
Enable: Check box to enable Video Loss.
Log: Check box to record video loss events in the log.
Alarm Output: This will transmit a signal to another device. It can be set to either “NONE” (not activated)
or “1” (output signal 1 transmits).
Output Type: Output action when alarm is triggered.
Timeout: Alarm output lasts for the set time duration.
Permanent: Alarm will continuously work until user presses “Live” key.
Transparent: Alarm output continues as long as there is a video loss.
Trans+Timeout: Alarm output continues until event ends, then lasts for the set time duration.
Timeout Dur: Time duration selectable from 0 to 150 seconds.
Buzzer: Check box to enable buzzer when a video loss event occurs.
Email Notify: Check box to enable email notification function when a video loss event occurs.
Copy: Press Copy key to copy the settings to other camera. This will bring up the copy window. Check the
boxes for each camera you wish to copy to, then click “OK” to copy settings. Click “Select All” to choose all
cameras. Click “Cancel” to cancel copy.


