


IR 102 Remote Control Kit • Installation and Operation
Installation and Operation, cont’d
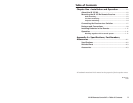
1-4
IR 102 Remote Control Kit • Installation and Operation
1-5
I
R
1
0
2
R
x
U
N
I
V
E
R
S
A
L
I
R
R
E
M
O
T
E
R
E
C
E
I
V
E
R
R
S
-
2
3
2
/
C
O
N
T
A
C
T
O
U
T
R
S
-
2
3
2
T
x
1
2
3
4
5
+
5
+
1
2
V
6
C
O
N
T
R
O
L
O
U
T
I
R
I
N
C
O
N
T
A
C
T
M
O
D
D
E
M
O
D
P
O
W
E
R
1
2
V
.
5
A
M
A
X
R
S
-
2
3
2
I
N
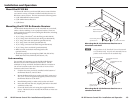
Ceiling
Projector
PMK 100
Projector
Mounting
Bracket
Mounting
Bolt
Projector Mounting
MBU 123
Under Desk Mounting Kit
Under Desk Mounting
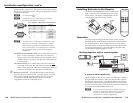
Projector mounting the IR 102 Rx with kit #70-217-01
Alternatively the IR 102 Rx Remote Receiver can be projector
mounted using the optional VersaTools multi-product projector
mounting kit, part #70-374-01.
N
Only VersaTools products and most IP Link products
can be mounted using the multi-product projector
mounting kit.
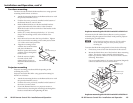
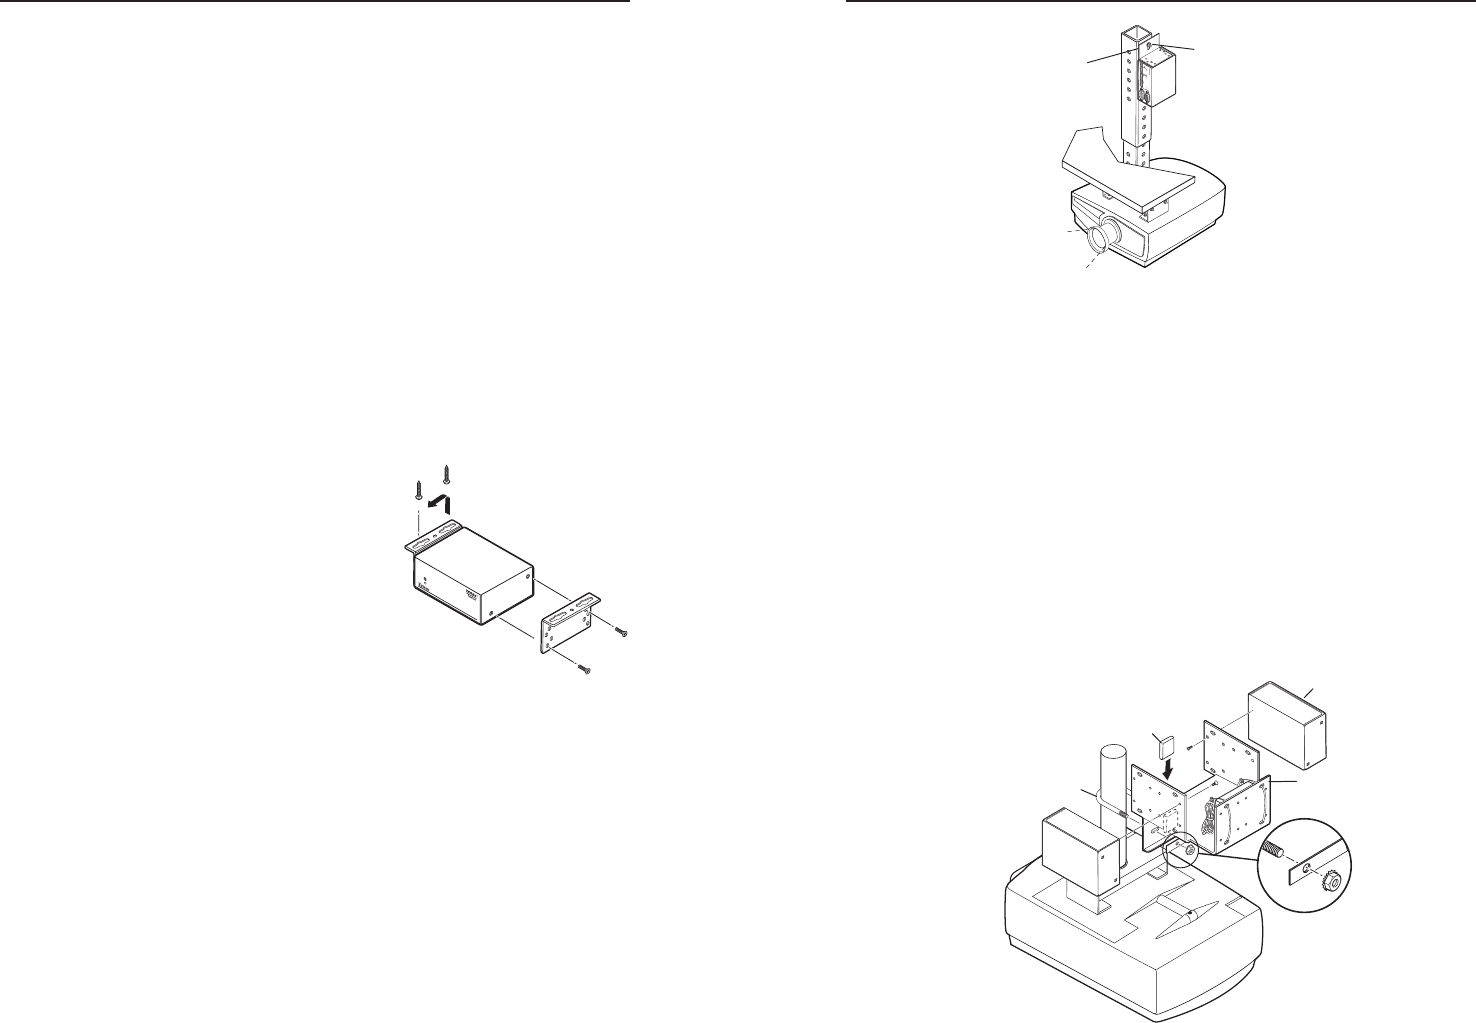
To mount the IR 102 Rx using kit #70-374-01, do the following:
1. If necessary, remove feet from the bottom of the receiver.
2. Mount the IR 102 Rx to one of the bracket’s three mounting
plates. The device can be vertically mounted facing
either up or down, whichever is most convenient. See the
following illustration.
Use two supplied 4-40 x 3/16 screws in opposite (diagonal)
corners to secure the device to the bracket.
PMK 300 Multi-Product
Projector Mounting Kit
IR 102 Rx or Other
VersaTools Device
U-Bolt
Rubber Pad
Projector mounting the IR 102 Rx with kit #70-374-01
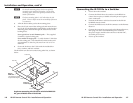
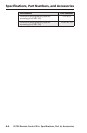
Furniture mounting
Furniture mount the IR 102 Rx Remote Receiver using optional
mounting kit #70-212-01 as follows:
1. Attach the mounting brackets to the Remote Receiver with
the provided machine screws.
2. If rubber feet were previously installed on the bottom of
the Remote Receiver, remove them.
3. Hold the Remote Receiver with the attached brackets
against the underside of the table or other furniture.
Mark the location of the screw holes of the bracket on the
mounting surface.
4. Drill 3/32" (2 mm) diameter pilot holes, 1/4" (6.3 mm)
deep in the mounting surface at the marked screw
locations.
5. Insert #8 wood screws into the four pilot holes. Tighten
each screw into the mounting surface until just less than
1/4" of the screw head protrudes.
6. Align the mounting screws
with the slots in the brackets
and place the Remote
Receiver against the surface,
with the screws through the
bracket slots.
7. Slide the receiver slightly
forward or back, then
tighten all four screws to
secure the Remote Receiver
in place.
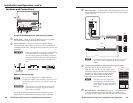
Projector mounting
Projector mounting procedures differ depending on the
mounting kit you use.
Projector mount the IR 102 Rx using optional mounting kit
#70-217-01 as follows:
1. Attach the mounting brackets to the Remote Receiver with
the provided machine screws.
2. If rubber feet were previously installed on the bottom of
the receiver, remove them.
3. Secure the Remote Receiver to a projector mount or
other surface by inserting the mounting bolt through the
bracket’s slotted hole and tightening the bolt.
I
R
1
0
2
R
x
U
N
I
V
E
R
S
A
L
I
R
R
E
M
O
T
E
R
E
C
E
I
V
E
R
R
S
-
2
3
2
/
C
O
N
T
A
C
T
O
U
T
R
S
-
2
3
2
T
x
1
2
3
4
5
+
5
+
1
2
V
6
C
O
N
T
R
O
L
O
U
T
I
R
I
N
C
O
N
T
A
C
T
M
O
D
D
E
M
O
D
P
O
W
E
R
1
2
V
.
5
A
M
A
X
R
S
-
2
3
2
I
N
Ceiling
Projector
PMK 100
Projector
Mounting
Bracket
Mounting
Bolt
Projector Mounting
MBU 123
Under Desk Mounting Kit
Under Desk Mounting