7
3. Connection
3.1 Connecting the Header Board to the User System
Mount the supplied NQPACK on the user system before using the header board.
The header board is used together with the adapter.
Refer to the hardware manual for the adapter for details about how to connect the header board and
adapter.
■ Connection procedure
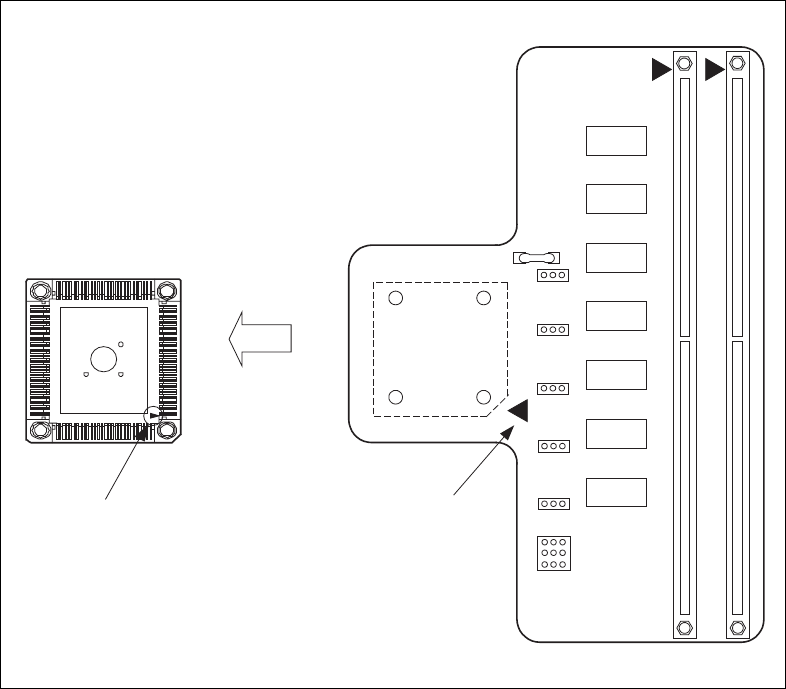
1. To connect the header board to the user system, align the index mark (▲) on the header board
with pin 1 on the NQPACK mounted on the user system. Pin 1 on the NQPACK is also indicated
by an index mark (▲) (See Figure 3.1) .
As the YQPACK pins are thin and easily bent, check that the YQPACK pins are kept straight
when inserting into the NQPACK.
2. Insert the header board attachment screws, together with washers, into the four screw holes in the
top of the header board and tighten the diagonally opposite screws in turn (See Figure 3.2) .
Use the dedicated screwdriver supplied with the NQPACK to tighten the screws and tighten each
screw equally in turn. Take care not to over-tighten as this may cause a bad connection.
Figure 3.1 Index Positions
TET
176SD
NQPACK
Index (▲)
Header board
index (▼)


