37
Connections Getting
Started
SetupBasic
Operations
Advanced
Features
Help
:: Timer Recording
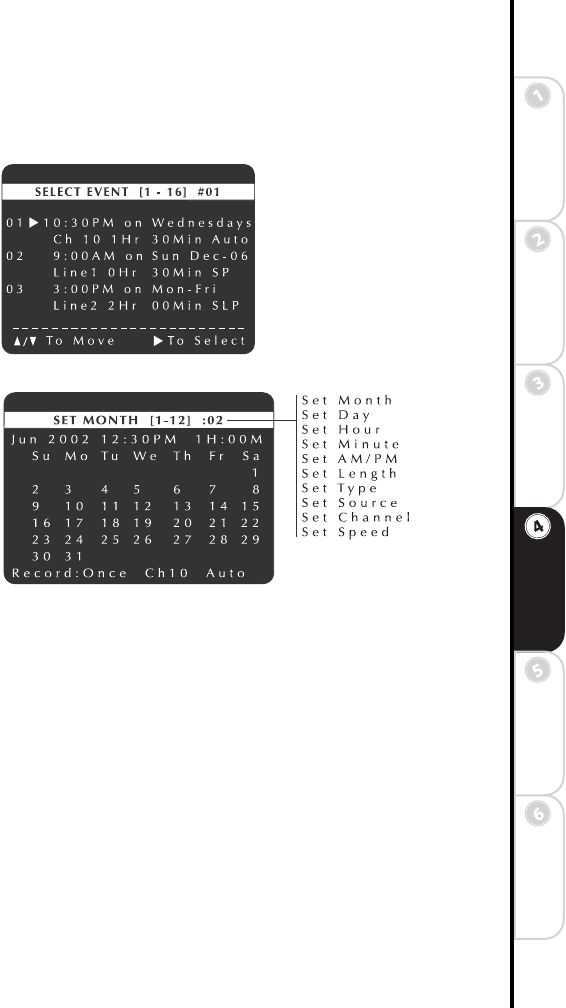
To Set a Timer Recording
1 Insert a standard VHS tape with a record safety tab into the VCR deck.
2 Press SET TIMER.
• If the clock has not been set, the Clock Setup Menu will appear. You
MUST set the clock before you can program a Timer Recording (see
page 22).
3 Press
Y/B and " or use the 0-9 keys as directed to:
• Choose an event number (1-8).
• Set the event date and time (month, day, hour, minute, and AM/PM)
• Set the event length (hours and minutes).
4 Press
Y/B and " or use the 1-4 keys to set the event type:
Once Records the event once.
M-F Records the event Monday through Friday.
Weekly Records the event once a week.
Always Records the event every day.
5 Press
Y/B and " or use the 1-3 keys to set the record source:
Ch## Records from television. Use the 0-9 keys to enter the channel you
wish to record. If you are recording from a cable box, set the Record Source
to channel 2, 3, or 4 -- whichever channel your cable box uses -- and then select the channel to record on the cable box.
Line 1 Records from an external source connected to the rear line inputs.
Line 2 Records from an external source connected to the front line inputs.
6 Press
Y/B and " or use the 1-3 keys to set the record speed:
Auto Activates Complete Program Record (see page 38).
SP Sets the record speed to Standard Play. Use for best quality (a T-120 tape will record for 2 hours).
SLP Sets the record speed to Super Long Play. Use for maximum recording time (a T- 120 tape will record for 6 hours).
7 Press RETURN to confirm and view a summary of the event, as well as any other programmed events.
8 Select another event number or press RETURN to exit.
• The event is now stored in memory and will record at the scheduled time. It is not necessary to turn the DVD+VCR off or
put it into a Timer mode; the event will record regardless of the state of the DVD+VCR.
