


53
ENGLISH
SPECIAL SETTINGS
----------------------------------------------------------------------------------------------------------
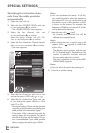
5 Select the line »Scan Typ« with »
V
« or »
Λ
«
and set the option »ATV« with »
<
« or »
>
«.
6 Start the scan with »
« (red).
Note:
7
After starting the scan, a security query will
appear. Press »
« (green) to confirm the
option »Yes«.
– All channel and favourites lists for the ana-
logue channels will be deleted and com-
piled anew.
– The »Results« menu appears, and the scan
for TV channels begins. Depending on the
number of television channels received,
this can easily take a few minutes.
– The search is complete as soon as the »PRO-
GRAM TABLE« appears.
Note:
7
You can abort the search by pressing »i«.
7 Press »
i« to end the setting.
Tuning analogue television
channels
This setting is only necessary if you cannot re-
ceive any digital channels and you have not car-
ried out an analogue search during initial setup.
The television channels can be set directly or
using the scan.
Setting all analogue television
channels
Analogue channels are displayed in the channel
list after the digital channels.
Note:
7
Plug the rooftop antenna cable (for analogue
television channels) into the »ANT IN«
socket on the television.
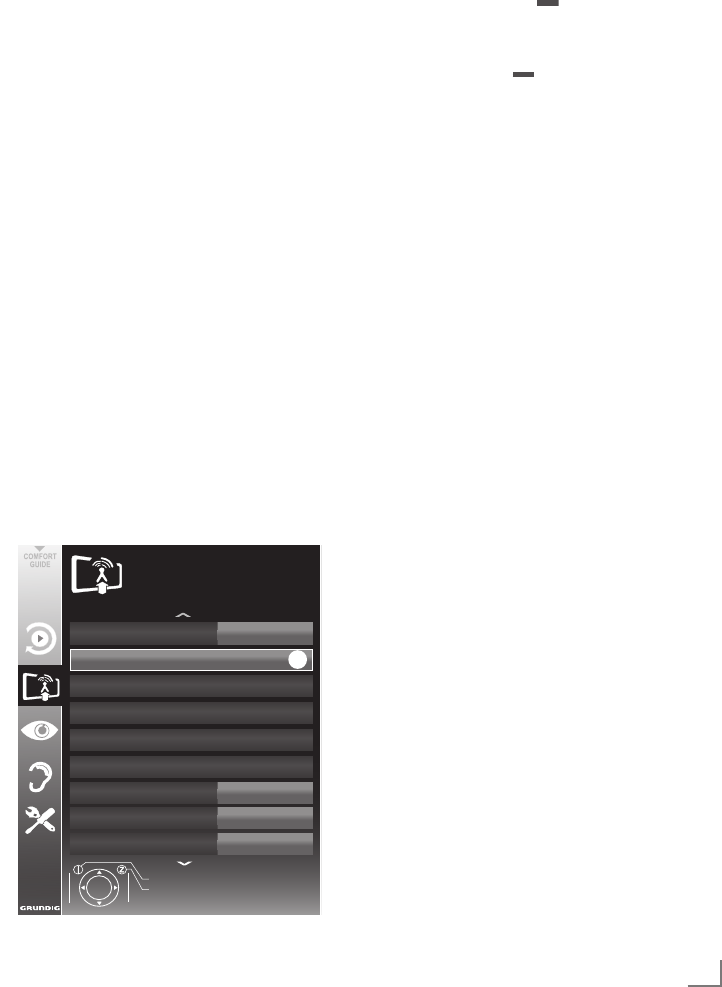
1 Open the menu with »i«.
2 Select the line »SOURCE SETUP« with »
V
«
or »
Λ
« and press »●« to confirm.
– The »SOURCE SETUP« menu appears.
3 Select the line »Source« with »
V
« or »
Λ
«
and press »●« to confirm.
Select the option »Air« or »Cable« with »
<
«,
»
>
«, »
V
« or »
Λ
« and press »●« to confirm.
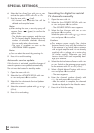
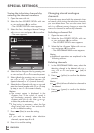
4 Select the line »Automatic Channel Search«
with »
V
« or »
Λ
« and press »●« to confirm.
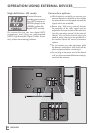
Automativ Channel Search
Source
Automatic Service Update
CA - Modul
Active Antenna Power
Analogue Manual Tuning
Signal Information
Digital Manual Tuning
Program Table
Exit
Back
SOURECE SETUP
20.09.2010
15:46
Air
On
Not inserted
Off
OK