


Customizing Your Channels and Sources 51
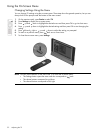
Customizing Your Channels and Sources
Adding or Deleting a Channel
You can manually add or delete channels in the list of channels for the antenna or cable input, which
enables you to add a new channel that becomes available or hide a channel you want to omit when
browsing channels.
1. Optional: tune to the channel you want to add or delete.
2. Press Settings and go to Setup > Channel setup > Add/Remove cable or Add/Remove antenna,
depending on the source (cable or antenna).
3. Press up and down to highlight the channel, then press red/CC to delete that channel or press
green/PIP to add it. Each deleted channel is marked with "X" and highlighted in gray.
4. Press back to close the list.
TIP:
• If you want only to delete channels, press Guide to display the list of channels, then press
red/CC to delete channels.
• If you want to update the complete list of channels, press Settings and go to Setup > Channel
setup > Auto search cable or Auto search antenna, depending on the source (cable or
antenna). For example, you could do this if you add new cable services or install a new
antenna. However, if you have a CableCARD installed, Auto search cable is not available
because the card provides complete channel information.
Setting Up Favorite Channels
You can quickly tune to your most-watched cable channels by creating a list of favorite channels. Only
channels received on the cable input can be included in the list of favorite channels—antenna channels
cannot be added to the list.
To tune to a favorite channel
S Press Favorites one or more times to tune to one of your favorite cable channels.
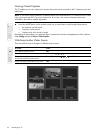
To add a channel to your favorites
1. Tune to the cable channel you want to add (or delete).
2. Press Guide to show the list of channels. Each favorite channel is marked with .
3. Press green/PIP to add or remove the for the selected channel.
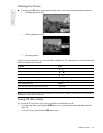
Labeling the Sources
You can assign names to the input ports so you can select sources based on names you can easily recognize.
These names replace the standard input names in most situations.
1. Press Settings and go to Setup > Source names.
2. Select the input you want to rename and press OK.
3. Press down and up to select the first letter of the name; then press right. Repeat for each letter
or character in the name. The name can be as short as you want.
4. When the name is complete, press OK.
5. Repeat for other inputs as needed.
TIP: To delete the name for an input and restore the default name, open the name for editing, and then
press the red/CC button.