7.0 Start-Up Instructions
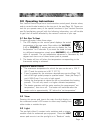
Congratulations! You are now all set to get your new spa ready to use. Simply
follow this step-by-step procedure and, before long, you will be enjoying your
first glorious experience in your Jacuzzi Premium spa. For best results, read
each step in its entirety before proceeding with that step.
7.1Filling the Spa
Clear all debris from the spa. Although the spa shell has been polished at
the factory, you may want to treat it with a specially formulated spa cleaner
and wax available from your dealer prior to filling the first time.
Remove the filter cover, then remove both filter cartridges as outlined in
section 12.1 (Page 31). Place the end of your garden hose into the exposed
pump #1 filter wall fitting without a mesh grill. Fill the spa half way, then
place end of your garden hose into the circulation pump filter wall fitting
with the mesh grill. Continue filling spa until the water level is 1 inch below
the lowest pillow and and above all jets. Do not over fill. Never fill with
water from a water softener.
If your water is extremely “hard”, it is preferable to fill half-way with hard
water and the rest of the way with softened water. Or, you may fill entirely
with hard water if you use a special water additive available from your
Jacuzzi Premium dealer. Always refill spa through both filter wall fittings
to purge trapped air from pump intakes. Failure to do so may cause air to
be trapped in either pump #1 or the circulation pump’s intake (air lock),
preventing either pump from circulating water. After filling, make sure
both filters are installed properly before applying power to the spa. Refer
to section 12.1 (Page 31) “Cleaning the Filter” for specific cleaning
and installation instructions.
7.2 Safety Check
Open the wood cabinet access panel and check all pump unions to make sure
they are hand tight. Loosening can occur during shipping and handling.
7.3 Turn on Power
Turn on power to spa at the home’s circuit breaker. The heater and circulation
pump will automatically activate. If the control panel LCD flashes water tem-
perature and “COOL” or “ICE”, the pump 1 will also activate in low speed. If
this occurs, refer to page 38-39 for additional information.
7.4 Initiating Water Circulation
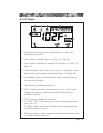
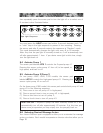
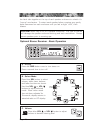
Depress the JETS 1 sensor pad on the control panel twice to
activate pump #1 in high speed and initiate maximum water
flow to certain jets.
Page 11


