


June 30, 2003 6:18 pm Page 10
— 10 —
Master Page: Right
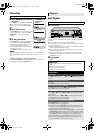
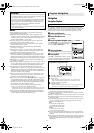
Receiving stereo and bilingual programmes
Your recorder is equipped with a Sound-Multiplex decoder (A2)
and a Digital stereo sound decoder (NICAM) as well, making
reception of stereo and bilingual broadcasts possible.
When the channel is changed, the type of broadcast being
received will be displayed on the TV screen for a few seconds.
● To listen to a stereo programme, press AUDIO until “HIFI L
R” appears on the screen.
● To listen to a bilingual programme, press AUDIO until “HIFI L
” or “HIFI R” appears on the screen (as required).
● To listen to the Standard (regular monaural) audio while
receiving a NICAM broadcast, press AUDIO until “NORM”
appears on the screen.
NOTE:
“O.S.D.” must be set to “ON” or the on-screen displays will not
appear (
੬
16)
To record stereo and bilingual programmes (A2)
● Stereo programmes are automatically recorded in stereo on the
Hi-Fi audio track (with the normal audio track recording mixed
L and R channel sound).
● Bilingual programmes are automatically recorded in bilingual
on the Hi-Fi audio track. The main soundtrack will be recorded
on the normal audio track.
To record NICAM stereo and bilingual programmes
The NICAM audio programme is recorded on the Hi-Fi audio
track, and the standard audio programme on the normal audio
track.
NOTES:
● If the quality of stereo sound being received is poor, the
broadcast may be received in monaural with better quality.
● Before playing back a programme recorded in stereo, or a
bilingual programme, refer to “Soundtrack selection” (
੬
8).
S-VHS (Super VHS), S-VHS ET or VHS Recording
Mode
This VCR can record in S-VHS (Super VHS), S-VHS ET or VHS.
● To record in S-VHS:
Set “S-VHS MODE” to “ON” (
੬
16). Then, insert a cassette
marked “S-VHS”. The S-VHS indicator lights up on the display
panel.
The S-VHS recording mode is selected.
● To record in S-VHS ET on a VHS cassette:
Set “S-VHS ET” to “ON” (
੬
9). Then, insert a cassette marked
“VHS”. The S-VHS indicator lights up on the display panel.
● To record in VHS:
Insert a cassette marked “VHS”.
Set “S-VHS ET” to “OFF” (
੬
9).
● To record in VHS on a S-VHS cassette:
Insert a cassette marked “S-VHS”. The S-VHS indicator lights up
on the display panel. Then, set “S-VHS MODE” to “OFF”
(
੬
16). The S-VHS indicator goes off.
The VHS recording mode is selected.
NOTE:
When playing back a tape that has been recorded in S-VHS or
S-VHS ET, the S-VHS indicator lights up on the display panel
regardless of the “S-VHS ET” (
੬
10) or “S-VHS MODE” (
੬
16)
setting.
Up to 8 timer recording programs can be made using G-
CODE
/
S
HOW
V
IEW
timer programing or Express timer programing method
as far as a year in advance. Remember, the clock must be set
before you can program the timer.
NOTES:
● If all the 8 programs have already been set, “PROGRAM FULL”
appears on the TV screen.
● After timer recording is completed, the recorder turns off
automatically.
● You can program the timer recording while a regular recording
is in progress; the menu screens will not be recorded.
● In case of a power failure after programming, the recorder’s
memory backup keeps your selections (if the lithium battery is
not exhausted).
G-
CODE
TM
/S
HOW
V
IEW
TM
System Setup
INFORMATION
G-
CODE
and S
HOW
V
IEW
are different trademarks used to represent
the same easy recording feature, but only the term G-
CODE
system
will be used in the instructions. If you use the S
HOW
V
IEW
system,
follow the same instructions listed for the G-
CODE
system.
The G-
CODE
timer programming system eliminates the need to
input channel, date, start and stop time data when setting the
timer record function. Simply key in the G-
CODE
number for the
TV programme you wish to record (found in most TV listings) and
the recorder's timer is automatically programmed.
You have to set “GUIDE PROG” numbers, which are assigned to
each station for purposes of G-CODE
timer programming, for all
the stations stored in your recorder’s memory to get proper results.
Before G-
CODE
setup you must have performed the procedures of
Tuner Set and Clock Set.
IMPORTANT
Perform the following procedure after Auto Set Up and/or the
channel setting steps.
After setting the Guide Program Numbers, channel positions may
be incorrect if you stored or skipped channels. In this case, re-
perform Guide Program Number setting.
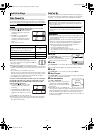
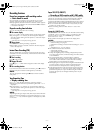
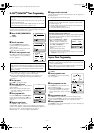
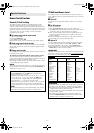
Guide Program Number Set
A
Access Main Menu screen, then Initial Set screen
Press MENU on the remote control. Press PUSH JOG rt to place
the pointer next to “INITIAL SET”, then press OK or PUSH JOG e.
B
Access G-
CODE
/S
HOW
V
IEW
Setup screen
Press PUSH JOG rt to place the pointer next to “G-CODE/
SHOWVIEW SETUP”, then press OK or PUSH JOG e.
C
Input Guide Prog number
Press PUSH JOG rt or the Number
keys to select the Guide Program number
as shown in the TV listing, then press OK
or PUSH JOG e.
D
Input receiving channel number
Press PUSH JOG rt or the Number
keys to select the number of the channel
on which the Guide Program number’s
broadcasts are received, then press OK
or PUSH JOG e.
● If the satellite broadcast is received on
your recorder's auxiliary channel (“L-1” or “F-1”), select “L-1”
or “F-1” for the channel position to which the satellite receiver is
connected.
● Repeat steps 3 and 4 as necessary.
E
Return to normal screen
Press MENU on the remote control.
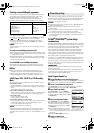
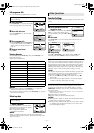
Type of broadcast being received On-screen display
A2 Stereo
A2 Bilingual
Regular Monaural
NICAM Stereo
NICAM Bilingual
NICAM Monaural
ST
BIL.
(none)
ST NICAM
BIL. NICAM
NICAM
Timer Recording
G-CODE/SHOWVIEW SETUP
[MENU] : EXIT
[0-9] OR [R/T]: SELECT
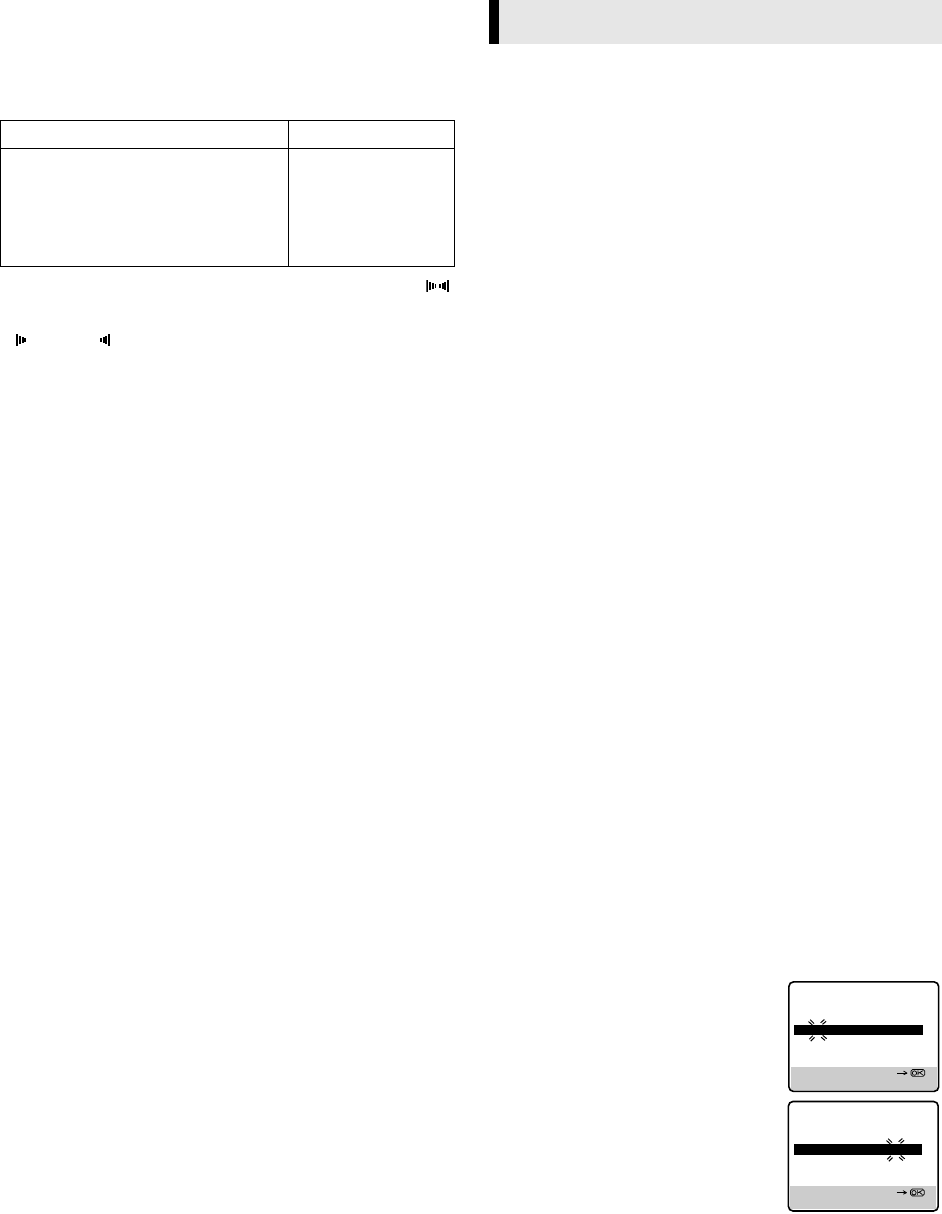
GUIDE PROG TV PROG
2 5
GUIDE PROG TV PROG
2 2
G-CODE/SHOWVIEW SETUP
[MENU] : EXIT
[0-9] OR [R/T]: SELECT
HR-S6960AA_EN.fm Page 10 Monday, June 30, 2003 6:18 PM