


20
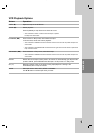
TV Rating-CELR
(US Rating
)
(CELR: Canadian English Language Rating system)
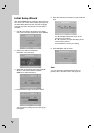
1. Select the [TV Rating-CELR] option then press B.
2. Follow step 2 as shown in [Lock System] above.
3. Select a rating then press ENTER.
[E]: Exempt TV program includes: news, sports, doc-
umentaries and other information program, talk
shows, music videos, and variety program.
[C]: Program intended for children under age 8.
[C8+]: Program generally considered acceptable for
children 8 years and over to watch on their own.
[G]: General audience.
[PG]: Parental guidance.
[14+]: Program contains themes or content which
may not be suitable for viewers under the age of 14.
[18+]: Adult program.
[Blocking Off]: Permits all programs.
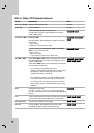
TV Rating-CFLR
(US Rating)
(CFLR: Canadian French Language Rating system)
1. Select the [TV Rating-CFLR] option then press B.
2. Follow step 2 as shown in [Lock System] above.
3. Select a rating then press ENTER.
[E]: Exempt TV program
[G]:
General - Program intended for audience of all
ages.
[8 ans+]: Not recommended for young children.
[13 ans+]: Program may not be suitable for children
under the age of 13.
[16 ans+]: Program is not suitable for children under
the age of 16.
[18 ans+]: Program restricted to adults.
[Blocking Off]: Permits all programs.
Recording Settings
Recording Settings
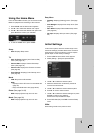
Disc Record Mode
You can set the picture quality for recording;
XP (High Quality), SP (Standard Quality),
LP (Low Quality), EP (Extend Quality).
1.
Select the [Disc Record Mode] option then press B.
2. Use v / V to select a desired Disc Record Mode
(XP, SP, LP or EP).
3. Press ENTER to confirm your selection, then
press HOME to exit the menu.
VCR Record Mode
You can set the picture quality for VCR recording;
SP (Standard Play), SLP (Super Long Play).
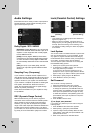
DV Record Audio
You need to set this if you have a camcorder using
32kHz/12-bit sound connected to the front panel DV
IN jack. Some digital camcorders have two stereo
tracks for audio. One is recorded at the time of shoot-
ing; the other is for overdubbing after shooting.
On the Audio 1 setting, the sound that was recorded
while shooting is used. On the Audio 2 setting, the
overdubbed sound is used.
Auto Chapter
During recording, chapter markers are added auto-
matically at fixed intervals. You can set this interval to
5 minutes or 10 minutes. To turn off automatic chap-
ter marking, select [None].