25
EDITING
Audio Dubbing
(J438E only)
Audio dubbing replaces the normal audio sound of a previously
recorded tape with a new soundtrack.
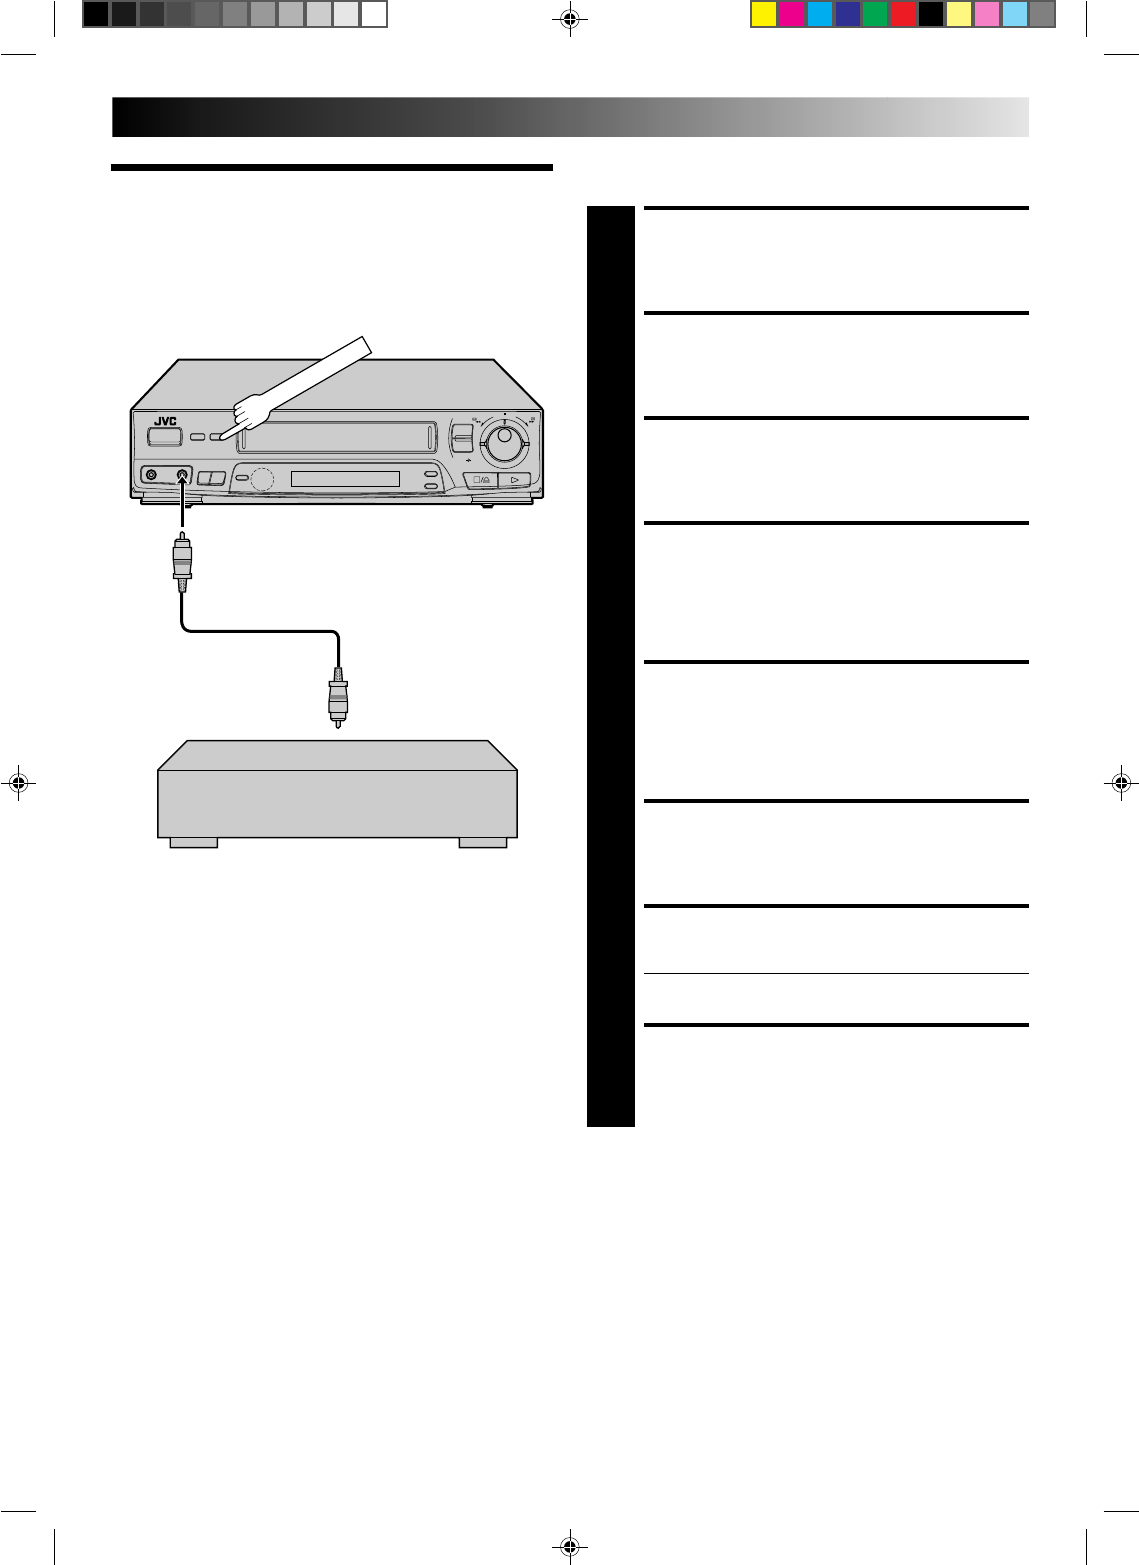
CONNECT AUDIO SOURCE
1
Connect using the AUDIO IN connector on the
recorder's front panel.
SET INPUT MODE
2
Press NUMBER key "0" to set the input mode. "F-AU"
appears in the recorder's display panel instead of a
channel position number.
START PLAYBACK
3
Press PLAY.
FIND START POINT FOR
DUBBING
4
Watch the tape as it plays back, and when you reach the
point where you want dubbing to start, press PAUSE.
ENGAGE AUDIO DUB
MODE
5
Press AUDIO DUBBING.
START SOURCE PLAYBACK
6
Engage the audio source's Play mode.
START AUDIO RECORDING
7
Press PLAY, and audio dubbing begins.
● To stop dubbing temporarily, press PAUSE.
STOP AUDIO DUBBING
8
Press STOP to stop the recorder, and engage the audio
source's Stop mode.
NOTES:
●
Audio dubbing stops automatically when the counter reaches
"0:00:00", and the recorder enters the Play mode. Check the
counter reading before beginning audio dubbing.
●
Audio dubbing is also possible with input via the rear panel
AV1 or AV2. With AV2, set the AV2 SELECT switch to "AV2".
●
Connections made to the front panel AUDIO and VIDEO IN
connectors are given priority over the rear panel AV1 and
AV2 input connectors.
6
q
Your recorder
AUDIO IN
Audio component
(CD player etc.)
Audio cable


