4
INSTALLING YOUR NEW RECORDER (cont'd)
SET TV CHANNEL
3
Set your TV to the video channel (UHF channel 36).
Two white bars appear on screen vertically.
● Tune the TV until the bars are as clear as they can be.
● Your TV should be set to the channel designated for
use with a video recorder, or to a spare channel if
there is not a specified video channel on your TV.
RESET OUTPUT MODE
4
Return the RF TEST switch to OFF.
NOTES:
●
If CH36 is occupied by a local station, adjust the RF output
channel adjustment screw to use another channel between
CH32 and CH40 instead.
●
If some interference noise is continually seen on the screen,
consult your JVC dealer.
SELECT INPUT MODE
1
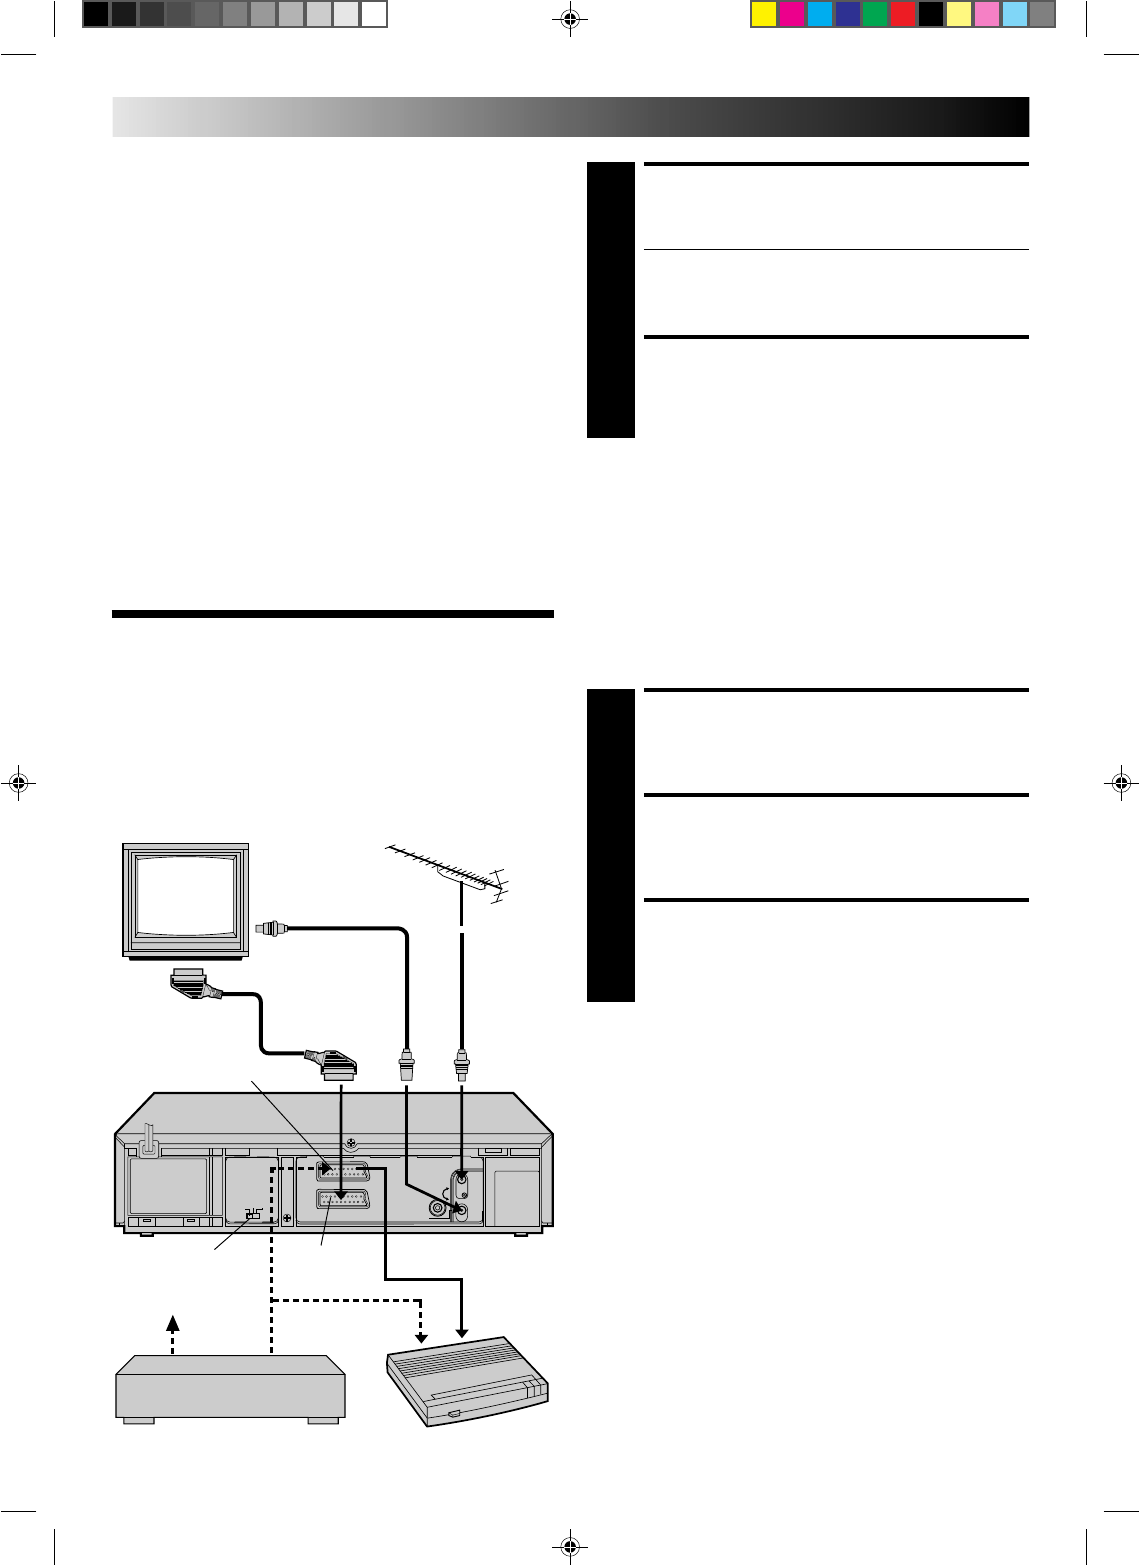
Set the AV2 SELECT switch to "DECODER".
CONNECT DECODER
2
Connect your recorder's AV2 IN/DECODER connector
to the decoder's Euroconnector using a 21-pin SCART
cable.
SET TUNER
3
Follow the procedure starting on page 5.
NOTES:
When Connecting A Satellite Tuner . . .
. . . connect it to the decoder, or if you don't have a decoder
connect the satellite tuner directly to the video recorder.
. . . set the AV2 SELECT switch to "AV2".
. . . to view a programme via the satellite tuner, select AU 2
mode by pressing TV PROG. until "AU 2" appears on the
display panel.
The AV2 IN/DECODER connector can be used as an input
terminal for an external decoder (descrambler). Simply connect
a decoder and you can enjoy the variety of programming that is
available through scrambled channels.
Connecting/
Using A
Decoder
TV Receiver
Satellite tuner
AV2 IN/DECODER
AV1 IN/OUT
TV Aerial
Cable
RF Cable
(provided)
Decoder
Back of Recorder
Satellite antenna
AV2 SELECT switch


