


Getting started
XV-D721BK[J, 1U]EN
LET0486-001B
13
Getting
started
Connections
*In the following description, “TV” may be substituted with “monitor” or “projector.”
*Before using the unit, you have to connect the unit to a TV and/or amplifier.
Before making any connections
• Do not connect the AC power cord until all other connections have been made.
• Since different components often have different terminal names, carefully read the instructions supplied with the
component you are going to connect.
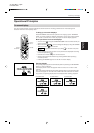
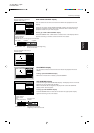
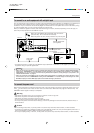
To connect to a normal TV
You can enjoy using the unit by simply connecting it to a TV. To improve audio sound quality, connect the audio
outputs to your separate audio equipment. (See the following pages.)
Getting started
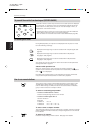
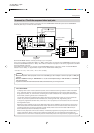
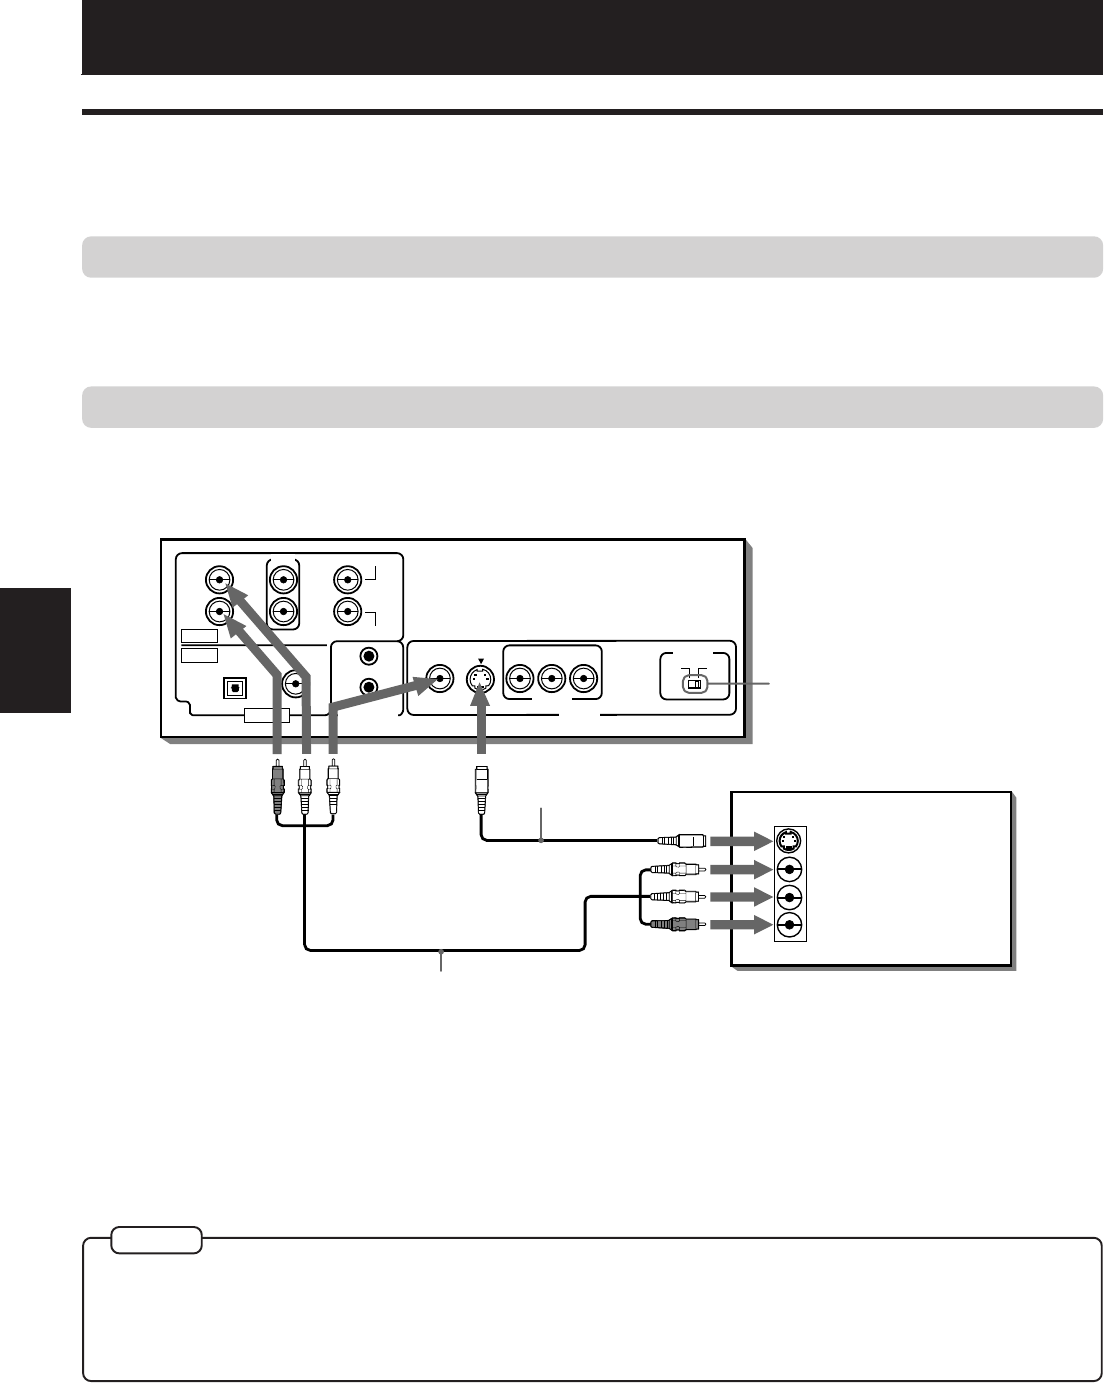
Connect the unit to a TV equipped with stereo audio input and video input jacks using the supplied audio/video
cables.
• If your TV has a monaural audio input instead of stereo, you need to use an optional audio cable which converts
stereo audio output to monaural.
• If your TV has an S-video input, you should connect it with the S-VIDEO output of the unit using the supplied S-
video cable in addition to the (standard) video connection to get better picture quality.
• When connecting to a TV using the VIDEO jack, set the SCAN MODE selector to “525i”. Otherwise, you cannot get any picture.
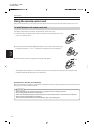
• When making the audio connection using the FRONT (LEFT and RIGHT) jacks, set “DOWN MIX” in “PREFERENCE 2” to “Lo/
Ro” and the Speaker setting in “SPK. SETTING” to “2 CHANNEL”. See pages 42 and 44.
• Connect VIDEO OUT of the unit directly to the video input of your TV. Connecting VIDEO OUT of the unit to a TV via a VCR may
cause a monitor problem when playing back a copy-protected disc.
* If the TV has an AV COMPU LINK
terminal, see “AV COMPU LINK
remote control system” on page
49.
Audio/video cable
(supplied)
S-video cable
(supplied)
TV
The unit
White
Red
Yellow
ANALOG
DIGITAL
FRONT CENTER
SUBWOOFER
PCM/STREAM
AUDIO OUT AV COMPU LINK
LEFT
RIGHT
LEFT
RIGHT
OPTICAL COAXIAL
VIDEO S-VIDEO
YP
B
P
R
COMPONENT
VIDEO
AUDIO
RIGHT
LEFT
IN
S-VIDEO
SCAN MODE
525p 525i
REAR
VIDEO OUT
Red
White
Yellow
NOTES
Set to “525i”