6
After setting is complete, select “ENTER”, and
press the [OK] button
v
Doing so exits date/time setting, and returns to the initial
screen.
.
1-
4'6740
5'672
5'.'%6
':+6
%.1%-5'6&+52.#;
%.1%-5'6
5'672
'06'4
#/6+/'
,#0/106*&#;
;'#4
%.1%-5'6
Memo:
v
The value for seconds cannot be set. After setting the
minute, press the [SET UP] button according to the time
signal.
v
To cancel date/time setting, press the [RETURN] button.
Doing so cancels date/time setting and returns to the initial
screen.
v
The year can be set from 2012 to 2037.
If “2037.12.31 PM11:59” is set, the time will change to
“2012.1.1 AM12:00” after one minute.
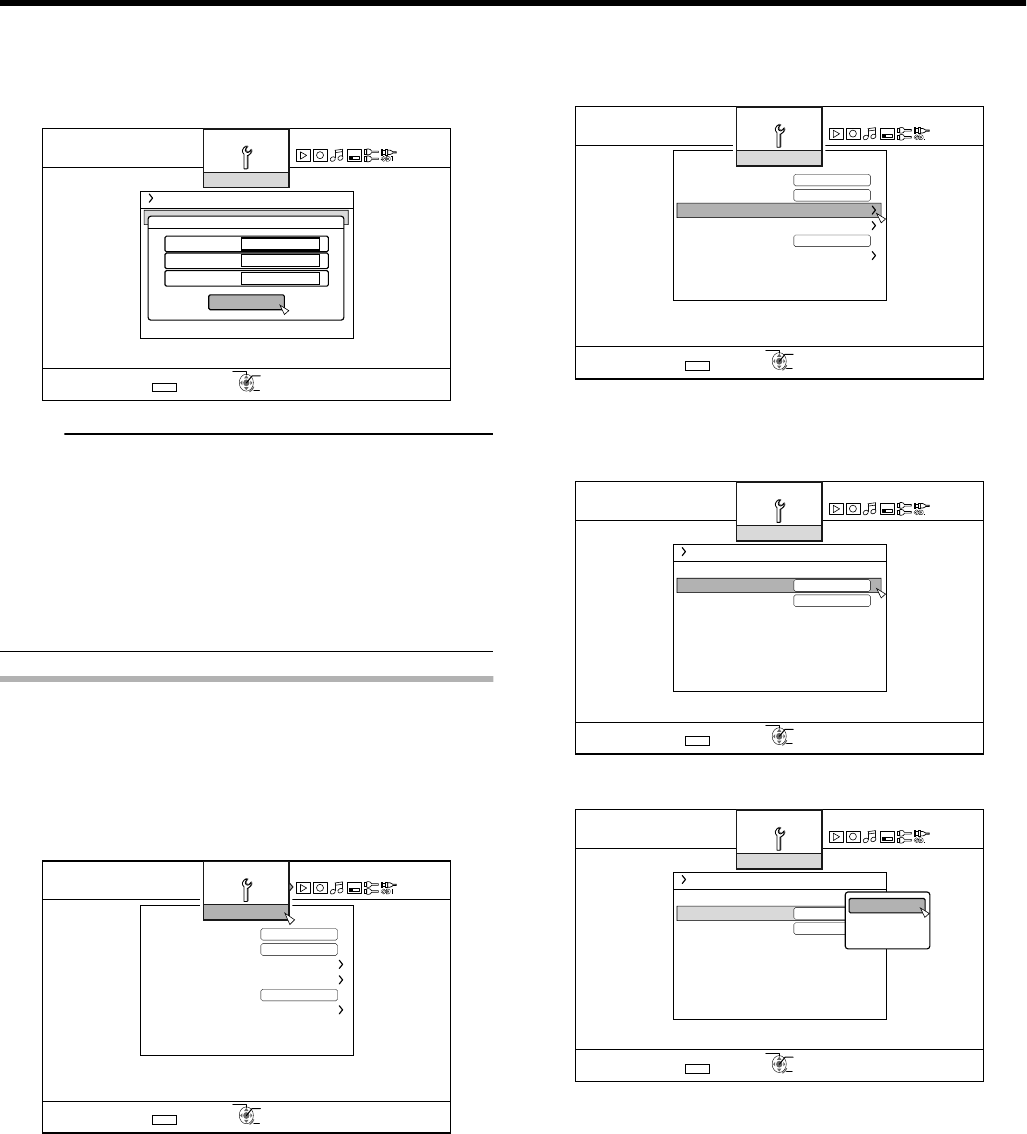
Changing the date display style
You can specify the display style of the date as follows.
1
Press the [SET UP] button on the remote control
unit
2
Select “SETUP”, and press the [OK] button
v
The Settings menu screen appears.
.
1-
4'6740
5'672
5'.'%6
':+6
&'(#7.65'66+0)
$7<<'4176276
1((
1((37+%-56#4672
2#0'.&+52.#;$4+)*60'55
%.1%-5'6&+52.#;
4'/16'%10641.
4'/16'%10641.%1&'
#761219'41((
5'672
3
Select “CLOCK SET/DISPLAY”, and press the
[OK] button
v
The Clock Set/Display menu screen appears.
.
1-
4'6740
5'672
5'.'%6
':+6
&'(#7.65'66+0)
$7<<'4176276
37+%-56#4672
2#0'.&+52.#;$4+)*60'55
%.1%-5'6&+52.#;
4'/16'%10641.
4'/16'%10641.%1&'
1((
1((#761219'41((
5'672
4
Select “DATE DISPLAY”, and press the [OK]
button
v
The Date Display menu screen appears.
.
1-
4'6740
5'672
5'.'%6
':+6
*6+/'&+52.#;%*1+%'
/106*&#;;'#4'&+52.#;
%.1%-5'6
%.1%-5'6&+52.#;
5'672
5
Select the date display style.
.
1-
4'6740
5'672
*
/106*&#;;'#4
5'672
5'.'%6
':+6
6+/'&+52.#;%*1+%'
'&+52.#;
%.1%-5'6
%.1%-5'6&+52.#;
&#;/106*;'#4
;'#4/106*&#;
/106*&#;;'#4
v
Select a date display style from the following items.
YEAR.MONTH.DAY
:
Displays the date in the year/month/
day order.
MONTH.DAY.YEAR
:
Displays the date in the month/day/
year order.
DAY.MONTH.YEAR
:
Displays the date in the day/month/
year order.
6
After selecting, press the [OK] button
v
The date display style will be saved.
Preparation
21
2012/3/8 13:53:0
