


Masterpage:Right+
EN 51
Filename [SR-MV30U_07VCR Operation.fm]
Page 51 March 30, 2004 5:46 pm
OPERATIONS ON VCR DECK
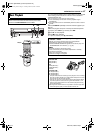
Instant Timer Recording (ITR)
This easy method lets you record for from 30 minutes to 6 hours
(selectable in 30-min. increments), and shuts the unit off after
recording is finished.
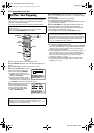
1 Press 7 on the unit to start recording.
2 Press 7 again to engage the ITR mode.
● On the front display panel, “0:30” appears.
3 If you want to record for more than 30 minutes, press 7 to
extend the time. Each press extends recording time by 30 minutes.
NOTES:
● You can only perform ITR using the 7 button on the unit.
● When the end of the tape is reached during timer recording or Instant
Timer Recording, the cassette is automatically ejected and the unit is
shut off.
● During Instant Timer Recording, any other timer programed recording
won’t start even if their start time has come. In such a case, the timer
programed recording starts (if the end time of the timer programed
recording is set after the end of Instant Timer Recording) after the
Instant Timer Recording finishes.
Elapsed Recording Time Indication
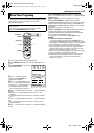
1 Press DISPLAY until a counter reading appears on the front
display panel.
2 Press CANCEL to reset the counter before starting recording or
playback.
● The counter is reset to “0:00:00” and shows the exact elapsed time
as the tape runs. You can check the exact time of a recording or
playback.
Tape Remaining Time
1 Press DISPLAY until the time remaining on the tape appears.
● By pressing the DISPLAY button, you can change display to show
the clock time, counter reading or tape remaining time.
NOTES:
● When you press DISPLAY, the on-screen display appears on the TV
screen for 5 seconds, then the displays other than the counter
disappears. To clear the counter display, press DISPLAY.
● Depending on the type of tape being used, the tape remaining time
reading may not appear right away, or is not correct.
“– –:––” may sometimes appear, or the display may blink on
occasion.
Second Audio Recording
This unit’s built-in MTS decoder enables reception of Multichannel
TV Sound broadcast. To record a SAP program received, set “2ND
AUDIO RECORD” to “ON”. (੬ pg. 76)
NOTE:
When the channel is changed on the unit;
● The “STEREO” indicator appears on the screen for about 5 seconds
if the program is a stereo broadcast.
● The “SAP” indicator appears on the screen for about 5 seconds if the
program is a SAP broadcast.
● Both indicators appear when a stereo program is accompanied by
SAP sound.
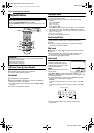
Active Video Calibration
The Video Calibration checks the condition of the tape in use
during playback and recording, and compensates to provide the
highest-possible playback and recording pictures. You can set
“VIDEO CALIBRATION” to “ON” or “OFF” to your preference.
(੬ pg. 75)
Playback
The unit assesses the quality of the tape once you initiate
playback.
● The unit adjusts the playback picture quality based on the quality of
the tape in use.
● Video Calibration is active during automatic tracking. The Video
Calibration screen appears blinking on the TV screen.
NOTES:
● When watching a tape recorded with “VIDEO CALIBRATION” set to
“ON”, it is recommended that you leave “VIDEO CALIBRATION” on
during playback as well.
● When watching a rental tape or one recorded on another VCR, or
when using this unit as the player for editing, set “VIDEO
CALIBRATION” to your preference. (੬ pg. 75)
● The Video Calibration only appears at the beginning of automatic
tracking. Even though it doesn’t appear after that, the VIDEO
CALIBRATION function is operative.
Recording
The unit assesses the quality of the tape once you initiate
recording.
● The unit spends approximately 7 seconds assessing the condition of
the tape, then begins recording.
NOTES:
● The Video Calibration works for both SP and EP modes only after a
tape has been inserted and the Record mode is first initiated. It does
not work during recording.
● In the case of timer recordings, the Video Calibration works before
recording is initiated.
● Once the cassette is ejected, the Video Calibration data is cancelled.
The next time the cassette is used for recording, Video Calibration is
re-performed.
● Pressing the unit’s 7 button while the Video Calibration is displayed
does not start Instant Timer Recording. (੬ pg. 39)
-
A
TTENTION:
Since the Video Calibration works before recording actually starts,
there is a delay of approximately 7 seconds after 7 and 4 on the
Remote are pressed, or 7 on the unit is pressed. To make sure you
record the desired scene or program in its entirety, first perform the
following steps:
A Press and hold 9 and press 7 to engage the Record Pause
mode.
● The unit then automatically checks the condition of the tape and,
after approximately 7 seconds, re-enters Record Pause mode.
B Press 4 to start recording.
If you want to bypass the Video Calibration and begin recording
immediately, set “VIDEO CALIBRATION” to “OFF”. (੬ pg. 75)
SR-MV30U_00.book Page 51 Tuesday, March 30, 2004 5:46 PM