


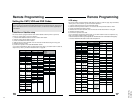

TM-2001U
TM-2701SU
5
9
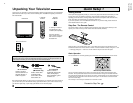
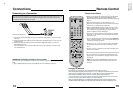
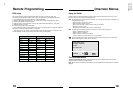
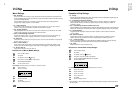
Press the M
ENU
button on the remote control.
Press the
➐❷
buttons to move to AUTO TUNER SETUP
Press the
➛❿
buttons to begin AUTO TUNERSETUP
➛❿
To choose CABLE (if you are connected to a cable system) or AIR (if you use an antenna)
➐❷
To move to START
➛❿
To start Auto Tuner Setup
The Auto Tuner will now memorize all of the clear, active channels your television can receive. This
will take one or two minutes.
NOW
PROGRAMMING!
48
TUNER MODE : CABLE AIR
START
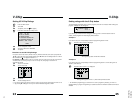
Step Three - Auto Tuner Setup
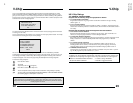
JVC’s onscreen menu system lets you set your television up to meet your own personal viewing
preferences. The menu screens and their features are discussed in detail in this book. The menu
settings are optional, you can set as many or as few of them as you wish. But to begin watching
your television right away you will need to run the Auto Tuner Setup. This lets your television learn
the channels it is able to receive. To run the Auto Tuner Setup follow the steps below.
The Auto Tuner is finished when the message PROGRAMMING OVER! appears onscreen.
The Auto Tuner programming is now complete. You can now begin watching your television, or you can
continue on in this guide for more information on connecting audio/video devices, programming your
remote control, or using the JVC onscreen menu system to customize your television viewing experience.
STOP
The Quick Setup
is complete
Quick Setup 3
8
L/ MONO
R
75Ω
(VHF/UHF)
INPUT
AUDIO OUT
S-VIDEO
VIDEO
OVER
L
R
75Ω
(VHF/UHF)
Cable/RF connector
AV Cables/Plugs
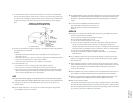
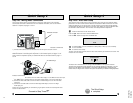
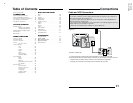
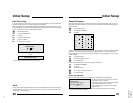
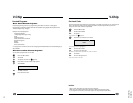
Step Two - Making Basic Connections
Next you will need to connect your television to an antenna or cable system. The most basic
antenna/cable connection is shown below. For more detailed connections, such as ones where a
cable box is required, see pages 11 and 12.
You may also wish to connect a VCR at this point. Abasic stereo VCR connection is shown below. For
detailed instructions on connecting other components or a home theater system, see pages 11 to 14.
Note: AVCR is not required to operate your television.All others use connections shown on pages 11
and 12.
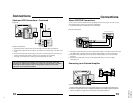
1) Connect the yellow video cable out from the VCR’s Video Output, in to the BNC connector box Input
jack, OR connect an S-Video cable from the VCR’s S-Video Output, to the TV’s S-Video Input.
2) Connect the white audio cable out from the VCR’s Left Audio Output, in to the TV’s Left Audio
Input Jack.
3) Connect the red audio cable out from the VCR’s Right Audio Output, in to the TV’s Right
Audio Input jack.
Finally, once you have finished your connections, plug the power cord into the nearest power outlet
and turn on the television.
1) Connect an RF cable out from the wall outlet in to the RFInput on the back of the TV.
☞
Proceed to Step Three
Illustration of TM-2701SU
Illustration of TM-2701SU
Quick Setup 2
L/ MONO
R
75
(VHF/UHF)
INPUT
AUDIO OUT
S-VIDEO
VIDEO
OVER
L
R
Yellow
White
Red
IN
IN
L/ MONO
R
L
IDEO
IN
OUT
VCR
Video
Audio
BNC
Connector
box