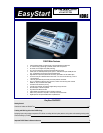
D16XD EasyStart
[TEMPO] Tempo, Time signature and Rhythm
There are 265 preset metronome / rhythm patterns in the D16XD. These patterns can be used to create a drum track or Tempo
Map with pattern, tempo and time signature changes. The Rhythm Patterns /Tempo Maps that you build do not use actual tracks,
but can be recorded to tracks if desired. (See the D16XD Owner’s Manual page 61)
1. Press the [TEMPO] Key, and then press the “Prev))” (Preview) button in the display.
2. Press the “” popup button in the lower left of the display (Metro04 L1 is currently selected). Audition some of the
patterns by pressing to select them in the display, and by using the <scroll bar> or the DIAL. When finished, press
“Cancel”, and then press “Prev))” to turn previewing off.
! In a 24Bit 96kHz song, you will only be able to select Metro, Hi Hat and Blank.( In the following section, you can try them
all)
Creating and Working with a New D16XD Song
In this section, you will go through the basic steps of creating a new song: Assigning the input, applying effects and EQ
to your input source, basic recording procedures, as well as mixing down, burning a CD and backing up your song to a
computer. You will need a guitar or microphone and a blank CD-R for this section.
Select a new song:
1. Press the [SONG] key, and then press the “SelectSong” tab in the display.
2. Press the “New” button in the display
Ä select the “New Song Type” as “44.1kHz / 16bit” Ä press “OK”. The display
will indicate “00X: Song00X” - the next available empty song location. The New Song Type setting you’ve just selected
is one of five selections specifiying the sampling frequency and bit depth available for recording. Both 44.1kHz/16 bit and
48kHz/16bit allow for 16 track simultaneous recording/playback (with the optional AIB-8 board). (For more information on
Song Type settings, see the Owner’s Manual page 135)
3. Rename the song by pressing “Rename” in the display. Press “ClearAll” Ä name the song “QUICKTOUR”, and then
press “OK’.
Assign an input and apply one of the analog compressors:
1. Make sure that the PAD keys above the TRIM knobs are in the up position, and that the TRIM knob is set all the way left
to -12dB.
2. Connect a guitar to the GUITAR IN jack on the front panel. Or.. If you are going to use a microphone, make sure that
the PHANTOM power switch for INPUT 1 (located on the back of the unit) is set to OFF, unless your condensor
microphone requires phantom power. Then connect your mic to INPUT 1 on the top panel.
3. Press the [MIXER] key, and then press “INPUT/OUTPUT CH ASSIGN” in the display. Here, you can select which track
each input will be recorded onto, by pressing the icon that looks like a ¼” phone jack and using the DIAL to set the input
Ä select “1” for “SOURCE” on Channel 1. (This is the default)
4. Press the green [REC/PLAY] key for Channel 1, and it will change to red (record status).
5. Gradually raise the channel fader 1 to -0-, and as you play or speak, adjust the channel TRIM knob so its LED indicator
indicates steady green and yellow during the maximum or loudest input. Avoid red, as it indicates clipping.
5


