


9
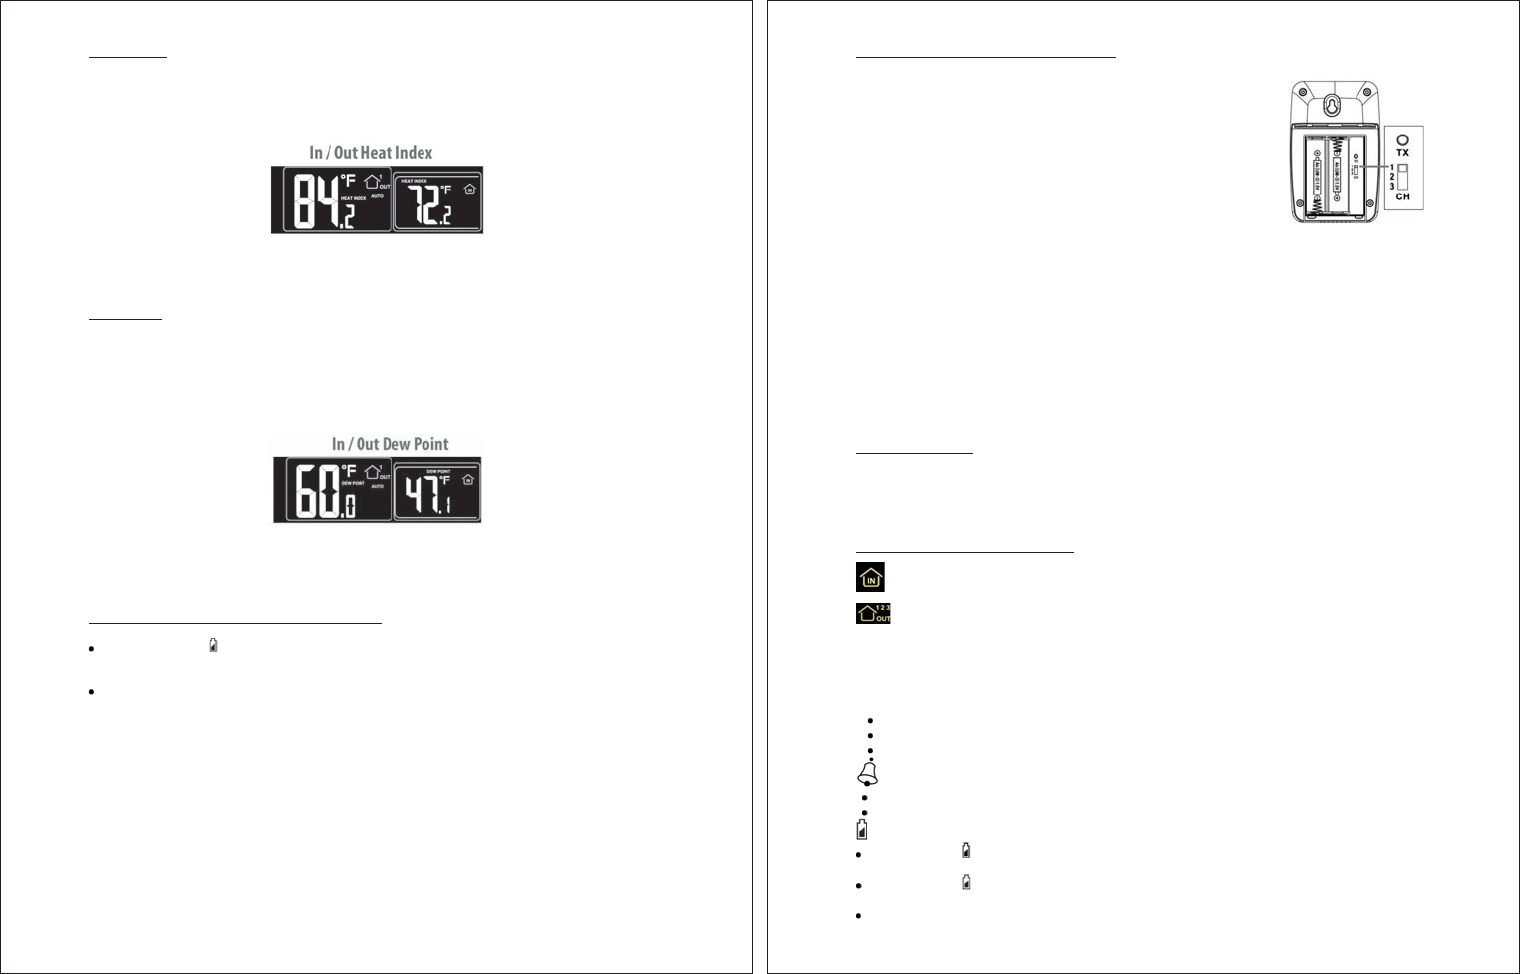
HEAT INDEX:
Heat Index combines the effects of heat and humidity. It is the apparent temperature of how hot it feels to
a human being. When relative humidity increases, the air feels warmer than it actually is because your
body is less able to cool effectively by evaporation of perspiration.
Note: Heat index will be the same number as the temperature until the temperature is above 80 degrees
°F (26.7°C).
View Heat Index: From a normal display press the HEAT/DEW button once and the Heat Index will show
(indoor/outdoor) instead of the ambient temperature. The words Heat Index will show near the indoor and
outdoor temperatures.
DEW POINT:
Dew point is the saturation point of the air, or the temperature to which the air has to be cooled in order to
create condensation. The higher the dew points, the higher the moisture content of the air at a given
temperature. Dew Point Temperature is the absolute measure of the moisture in the air at a given
temperature. Relative humidity is the relative measure of moisture in the air at a certain temperature.
Note: Dew Point is lower than the actual temperature.
View Dew Point: From a normal display press the HEAT/DEW button twice and the Dew Point
temperature will show (indoor/outdoor) instead of the ambient temperature. The words Dew Point will
show near the indoor and outdoor temperatures.
OUTDOOR TEMPERATURE/HUMIDITY FLASHING:
Low battery icon present: Change batteries in the transmitter, and then hold the CH button until
the station beeps to search for the outdoor transmitter again.
End of Transmission Range: Move the transmitter closer to the Forecast Station. Avoid
obstructions in the signal path. Keep transmitter and Forecast Station away from electronics.
10
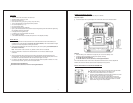
USE MULTIPLE OUTDOOR TRANSMITTERS:
The Forecast Station will accommodate up to three remote outdoor transmitters (TX14TH). The channel
selection button allows you to easily see the temperature in various locations:
outdoors, baby’s room, greenhouse, basement, etc.
To connect multiple remote transmitters to the Forecast Station:
1. Remove the battery cover from all the transmitters (Leave battery covers
off until all transmitters are received by the Forecast Station).
2. Set the first outdoor transmitter to Channel 1 and insert 2-AA batteries.
3. Set the second outdoor transmitter to Channel 2 and insert 2-AA
batteries.
4. Set the third outdoor transmitter to Channel 3 and insert 2-AA batteries.
5. Press and hold CH button on Forecast Station until a beep sounds. The Forecast Station will search
for all outdoor transmitters.
6. Press the TX button on the back of each outdoor transmitter to transmit RF signal.
7. When RF connection is established, the respective temperature & humidity for each of the selected
channels will appear on the main unit.
8. Allow the transmitters and the Forecast Station to stay 5-10 feet apart for 15 minutes to establish a
solid connection.
9. Install the battery covers on each sensor.
10. After 15 minutes place the remote transmitters in appropriate locations (see “position the outdoor
transmitter”).
Press and release the CH button to view channel 1, 2 or 3 on the Forecast Station when multiple
transmitters are used.
Note: You cannot change channels if only one transmitter is connected.
CHANNEL SCROLL: Press and release the CH button until you see the word AUTO appear in the
outdoor data area. The Forecast Station will automatically rotate through the channels for all connected
transmitters.
Press and release the CH button to lock the Forecast Station into one channel. Then view channels
individually with a press of the CH button.
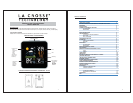
OTHER FORECAST STATION ICONS:
Indoor readings (Temperature, Humidity, Dew Point, Heat Index)
Outdoor Channel indicator: The number 1, 2 or 3 for will display next to this icon indicating
which transmitter the Forecast Station is reading. Press and release the CH button to view other
channels when using multiple sensors.
AUTO When this word appears the outdoor temperature/humidity readings will automatically switch
between channels (when using multiple sensors). Press and release the CH button to display only one
channel.
Zz – Snooze icon
Will flash when snooze feature has been activated
Solid when alarm is on
Does not display when alarm is deactivated.
Alarm icon
Shows when time alarm is on
Does not display when time alarm is deactivated
Low Battery:
When this icon appears in the Indoor reading section the batteries in the Forecast Station need to
be replaced.
When this icon appears in the Outdoor readings section, replace the batteries in the outdoor
transmitter.
It is recommended to replace the batteries every 12 months to ensure optimum accuracy of this unit.