


43
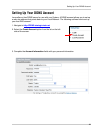
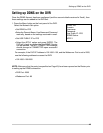
Setting up DDNS on the DVR
Setting up DDNS on the DVR
Once the DDNS Account has been configured (and the account details received in Email), then
these settings can be added to the DVR unit.
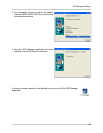
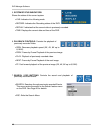
1. Press the Menu button on the front panel of the DVR.
Select the Network Set option.
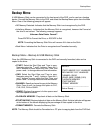
• Set DDNS to YES
• Setup the Domain Name, User Name and Password
manually, based on the settings received in email.
• Set USE PUBLIC IP to YES
• Select the APPLY option and press ENTER. The
DVR will check to confirm that the DDNS Service
can be reached. The NOT CONNECTED message
should change to CONNECTED upon successful
connection.
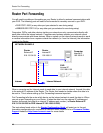
For example, if the DVR IP Address is 192.168.0.150, and the Webserver Port is set to 2005,
use the following address to access the DVR:
• 192.168.0.150:2005
NOTE: Make sure that the ports (as specified on Page 40) have been opened on the Router prior
to setting up the DDNS connection:
• DVR Port: 2505
• Webserver Port: 80
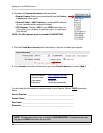
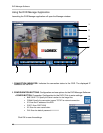
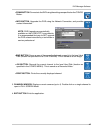
DDNS: NO
Domain:
Username:
Password:
Use Public IP: YES
DDNS Status:
APPLY