6
Note:
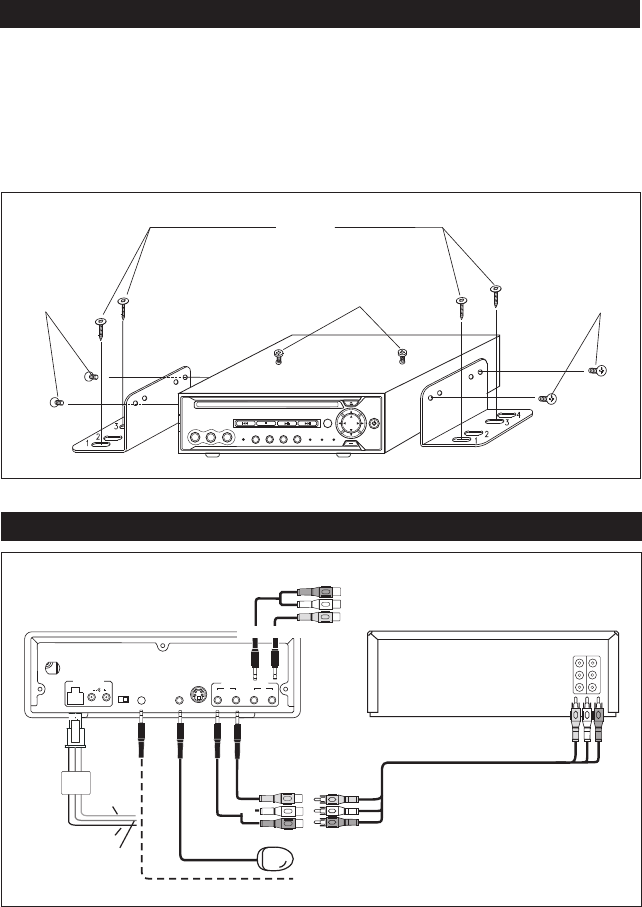
1. First remove the two screws that lock the
player mechanism (see figure below).
Then attach the brackets on both sides
of unit with the M4x5 screws. Next,
install the unit with the M5x25 screws.
2. When mounting the unit, slide the
screws to the left or right side to meet
desired position. Select position 1 and 3,
or 2 and 4 to mount the bracket.
SCREW
M5x25
SCREW
M4x5
SCREW
M4x5
Screws Lock the Player Mechanism
Installation
AUDIO VIDEO
S-VIDEO
REMOTE
DIGITAL
AUDIO
INPUT
TYPE
OUTPUT
AV OUTPUT
VIDEOAUDIO
1
2
AB
DC
12V
ANT IN
MV-DVD-PL5
Male/Male
Jumper Cable
(not supplied)
Infrared Eye (supplied with DVD)
Digital Audio (optional)
D
Connecting to a VCR as an Auxiliary Source
VCR with
AUX IN
Red
Ignition
12V
Black Ground
Y
Yellow Battery Power
Yellow
Red
White
Optional Audio/Video
Output
O
Electric Connection
MV-DVD-PL5Rev_B.qxp 11/2/04 3:48 PM Page 6


