PRECAUTIONS
PREPARATION
ADVANCED PLAYBACKBASIC OPERATIONS RECORDING OPTIONAL SETTINGS TROUBLESHOOTING INFORMATION
EN EN
9
PREPARATION
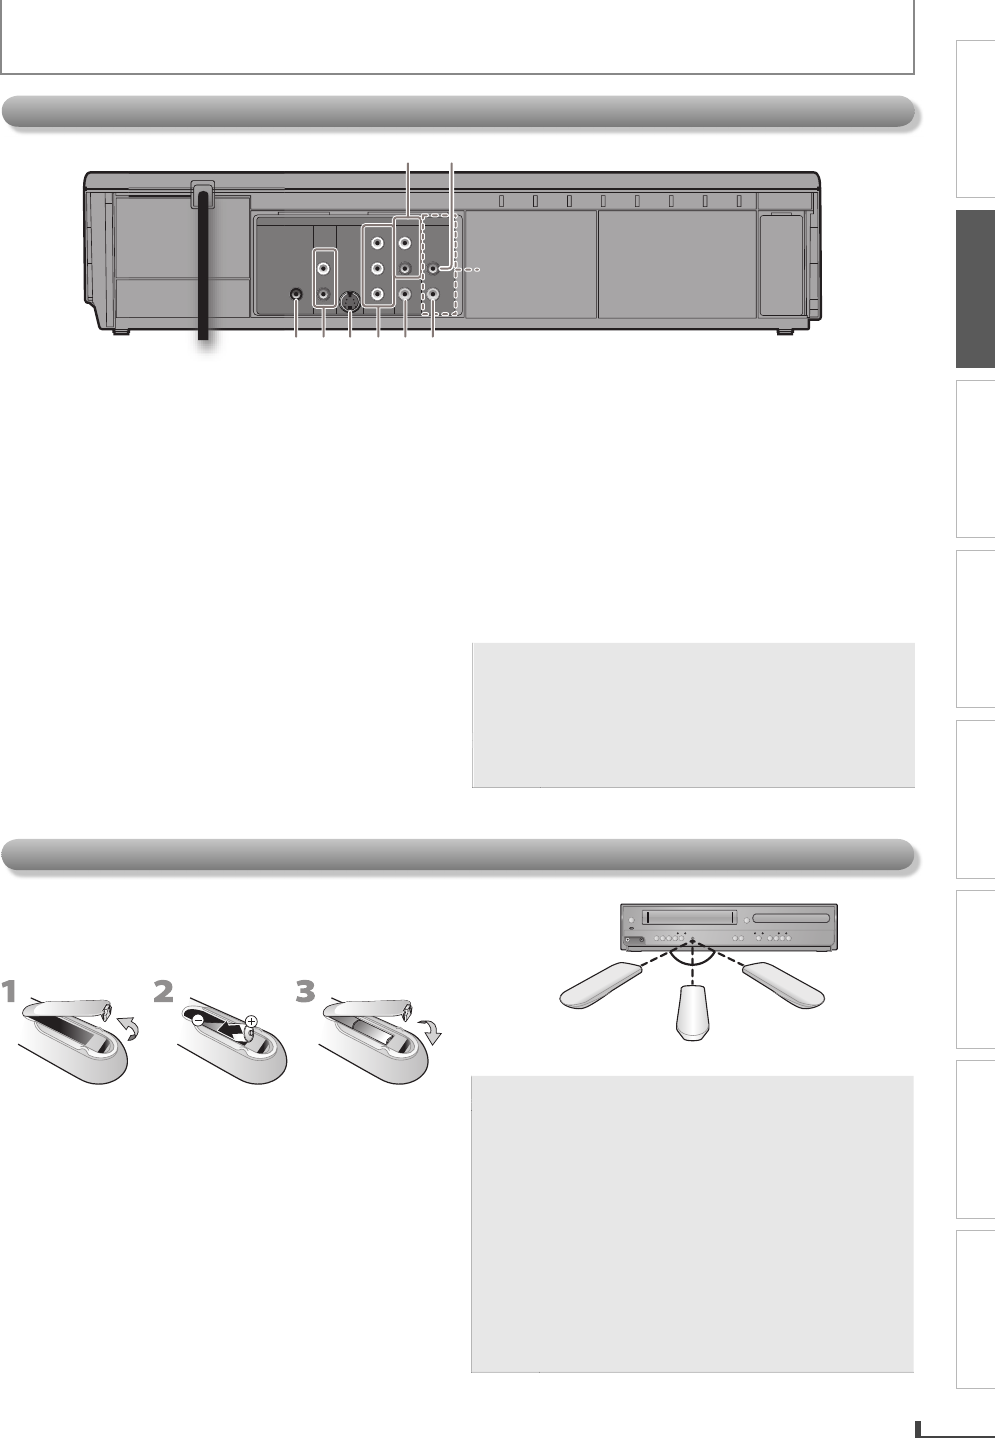
1. DVD/VCR AUDIO OUT jack
¬
p.10
Connect an RCA audio cable from here to the audio
input jack of your television or audio device. Standard
connection for DVD/VCR use.
2. VCR AUDIO IN jack
¬
p.22
Connect an RCA audio cable from the audio output
jack of your camcorder, VCR, etc. to here.
3. DIGITAL AUDIO OUT COAXIAL* jack
¬
p.12
Connect a digital audio coaxial cable from here
to the digital audio coaxial in jack of a decoder or
audio receiver.
4. DVD AUDIO OUT* (analog) jack
¬
p.11
Connect an RCA audio cable from here to the audio
input jack of your television or audio device.
5. S-VIDEO OUT* jack
¬
p.11
Connect an S-video cable from here to the S-video
input jack of your television.
6. COMPONENT VIDEO OUT* jack
¬
p.11
Connect component video cables from here to the
component video input jacks of your television.
•
•
•
•
•
•
7. DVD/VCR VIDEO OUT jack
¬
p.10
Connect an RCA video cable from here to the
VIDEO input jack of your television or audio device.
Standard connection for DVD/VCR use.
8. VCR VIDEO IN jack
¬
p.22
Connect an RCA video cable from here to the video
output jack of your camcorder, VCR, etc.
* For enhanced DVD viewing. DVD/VCR video and audio
connection required to view cassette tapes.
Note:
RCA audio and video cables are included for
both VCR and DVD viewing. You can enhance
your DVD picture and sound quality with an
S-video cable, component video cables, or a
digital audio coaxial cable. Please purchase
the necessary cables at your local store.
(Refer to pages 11-12.)
•
•
•
Rear Panel
DIGITAL
AUDIO OUT
COAXIAL
AUDIO
OUT
DVD VCR
DVD/VCR
S-VIDEO
OUT
COMPONENT
VIDEO OUT
AUDIO IN
VIDEO IN
AUDIO OUT
VIDEO OUT
L
LY
R
R
C
B
C
R
3 54 6 7 8
L1
12
Install the batteries (AA x 2) matching the polarity
indicated inside battery compartment of the remote
control.
Keep the following in mind when using the remote
control:
Make sure that there are no obstacles between the
remote control and the infrared sensor window on the
unit.
The maximum operable ranges of the unit are:
-
Line of sight: approx. 23 feet (7m)
-
Either side of center:
approx. 16 feet (5m) within 30°
-
Above:
approx. 16 feet (5m) within 15°
-
Below:
approx.
10 feet (3m) within 30°
•
•
16 feet (5m)
30˚30˚
16 feet (5m)
23 feet (7m)
Caution: Never throw batteries into a fire.
Note:
Do not mix different types of batteries together
(e.g., Alkaline and Carbon-Zinc) or old batteries
with fresh ones. Although they may look similar,
different batteries may have different voltages.
If the remote control is not to be used for a long
period of time, remove the batteries to prevent
damage or injury from possible battery leakage.
Do not try to recharge batteries; they can
overheat and rupture.
Batteries should always be disposed of with
the environment in mind. Always dispose of
batteries in accordance with applicable laws
and regulations.
•
•
•
•
Installing the Batteries for the Remote Control
E8K6SUD_DV200MW9_v1.indd 9E8K6SUD_DV200MW9_v1.indd 9 2007/12/25 10:30:262007/12/25 10:30:26


