


9
Blind Search – Transponders
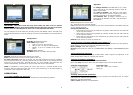
USING EVENT TIMER
IMPORTANT: The Event Timer will only work when the time is set to manual
mode. In Time Setting menu select Manual and set the time. Also the event timer
will not turn on if the STB lock is set to ‘On’ in the Parental Lock menu.
You can program up to 20 events for recording via the VCR SCART output. The STB turns
on and off automatically at the set times for the events. Press MENU key and select Event
Timer.
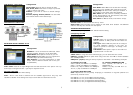
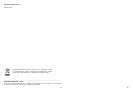
Event Timer Configuration
Channel: Press OK and select the channel you require.
Date: Enter date with 0~9 keys, of the event to turn ‘on’.
On Time, Off Time: Enter with 0~9 keys ‘On’ and ‘Off’ times for the event. Configure
other events the same way, ensuring that the ‘On’ and ‘Off’ times do not overlap previous
event time on the same date. The STB will turn ‘on’ (from standby) and select the set
channel automatically. If positioner is used, the dish will move to that satellite.
NOTE: If positioner is used, please set event ‘On’ time to 3 minutes ahead of the
program. After an event has turned ‘On’, if any of the remote key or the front panel key
is pressed, it will override the ‘Off’ time.
OPERATIONAL
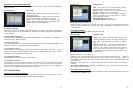
TO CHANGE CHANNEL OR SATELLITE
Press OK to display the channel browser (channel list). Select following options.
Channel Search
Event No: Select Event number.
Timer Mode: Select option.
€• Once, to turn ‘on’ one time only.
€‚ Daily, to turn ‘on’ daily at the same time.
€ƒ
Weekly, to turn ‘on’ weekly at the same
time.
Satellite: Select satellite.
TV/Radio: Select TV or Radio channel mode.
10
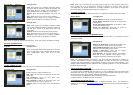
Channel Browser Operation
A-Z: Press green key to sort channels alphabetically. Select alphabet on the left and press
OK. Press OK on the required channel.
F/S: Press yellow key to sort channels by free to air first followed by scrambled. Press OK
on the required channel.
Encryption/Network/TP:
€„ Press blue key once to sort channels by encryption. Select from list and press OK
on the required channel.
€… Press blue key twice to sort channels by network. Select from list and press OK
on the required channel.
۠ Press blue key three times to sort channels by TP. Select from list and press OK
on the required channel.
Normal: Press red key to return to normal list.
USING POS KEY ON REMOTE CONTROL WITH DiSEqC 1.2
This key is used when after Channel Search you wish to re optimize the dish position.
Press POS key, the menu will open for adjusting the position.
Move / Nudge: Press left or right key.
Re-sync: This function is same as in CONFIGURING THE DiSEqC POSITIONER described
earlier.
SELECTING RADIO CHANNELS
Press TV / RAD key once to change to Radio Mode. Press it again to change back to TV
Mode. Follow above steps for changing the channel.
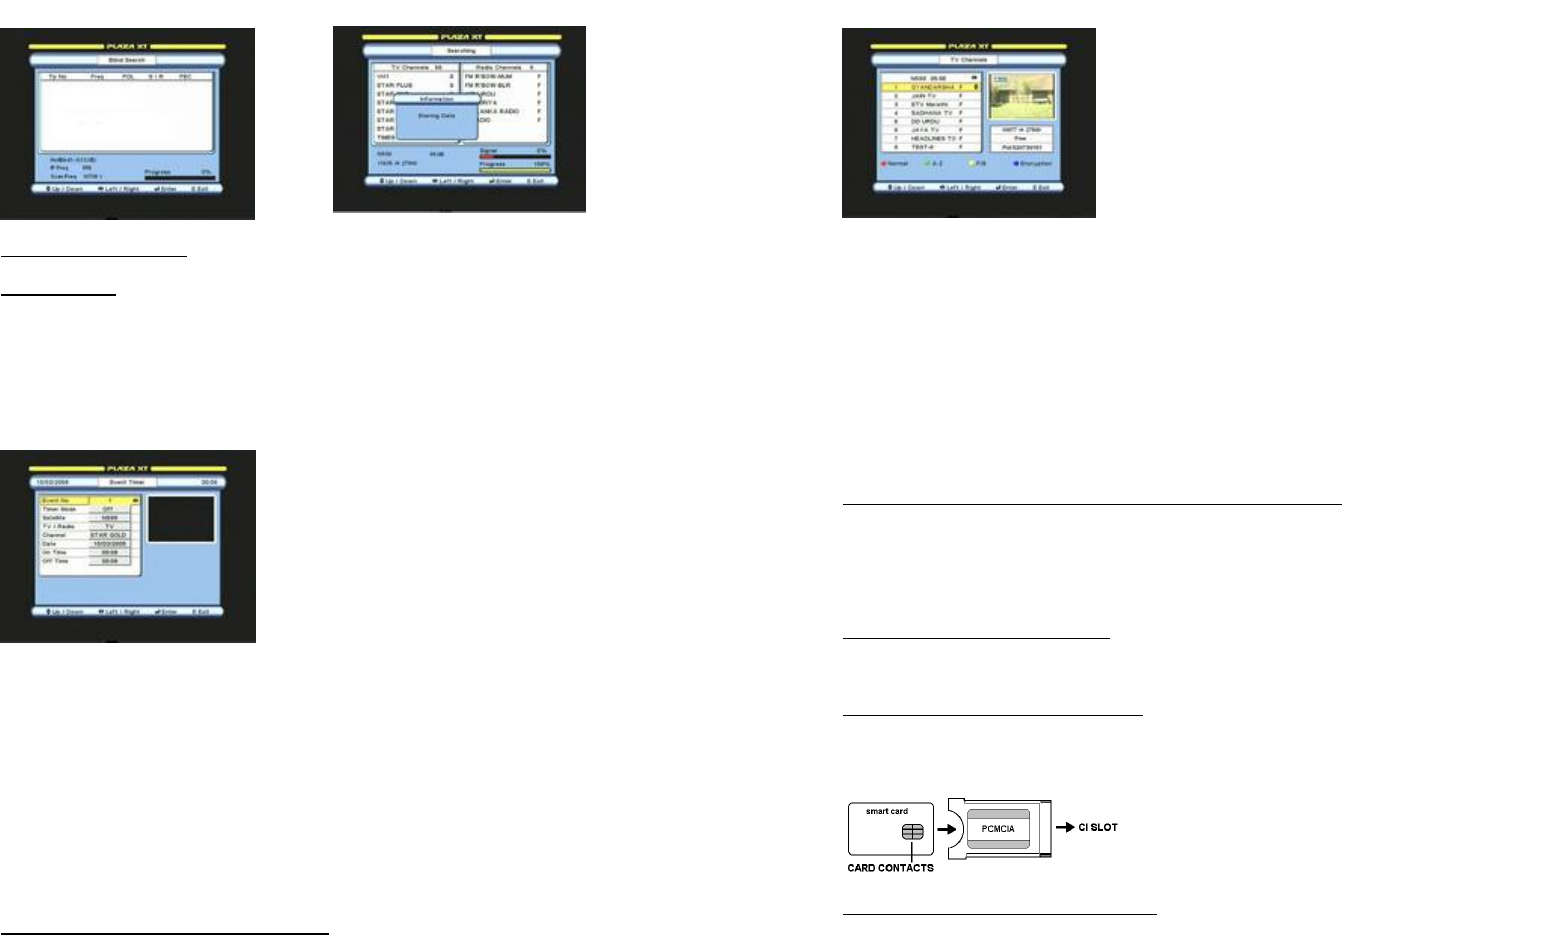
VIEWING SCRAMBLED CHANNELS
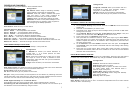
For models with Common Interface and Card Slots
Open flap (F10) and insert CAM in the slot together with a card as shown below.
Inserting card and CAM
Checking CAM and card parameters
Press MENU and go to CA SETUP. Select the required slot and follow the on screen
instructions for checking any parameters.
CI: Shows the CAM parameters.
CAS 1, CAS 2: Shows the card parameters.
To change channel:
Use PAGE and CH up / down
keys. Press OK on the required channel. Press OK
again or press EXIT.
To change satellite: Use SAT ke
y and select
satellite. Alternatively use left / right keys to select
satellite. Press OK on the required channel.
All Satellites list:
To display collective list of
channels for all satellites. Use left / right and select
All Satellites.
Inserting Cards
Insert the cards with contacts
facing up.