


E – 32
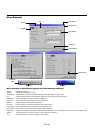
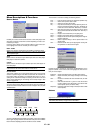
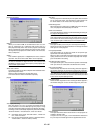
The launcher is a tool bar including the following buttons:
Drag............. Drags to move the tool bar. (for USB mouse operation only)
Prev ............. Returns to the previous slide or folder.
Next ............. Advances to the next slide or folder.
Play.............. Plays back automatically or manually depending on the set-
ting on PC Card Viewer Options of the menu. This allows you
to move on to the next slide when “Manual Play” is selected.
Stop ............. Stops Auto Play while you are playing back and to resume
playing from the selected slide or folder when “Auto Play” is
selected.
Jump ........... Displays a list of slides while you are playing back.
Select........... Displays a list of folders while you are playing back.
Setup ........... Displays the PC Card Viewer Options dialog box on Page 2 of
the Setup dialog box.
Delete........... Deletes a captured slide(s) or all the captured slides in the
selected folder.
View............. Hides the tool bar while you are playing back. Clicking with
the right button of a mouse shows it again.
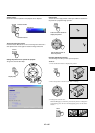
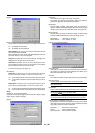
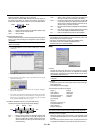
Picture
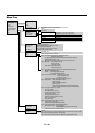
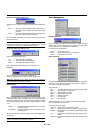
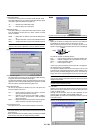
Menu Descriptions & Functions
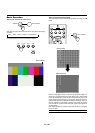
Source Select
Enables you to select a video source such as a VCR, DVD player, laser
disc player, computer or document camera depending on what is con-
nected to your inputs.
Press the “Select” button on the projector cabinet or your remote con-
trol to highlight the menu for the item you want to adjust.
RGB1 / RGB2
Selects the computer connected to your RGB or component signal.
NOTE: An optional component cable (Component V or ADP-CV1 cable) is needed
for a component signal.
Video
Selects what is connected to your Video input-VCR, laser disc player,
DVD player or document camera.
S-Video
Selects what is connected to your S-Video input-VCR, DVD player, or
laser disc player.
NOTE: A frame may freeze for a brief period of time when a video is played back
in fast-forward or fast-rewind with a Video or S-Video source.
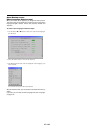
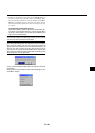
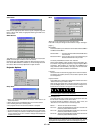
PC Card Viewer
This feature enables you to make presentations using a PC card that
contains captured images and slides created with the exclusive PC
Card Viewer Utility contained in the CD-ROM. See page E-41 for in-
stalling the PC Card Viewer Utility. The starting screen for the PC Card
Viewer varies depending on the settings of the Setup’s Page 2. See
Setup on page E-36.
NOTE: Even if you switch the current PC Card Viewer source to another source,
the current slide is retained. When you return back to the PC Card Viewer, you
will get the slide that has been retained. A launcher will appear when you press
the MENU button.
A press of the MENU button displays the toolbar; a press of the MENU
button again displays the Menu and hereafter each press of the MENU
button switches displaying between the Menu and the toolbar.
Provides access to controls for your image. Use ▲▼ buttons on the
projector cabinet or the remote control to highlight the menu for the
item you want to adjust.
Brightness ... Adjusts the brightness level or the back raster intensity.
Contrast ....... Adjusts the intensity of the image according to the incoming
signal.
Color ............ Increases or decreases the color saturation level (not valid
for RGB).
Hue .............. Varies the color level from +/- green to +/-blue. The red level
is used as reference. This adjustment is only valid for Video
and Component inputs (not valid for RGB).
Sharpness.... Controls the detail of the image for Video (Not valid for RGB
and Component).
Volume
Adjusts the sound level of the projector.
NOTE: You can also display the volume bar without opening the menu. See
“Volume Bar (Direct Button)” on page E-36 for more details.
Drag
Prev Play Jump Setup View
Next Stop Select Delete