


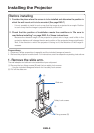


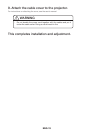

ENG-17
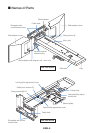
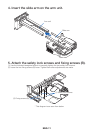
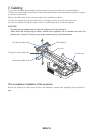
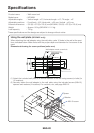
Wall adapter
screws
Wall adapter screws
Fixing screw (A)
Wall adapter
Arm unit
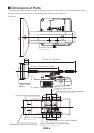
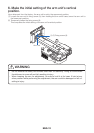
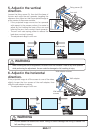
6. Adjust in the horizontal
direction.
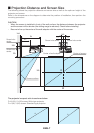
If the projected image is off the screen to one of the sides,
slightly loosen the four screws of the wall adapter, then
slide the wall adapter to adjust.
- The adjustment range is ±50 mm.
- Do not loosen the screws too much. Doing so could damage the fitting or cause it to
fall, resulting in injury.
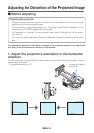
5. Adjust in the vertical
direction.
Loosen the fixing screw (A), then hold the base of
the arm and move the arm upwards, targeting the
reference line. Adjust so that the projected image is
at the center of the screen surface.
* If the projected image moves too far upwards
with respect to the screen surface, it is easier to
adjust by first holding the base of the arm and
lowering the arm, then moving it back upwards.
- The arm unit uses spring power to reduce the
load when moving it upward.
- The adjustment range is ±40 mm.
Reference line
Upwards Downwards
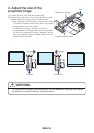
- When lowering the arm for adjustment, be sure to hold it at its base. If held at any other position
while performing the adjustment, the arm could be damaged or fall, resulting in injury.
Right Left
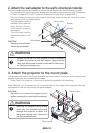
WARNING
WARNING