


25
1
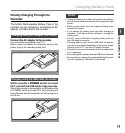
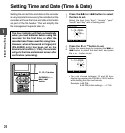
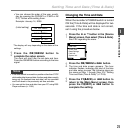
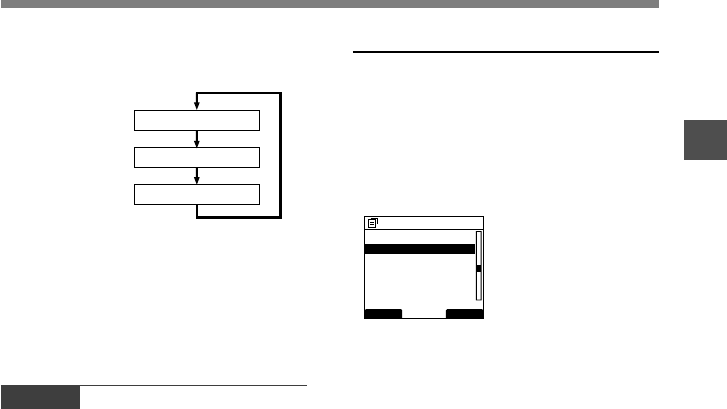
• You can choose the order of the year, month,
day by pressing the F2(D/M/Y or Y/M/D or M/
D/Y)* button while setting them.
Example: January 14, 2008
(Initial setting)
*The display will vary depending on the status of the
settings.
3
Press the OK/MENU button to
complete the setup screen.
The clock will start from the set date and time.
Press the OK/MENU button according to the time
signal.
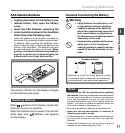
Changing the Time and Date
When the recorder’s POWER switch is turned
ON the [Time & Date] will be displayed for two
seconds. If the time and date is not correct,
set it using the procedure below.
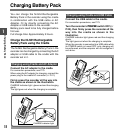
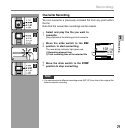
1
Press the + or
–
button in the [Device
Menu] screen, then select [Time & Date].
See P.42 regarding the menu.
2
Press the OK/MENU or 9 button.
The time and date screen appears. The hour
indicator flashes, indicating the start of the time
and date setup process.The following steps are
the same as Step 1 through Step 3 of “Setting
Time and Date (Time & Date)” (☞ P.24).
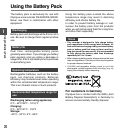
3
Press the F1
(
BACK
)
or 0 button to
return to the [Main Menu] screen, then
press the F3
(
EXIT
)
or 0 button to
complete the setting.
Setting Time and Date
1
M
14
D
2008
Y
14
D
1
M
2008
Y
2008
Y
1
M
14
D
BACK EXIT
Device Menu
USB Class
12
Time & Date
Power Save
Reset Settings
Card Info.
System Info.
Setting Time and Date (Time & Date)
Notes
• If the slide switch is moved to a position other than STOP
while setting the time and date, the time and date currently
being set (un-finalized time and date) will be cancelled
and it will revert to the previously set time and date.
•You can set the time and date from your PC using DSS
Player software (☞ P.69).