


49
3
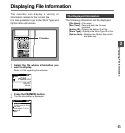
Erasing Fingerprint Data
1
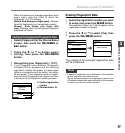
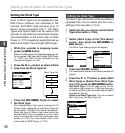
Select the registration number you want
to erase, then press the ERASE button.
The method for Step 1 on P.48 will appear on the
registration number list screen.
2
Press the
+
or
–
to select [Yes], then
press the OK/MENU button.
The erasing of the selected registration data
will be completed.
Fingerprint
Data1
Jonathan
Data5
Yes
No
Clear Data3 ?
Fingerprint
Data1
Jonathan
Data4
Data5
Data3 Cleared
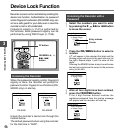
Device Lock Function
Verifying the Registered Fingerprint Data
1
Select [Fingerprint] at the [Device Menu]
screen, then press the OK/MENU or
9 button.
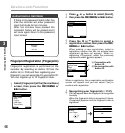
2
Press the
+
or
–
to button select
[Verify], then press the OK/MENU
button.
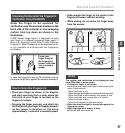
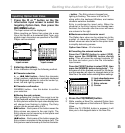
3
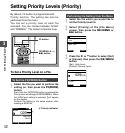
Recognizing your fingerprint (☞ P.47).
If your fingerprint data matches, [Fingerprint
Accepted] will be displayed and the matching
registration number will appear. In cases where
there is a connection with an author, the Author
ID will appear. If the fingerprint does not match,
then [Incorrect Fingerprint] will appear and then
it will return to the fingerprint scanning screen.
a Verified registration
number
b Related Author ID
When the below error message appeared, scan
again while referring “How to Scan the
Fingerprint” (☞P.47) carefully.
[Sweep Error Sweep your finger again]...Displays
when the fingerprint is not recognized correctly.
[Sweep Error Sweep your finger with
care]...Displays when the recognized fingerprint
data does not match.
Note
• Fingerprint registration and verification in this recorder
cannot guarantee the entire security.
We are not responsible for any damage or loss for use
of fingerprint registration and verification of this recorder
or even if you cannot use this function.
Device Lock Function
BACK
EXIT
Fingerprint
Your Finger
Fingerprint
Accepted
Data1
JONATHAN
a
b