9
INTRODUCTION
PREPARATION
WATCHING TV
USING FUNCTIONS
USEFUL TIPS
CONNECTING DEVICES
INFORMATION
English
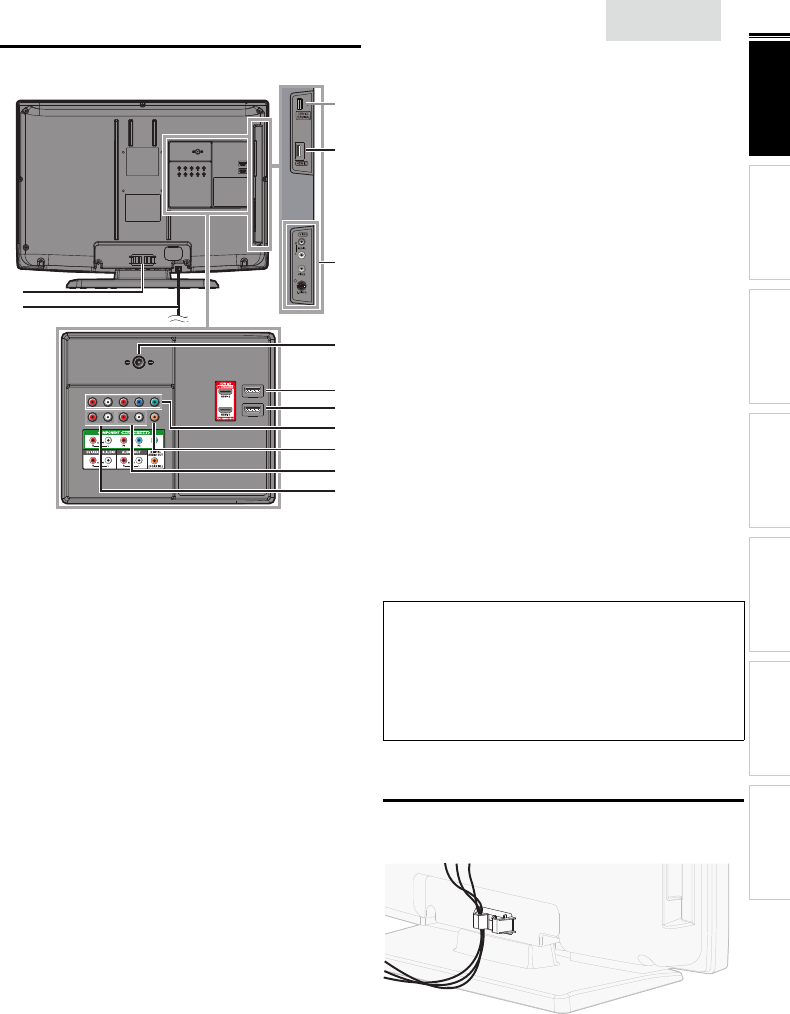
Terminals
10
11
13
14
12
15
16
18
17
9
8
*
Side Panel
8 HDMI 2 Input jack
➠
p. 10, 24
9 S-Video / Composite Video / Audio (L/R)
Input jacks for VIDEO
➠
p. 24, 25
Rear Panel
10 Cable management
➠
p. 9
11 AC power cord
➠
p. 10
12 Antenna Input jack
➠
p. 10
13 HDMI 3 Input jack
➠
p. 10, 24
14 HDMI 1 Input jack
➠
p. 10, 24, 25
HDMI connection for HDMI or DVI device. When you
connect your PC that has a DVI terminal, you can enjoy
this unit as a PC monitor.
15 Component Video and Audio (L/R) Input jacks
➠
p. 10,24
16 Digital Audio Output jack
➠
p. 25
17 Analog Audio (L/R) Output jacks
➠
p. 25
18 Analog Audio (L/R) Input jacks for HDMI 1
➠
p. 24, 25
Audio cable connection from a DVI device.
When you connect your PC that has a DVI terminal, use
a stereo mini plug conversion cable as well.
(For HDMI 1 Input jack only)
Note for service terminal
*
service terminal (service use only)
• Use this terminal only when a software update is necessary.
• User should not connect any devices to the service terminal such
as digital camera, keyboard, mouse, etc. (because these will not
work).
• The software update is, in most cases, handled by an authorized
service person or in some circumstances the user may be asked
to do the software update themselves.
Cable Management
Keep the cables through this holder to avoid tangling them.


