


Making use of PVR recording function (Continued)
PVR recording - digital only -
C. Check PVR File System
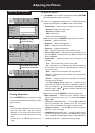
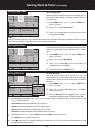
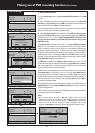
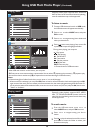
1. From File System menu, highlight Check PVR File System, press OK
to start.
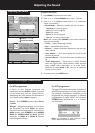
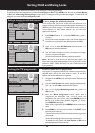
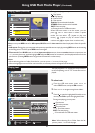
2. Now a dialogue box appears prompting you to start to create disk
partition. Highlight Start and press OK to proceed to format the disk, all
data will be lost. (Or select Exit to abandon and exit).
(If your disk file system is FAT32, then it is unnecessary to format the disk,
and the TV starts to check the disk speed directly.)
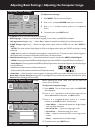
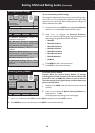
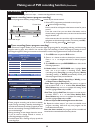
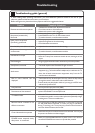
3. Now File System Size screen pops up with PVR File System Type
highlighted. Hi Speed FS (select for high recording speed) and FAT32 can
be selected with 3or4 button. (Note: If Hi Speed FS is choosed, it will
occupy disk space based on your PVR File System Size setting, while
FAT32 will not)
!If Hi Speed FS is choosed, then press 6 to highlight PVR File System
Size, use 3or4to select a size (the greater the size, the longer you can
make recording).The next line will show the recording time allowed (for
example, if shows “SD 294 Mins, HD 84 Mins”, that means recording SD
programs can last 294 minutes, while for HD programs, only 84 minutes is
allowed at your disk) . Then highlight OK and press OK to start formatting
the disk. The format may take several minutes, please wait. When finished,
Time Shift Size setting screen will pop up.
!If FAT32 is choosed, then PVR File System Size can not be set. The
screen will show the recording time allowed. Highlight OK and press OK to
start formatting the disk. The format may take several minutes, please wait.
When finished, it starts to check disk speed.
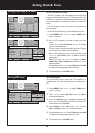
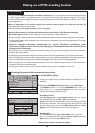
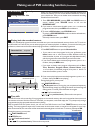
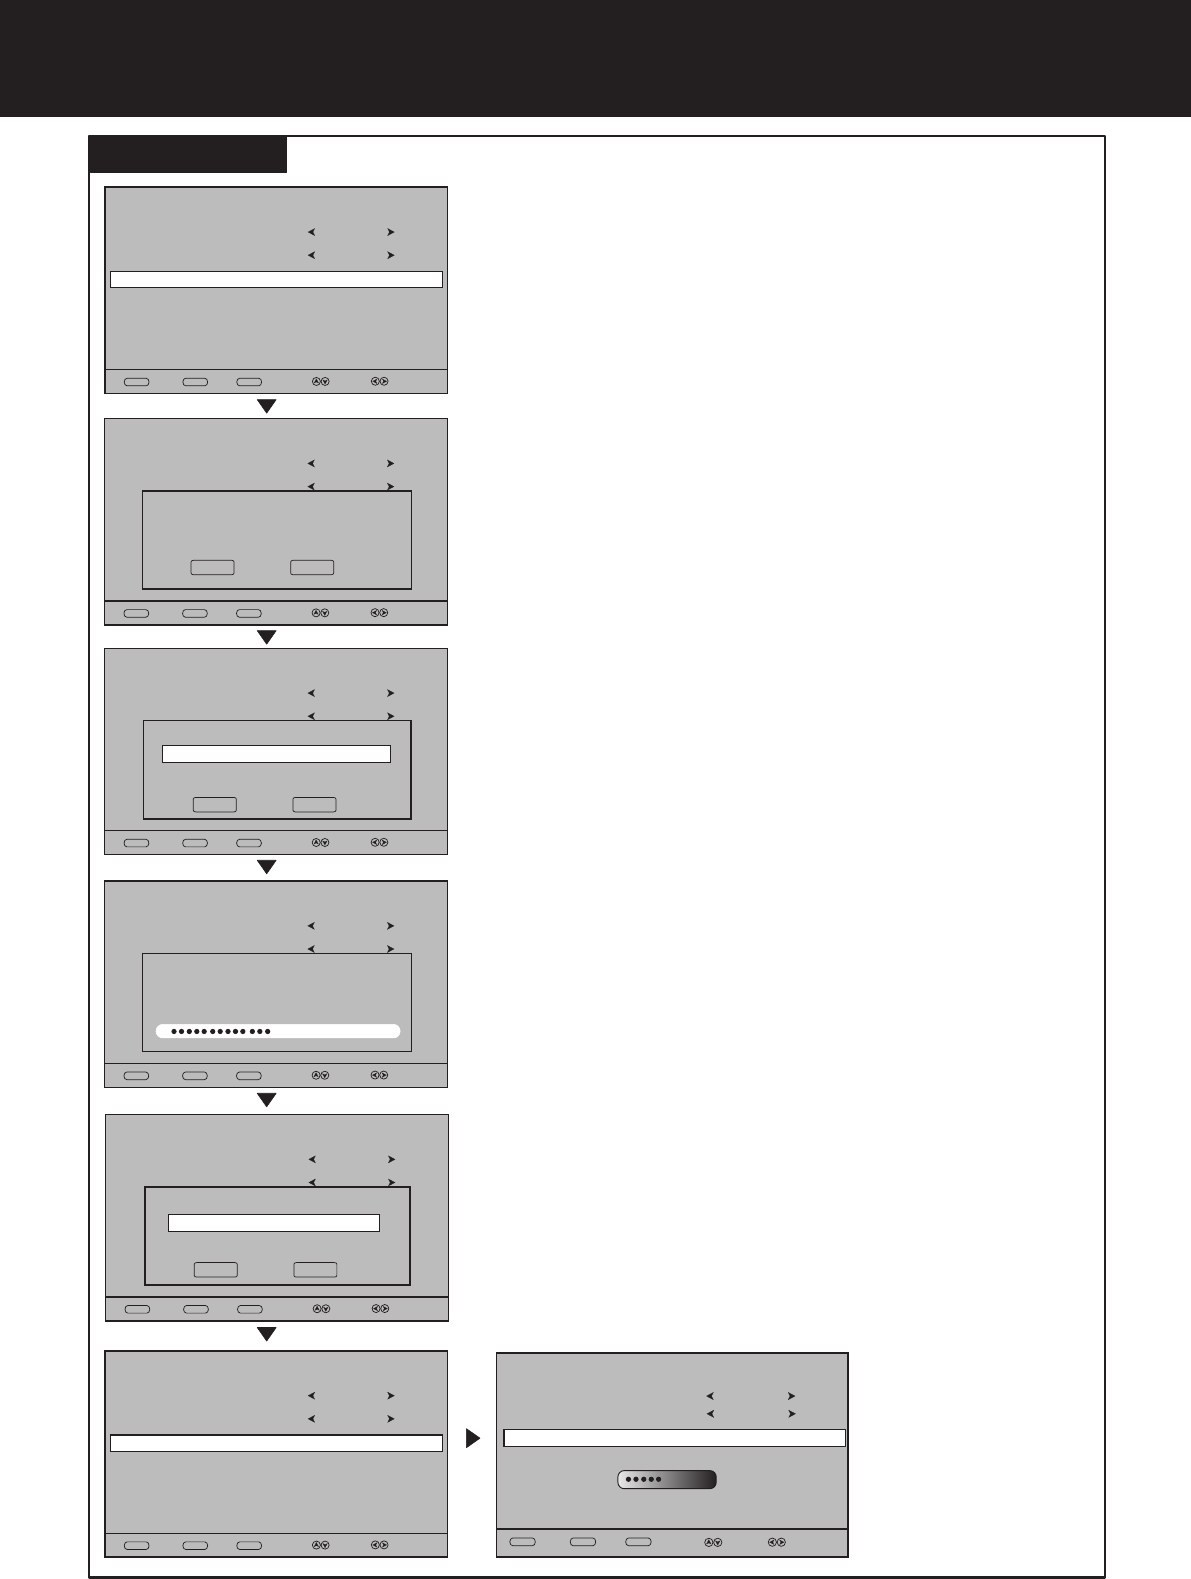
4. After you choosed Hi Speed FS and set size and the format is finished, the
Time Shift Size screen pops up. Use 3or4to set Time Shift size for
time shifting (the time shift size ranges from 512MB to 8GB, but is within
PVR File System Size you have set above. The greater the size, the longer the
duration allowed for time shifting), then highlight OK and press OK to
proceed to check disk speed.
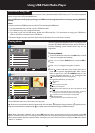
Checking speed may take several minutes, please wait. When finished, if
SUCCESS appears at the Check PVR File System line then you can start
PVR recording function.
(At File System menu bottom screen, USB Disk state and speed information
will appear, they can not be adjusted)
Select
Move
MENU
Return
USB Disk
Speed
Select Disk C:
Start
EXIT
EXIT
OK
OK
File System
Record Time
6 Hr.
Select
Move
MENU
Return
Check PVR File System
USB Disk
Speed
Select Disk C:
Start
Select Disk
EXIT
EXIT
OK
OK
File System
Create partition
Start Exit
Record Time
6 Hr.
Create disk partition.
Warning! All data will be lost.
Check PVR File System
Select
Move
MENU
Return
Check PVR File System
USB Disk
Speed
Select Disk C:
Start
Select Disk
EXIT
EXIT
OK
OK
File System
File System Size
OK EXIT
PVR File System Type Hi Speed FS
PVR File System Size All
Record Time
6 Hr.
SD 294 Mins HD 84 Mins
Select
Move
MENU
Return
Check PVR File System
USB Disk
Speed
Select Disk C:
Start
Select Disk
EXIT
EXIT
OK
OK
File System
Time Shift Size
OK EXIT
Time Shift Disk Size 5 GB
Record Time
6 Hr.
SD 80 Mins HD 25 Mins
Select
Move
MENU
Return
Check PVR File System
USB Disk
Speed
Select Disk C:
Start
Select Disk
EXIT
EXIT
OK
OK
File System
Format Disk
Record Time
6 Hr.
Do not unplug USB device.
Create PVR file system, please wait.
Select
Move
MENU
Return
USB Disk
Speed
Select Disk C:
Checking
EXIT
EXIT
OK
OK
File System
Record Time
6 Hr.
Check PVR File System
Checking
Pass
USB Disk
Speed
5112KB/s
Select Disk
Check PVR File System
SUCCESS
Pass
HD support
Select
Move
MENU
Return
EXIT
EXIT
OK
OK
C:
File System
Record Time
6 Hr.
Note:
! After PVR File System checking, if “SD Fail” appears on the screen, that
indicates this external memory device is not suitable to be used for recording,
please replace with other one and try it again. If “SD Support” appears, that
means this external device is suitable to record SD program, but not HD
program. If “HD Support” appears, then both SD and HD programs are OK.
31