8
RQT8248
Preparations
Preparations
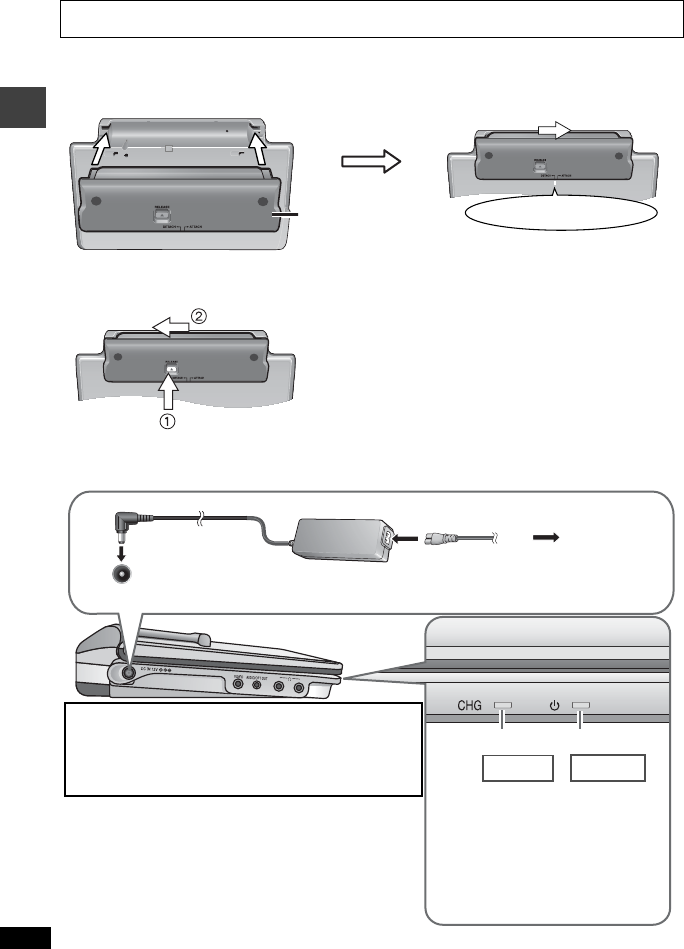
1 Attaching the battery (When the unit is off)
An optional battery pack (CGR-H713) is also available. The procedure for attaching and
detaching is the same.
Detaching
≥
Turn the unit off before detaching the battery pack.
When not using for long periods of
time
≥
Remove the battery pack (➜ left).
(Even when the unit is turned off, there is a
small amount of voltage running through the
unit, and this may result in a malfunction.)
≥
Recharge the battery for re-use.
FOR THE UNITED KINGDOM ONLY
READ THE CAUTION FOR THE AC MAINS LEAD ON PAGE 2 BEFORE CONNECTION.
Clicks into place
Check to make sure it is securely fastened.
Bottom side of this unit
Battery pack
RELEASE
DETACH ATTACH
Press and hold
1
2
DC IN
DC IN 12 V
%
3
To
household
mains socket
AC adaptor
(included)
AC mains lead (included)
≥
You can also use this unit without charging while
connecting the AC adaptor and the AC mains lead.
≥
You can also use this unit without charging while
connecting Car DC Adaptor (
➜
page 19,
Connecting the
included Car DC Adaptor
).
To conserve power
This unit consumes 0.3 W of power even when turned off. When
the unit is not going to be used for a long time, disconnect the
AC mains lead from the household mains socket.
The unit is in the standby condition (the [Í] indicator
lights) when the AC mains lead is connected. The
primary circuit is always “live” as long as the AC adaptor
is connected to an electrical outlet.
2 Recharging the battery (When the unit is off)
[
Í
] goes out ➜ lights
[CHG] lights ➜ goes out
Recharging time
:
Approx. 4 hours
(CGR-H701, included)
Approx. 10 hours
(CGR-H713
, optional
)
When finished, disconnect the AC
adaptor and the AC mains lead.
Í
CHG
Started
Finished


