


128
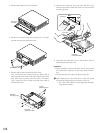
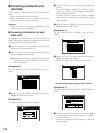
2. Remove the cable from the front panel.
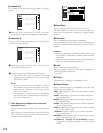
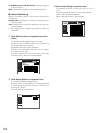
3. Remove the screws fixing the mounting unit, and then
pull the mounting bracket toward you.
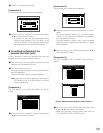
4. Remove the screws fixing the hard disk drive.
First, remove the four screws fixing the upper side of
the hard disk drive while holding the bottom side of the
hard disk drive to prevent the hard disk from falling.
Then, remove the four screws fixing the lower side of
the hard disk drive.
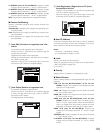
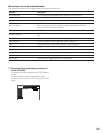
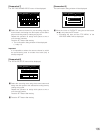
5. Remove the connector from the hard disk drive first,
and then remove the hard disk drive from the hard disk
mounting bracket.
6. Install the new hard disk drive in the reverse order of
detaching the hard disk drive.
Important:
• When installing, confirm that there are no dust around
the connectors. Adhesion of dust may cause malfunc-
tion.
• Set the hard disk as master using the jumper pin.
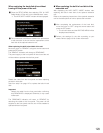
c After replacing the hard disk drive, insert the power
plug into the outlet and turn the power of the unit.
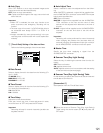
→ The "HDD DISK MENU" will be displayed automati-
cally after the restart.
Front panel
connector
S
S
D
S
S
D
Screws
SSD
SSD
Screws
(totally 8 pieces)
Hard disk
replacement label
Hard disk
mounting angle
SSD
Connector
Hard disk
replacement label
Jumper pin