USING THE SETUP CONTROLS
6
2
1
3
4
Language
Tuner Mode
Auto Program
Channel Edit
Channel List
Clock Set
IntelliSense
Formats
Menu To Menu Bar To Quit Exit
OK SETUP FEATURES PICTURE SOUND THEATER
Formats Tuner A 2
Screen Formats
ࠗ
4x3
ࠗ
16x9
ࠗ
Zoom
ࠗ
Theater
ࠗ
16x9-HD
V. Position + 5
Comp Color Type
ࠗ
HDTV
ࠗ
SDTV/DVD
Video Display
ࠗ
i-laced
ࠗ
proscan
Menu To Menu Bar To Quit Exit
OK SETUP
Press OK to set
5
F
ORMATS
Press the CURSOR
RIGHT button to enter the
Formats selection area.
Press the CURSOR
DOWN or UP button to
highlight a screen format you
want to select for the TV pic-
ture.
Press the OK button to
make your selection. Repeat
steps 4 and 5 to set
V. Position/Comp Color Type
and Video Display.
To return to the list of
Setup options, press the
CURSOR LEFT button. To
return to the Menu Bar, press
the MENU/SELECT button.
To quit the on-screen menu,
press the STATUS/EXIT but-
ton.
T
he Formats control is very useful
when setting up reception for High
Definition, Standard Definition, and
NTSC signals. The Comp Color Type
function allows you to automatically
change tint and color coordinate for
DTV programs. Use the HDTV (High
Definition Television) setting for a High
Vision Signal (Y-PbPr) from an HDTV
set-top box. Use the SDTV/DVD setting
for Standard Definition Television or
Digital Video Disc (Y-CbCr) such as a
digital video disc player.
.✔ If Comp Color
Type is set improp-
erly (does not match
the actual input sig-
nal), the color and
tint of the main pic-
ture will be abnor-
mal.
✔ You must be
tuned to A/V: 3 or
A/V: 4 and have an
accessory device
hooked up to the
Y-PbPr input jacks
to access all of the
Formats Menu
options.
✔ All settings will
affect only the com-
ponent input you are
currently viewing. If
you are using both
sets of component
input jacks, be sure
to set Formats for
both inputs (set
A/V: 3 and A/V: 4).
CHECK IT OUT
Press the
MENU/SELECT button on
the remote control to show
the on-screen menu.
Press the CURSOR
DOWN button repeatedly
until Formats is highlighted.
Y
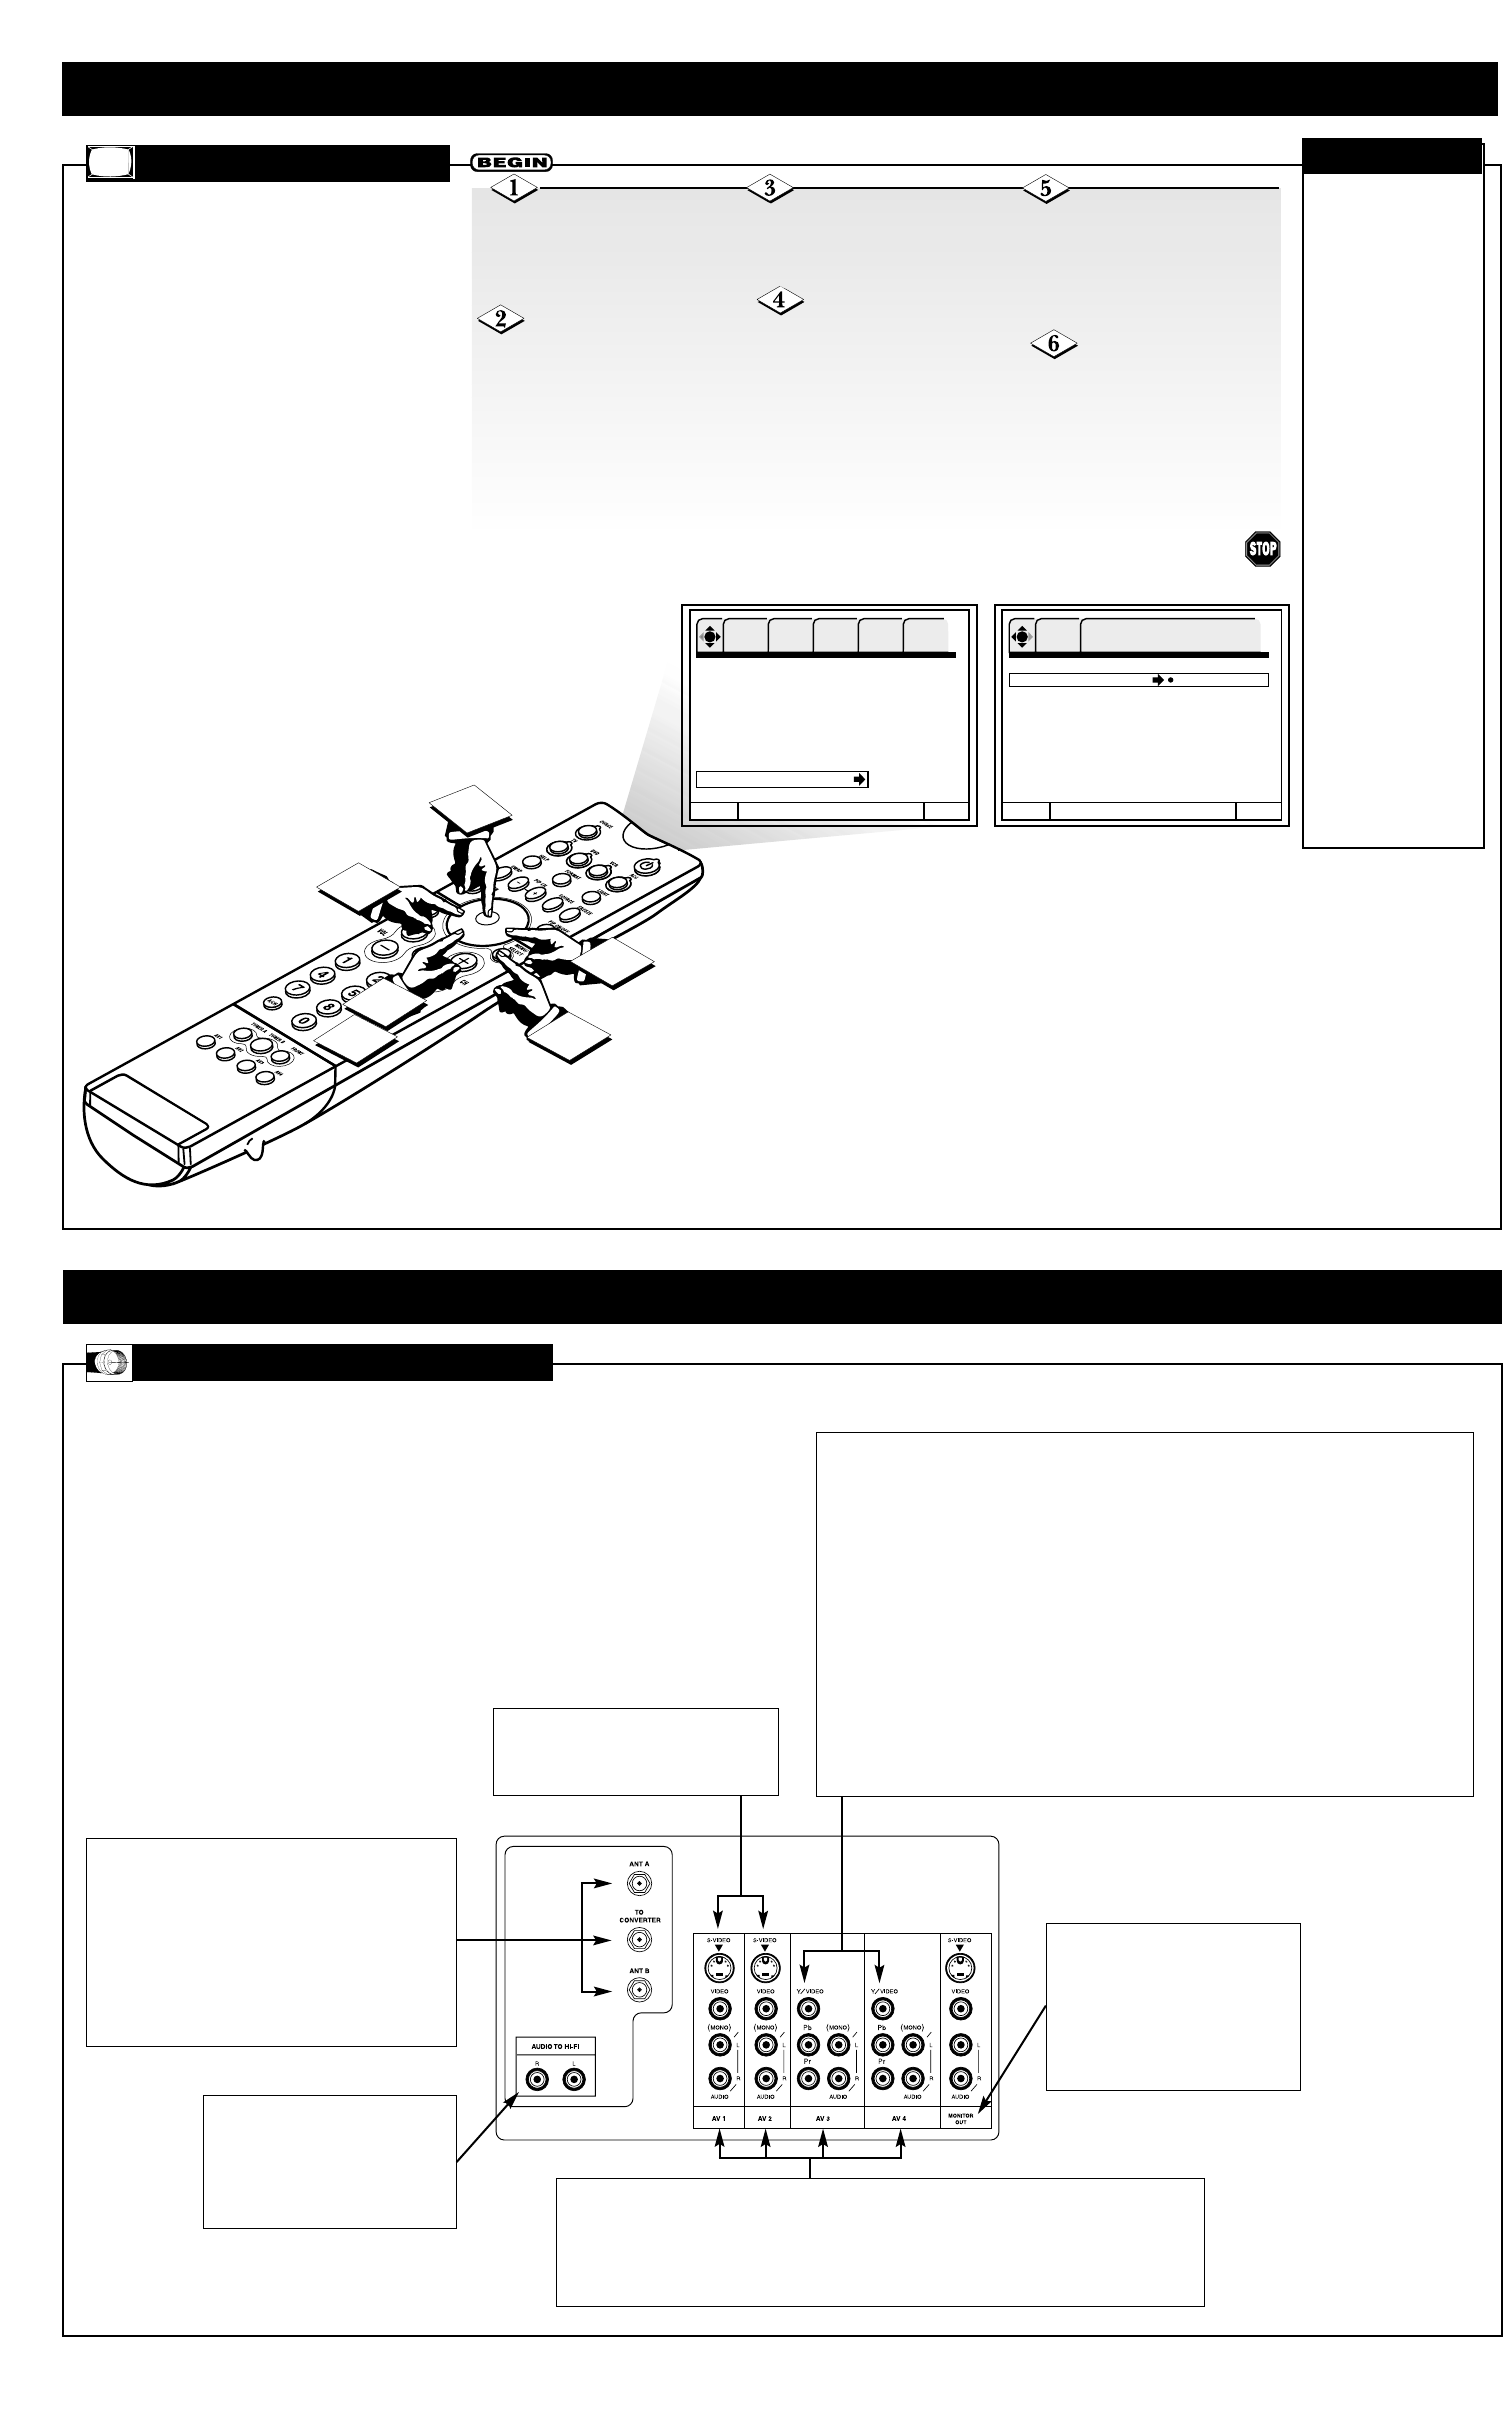
our TV’s Rear Panel jacks allow the connection
of a variety of accessory devices (“compo-
nents”). This section explains how you may use the
jacks.
8
LEARNING MORE ABOUT THE REAR PANEL JACKS
JACK DESCRIPTIONS
Antenna Input/Output
The remote control allows you to switch between two
separate 75-ohm RF antenna inputs, ANTAand ANT B.
The ANT A input can be displayed as a main picture or
subpicture. ANT B can be displayed only as a main
picture. (ANT B cannot be displayed as a subpicture.)
The antenna output labeled “TO CONVERTER” allows
the ANT A connection to pass directly to a different
source such as a cable box only when ANT B is
displayed as the main picture.
AUDIO TO HI-FI Output
These jacks provide variable audio
output to a separate stereo amplifier.
With this connection, the audio to the
stereo can be controlled by the
television’s main volume.
Audio/Video Inputs 1, 2, 3, and 4
The SOURCE button or your remote will step through each video source and antenna source input
each time it is pressed. Use the audio and video inputs to connect accessory devices—VCRs,
camcorders, laserdisc players, DVD players and the like. (If you have mono sound, insert the audio
cable into the left audio jack.) NOTE: You may use VIDEO or S-VIDEO inputs to connect AV 1
and AV 2, but only one of these inputs may be used at a time.
MONITOR OUT
These jacks provide fixed audio and
video signals for recording. Use the
S-VIDEO Output for high-quality
video output. NOTE: S-VIDEO
Output may be used for recording
only when the input is of S-VIDEO
type.
S-VIDEO Inputs 1 and 2
AV 1 and AV 2 provide S-VIDEO (Super
Video) jacks for connecting equipment
with S-VIDEO output capability.
Component: Y-PbPr Inputs
AV 3 and AV 4 provide Y-PbPr jacks for connecting equipment with Component Video capability.
Devices such as DVD players or set-top boxes can be connected to these jacks. You may use standard
video signal for AV 3 and AV 4.
NOTES:
• Your component inputs may be labeled Y, B-Y, and R-Y. In this case, connect the components
B-Y output to the TV’s Pb input and the components R-Y output to the TV’s Pr input.
• Your component outputs may be labeled Y-CbCr. In this case, connect the component output to the
TV’s Pb input and the component Cr output to the TV’s Pr input.
• It may be necessary to adjust Tint to obtain optimum picture quality when using the Y-PbPr inputs.
• To ensure no copyright infringement, the MONITOR OUT output will be abnormal when using
the Y-PbPr jacks.
• When using the Y-PbPr jacks, the TV will automatically change to Split PIPmode. When you have
Picture-in-Picture on and are viewing a Y-PbPr input, only Split mode is possible.
• AV 3 and AV 4 (Y/VIDEO) can be used for standard video input.


