


20 EN
Advanced options (clear
memory...)
1 Press .
2 Select [Setup] > [Advanced] to access the
advanced setup options.
[BD-Live security]: Restrict or allow
access to BD-Live (only for non-
commercial, user-created BD-Live
discs).
[Downmix mode]: Select 2-channel
stereo audio output to a TV or to
a receiver with left and right Dolby
surround.
[Software update]: Select to update
software from a network or from USB
storage device.
[Clear memory]: Delete the previous
BD-Live download on the USB storage
device or SD card. A "BUDA" folder is
automatically created to store the BD-
Live download.
[Local storage]: Select a USB storage
device or SD card to store the
[DivX
®
VOD Code]: Display the
DivX
®
registration code or the
deregistration code for this player.
[Version information]: Display the
software version of this player.
[Restore default settings]: Reset this
player to the default settings made at
the factory, except for password and
parental control level.
Note
You cannot restrict Internet access on commercial
Blu-ray discs.
Before you purchase DivX videos and play them on this
player, register this player on www.divx.com with the
DivX VOD code.
4 Update software
Before you update the software of this player,
check the current software version:
Press
, and then select [Setup] >
[Advanced] > [Version information], and
press OK.
Update software via the
Internet
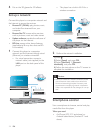
1 Connect the player to the Internet (see
"Set up a network").
2 Press , and select [Setup].
3 Select [Advanced] > [Software update]>
[Network].
» If an upgrade media is detected, you
are prompted to start the update.
4 Follow the instructions on the TV screen
to update the software.
»
player automatically turns off and on
again.
Update software via USB
1 Check the latest software version on www.
philips.com/support.
Search for your model and click on
"Software and drivers".
2 Download the software into a USB storage
device.
a Unzip the download, and make sure
that the unzipped folder is named
"UPG_ALL".
b Put the "UPG_ALL" folder in the root
directory.