


EN-33
ENGLISH
6 Install channels
The first time you setup your TV, you will
be prompted to select an appropriate menu
language and to perform automatic installation
of all TV and digital radio channels (if available).
This chapter provides instructions on how
to reinstall channels as well as other useful
channel installation features.
Note D
Re-installingchannelsmodiestheAll
channels list.
6�1 Automatically install
channels
This section describes how to search and store
channels automatically. Instructions are for both
digital and analogue channels.
Step 1 Select your menu language
Note D
Skip to Step 3 Select your time zone if your
language settings are correct.
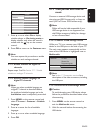
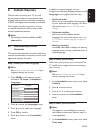
Press 1. MENU on the remote control
and select TV menu > Installation >
Languages.
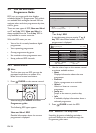
Languages
Menu language
Preferred audio
Preferred subtitles
Hearing impaired
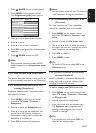
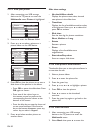
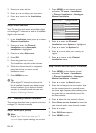
Installation
Languages
Time zone
Channel install...
Preferences
Connections
Factory settings
Press 2. Æ to enter the Languages menu.
Press 3. Î or ï to select your language.
Press 4. OK to confirm.
Press 5. Í to return to the Installation
menu.
In addition to menu language, you can
configure the following language settings via the
Languages menu (digital channels only):
Preferred audio•
Select one of the available audio languages
as your preferred audio language. For more
information, see Section 5.3.5 Adjust sound
settings.
Preferred subtitles•
Select one of the available subtitle
languages. For more information, see Section
5.11.3 Select a subtitle language on digital TV
channels.
• Hearing impaired
If available, select On to display the hearing
impaired version of your preferred audio or
subtitle language.
Step 2 Select your country
Select the country where you are located. The
TV installs and arranges channels according to
your country.
Note D
Skip to Step 3 Select your time zone if your
country settings are correct.
In the 1. Installation menu, press ï to select
Country.
Press 2. Æ to enter the list.
Press 3. Î or ï to select your country.
Press 4. Í to return to the Installation
menu.
Step 3 Select your time zone
Note D
This option is only available for countries
with different time zones. Skip this step if it
is not applicable.
In the 1. Installation menu, press ï to select
Time zone.