


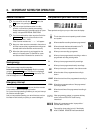

Initial installation
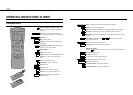
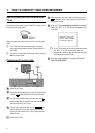
a Open up the battery compartment of your remote control
and place the batteries in it as shown in the picture.
b Close the battery compartment.
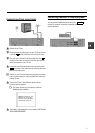
c Confirm the picture on the TV screen with the OK button
on the remote control.
d Select the language for the on-screen display (OSD) with
the P r or P q button.
The display on the video recorder will only show English
text.
e Confirm with the OK button.
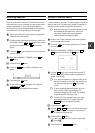
’Automatic TV channel search’ starts. This picture will
appear on the screen:
SEARCH 00
Wait until all TV channels have been found. This can take
several minutes.
f When all TV channels have been found, ’READY’ will
appear on the TV screen.
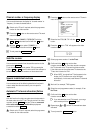
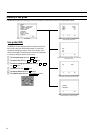
E ’TIME’, ’YEAR’, ’MONTH’, ’DATE’ will appear on the TV
screen.
TIME 20:00
YEAR 1999
MONTH 01
DATE 01
------------------------
-/+ 0-9 OK
g Check if the TIME in line ’TIME’ is correct. If required,
change the time with the number buttons 0-9 on your
remote control.
h Confirm with the OK button.
i Check ’YEAR’, ’MONTH’ and ’DATE’. Confirm each line
with the OK button.
j After you have confirmed the line ’DATE, the video
recorder will switch to standby.
The initial installation is now complete.
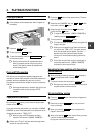
DIf you have connected a decoder, you must install it
as described in the next section.
DIf you have connected a satellite receiver, please
read the section ’satellite receiver’.
2. INSTALLING YOUR VIDEO RECORDER
6