


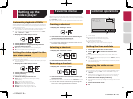
25
The time display of the dimmer duration adjusting
bar is depending on the clock display setting.
Setting the time and date on page 29
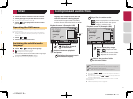
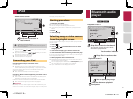
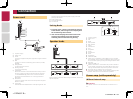
Adjusting the picture
You can adjust the picture for each source and rear view camera.
CAUTION
For safety reasons, you cannot use some of these functions
while your vehicle is in motion. To enable these functions, you
must stop in a safe place and apply the parking brake. Refer
to Important Information for the User (a separate manual).
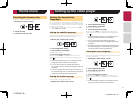
1 Display the screen you wish to adjust.
2 Display the “System” setting screen.
Displaying the “System” setting screen on page 23
3 Touch [Picture Adjustment].
4 Touch the item to select the function to be
adjusted.
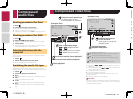
● Brightness:
Adjusts the black intensity. (–24 to +24)
●
Contrast:
Adjusts the contrast. (–24 to +24)
●
Color:
Adjusts the color saturation. (–24 to +24)
●
Hue:
Adjusts the tone of color (which color is emphasized, red or
green). (–24 to +24)
●
Dimmer:
Adjusts the brightness of the display. (+1 to +48)
With some pictures, you cannot adjust Hue and
Color.
When you touch [Rear View], the mode changes
to the picture adjustment for rear view. By touch-
ing [Source], you can return to the picture adjust-
ment for AV source.
5 Touch , , , to adjust.
The adjustments of “Brightness”, “Contrast”
and “Dimmer” are stored separately when your
vehicle’s headlights are off (daytime) and on
(nighttime).
“Brightness” and “Contrast” are switched auto-
matically depending on whether the vehicle’s
headlights are on or off.
“Dimmer” can be changed the setting or the time
to switch it to on or off.
Setting the dimmer on page 24
The setting contents can be memorized
separately.
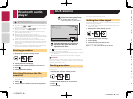
Displaying the “Audio” setting
screen
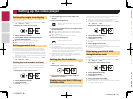
1 Press .
2 Touch , and then .
The “Audio” setting screen appears.
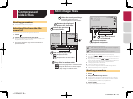
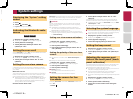
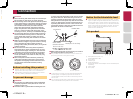
Using fader/balance adjustment
p This function is available when “Rear Speaker” is set to
“Full”, and “Preout” is set to “Rear”.
1 Display the “Audio” setting screen.
Displaying the “Audio” setting screen on page 25
2 Touch [Fader/Balance].
3 Touch or to adjust the front/rear speaker
balance.
4 Touch or to adjust the left/right speaker
balance.
p “Front15” to “Rear15” is displayed as the front/rear speaker
balance moves from the front to rear.
p
“Left15” to “Right15” is displayed as the left/right speaker
balance moves from the left to right.
p
The default setting is “F/R 0 L/R 0”.
You can also set the fader/balance by touching
the point on the displayed table.
Using balance adjustment
p This function is available when “Rear Speaker” and “Preout”
are set to “Subwoofer Settings”.
1 Display the “Audio” setting screen.
Displaying the “Audio” setting screen on page 25
2 Touch [Balance].
3 Touch or to adjust the left/right speaker
balance.
p “Left15” to “Right15” is displayed as the left/right speaker
balance moves from the left to right.
p
The default setting is “L/R 0”.
You can also set the balance by touching the point
on the displayed table.
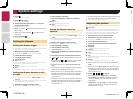
Adjusting source levels
SLA (source level adjustment) lets you adjust the volume level of
each source to prevent radical changes in volume when switch-
ing between sources.
p
Settings are based on the FM tuner volume level, which
remains unchanged.
p
This function is not available when the FM tuner is selected
as the AV source.
1 Compare the FM tuner volume level with the
level of the source you want to adjust.
2 Display the “Audio” setting screen.
Displaying the “Audio” setting screen on page 25
3 Touch [Source Level Adjuster].
4 Touch or to adjust the source volume.
p If you directly touch the area where the cursor can be moved,
the SLA setting will be changed to the value of the touched
point.
p
“+4” to “–4” is displayed as the source volume is increased
or decreased.
p
The default setting is “0”.
Adjusting loudness
This function compensates for deficiencies in the low-frequency
and high-frequency ranges at low volume.
p
This function is not available while you make or receive a call
using the hands-free function.
1 Display the “Audio” setting screen.
Displaying the “Audio” setting screen on page 25
2 Touch [Loudness].
3 Touch the item.
The following items are available:
Off (default), Low, Mid, High.
Using the subwoofer output
This product is equipped with a subwoofer output mechanism,
which can be turned on or off.
1 Display the “Audio” setting screen.
Displaying the “Audio” setting screen on page 25
2 Touch [Subwoofer] to switch “On” (default) or
“Off”.
< CRD4837-B >
System settings Audio adjustments
< CRD4837-B > 25