


29
content provider. You do this by generating a DivX VOD registra-
tion code, which you submit to your provider.
p
Keep a record of the code as you will need it when you
register this product to the DivX VOD provider.
p
This setting is available when the selected source is “Disc”,
“CD”, “Video CD” or “DVD”.
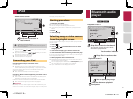
1 Display the “Video Setup” screen.
2 Touch [DVD/DivX Setup].
3 Touch [DivX® VOD].
The “DivX® VOD” screen appears.
p
If a registration code has already been activated, it cannot be
displayed.
4 Touch [Registration Code].
Your 10-digit registration code is displayed.
p
Make a note of the code as you will need it when you deregis-
ter from a DivX VOD provider.
Displaying your DivX VOD
deregistration code
A registration code registered with a deregistration code can
be deleted.
p
This setting is available when the selected source is “Disc”,
“CD”, “Video CD” or “DVD”.
1 Display the “Video Setup” screen.
2 Touch [DVD/DivX Setup].
3 Touch [DivX® VOD].
The “DivX® VOD” screen appears.
4 Touch [Deregistration Code].
Your 8-digit deregistration code is displayed.
p
Make a note of the code as you will need it when you deregis-
ter from a DivX VOD provider.
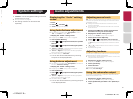
Automatic playback of DVDs
When a DVD disc with a DVD menu is inserted, this product will
cancel the menu automatically and start playback from the first
chapter of the first title.
p
Some DVDs may not operate properly. If this function is not
fully operable, turn this function off and start playback.
p
This setting is available when the selected source is “Disc”,
“CD”, “Video CD” or “DVD”.
1 Display the “Video Setup” screen.
2 Touch [DVD/DivX Setup].
3 Touch [DVD Auto Play] repeatedly until the
desired setting appears.
● Off (default): Turns the DVD Auto Play setting off
●
On: Turns the DVD Auto Play setting on
Setting the video signal for the
rear view camera
When you connect a rear view camera to this product, select the
suitable video signal setting.
p
You can operate this function only for the video signal input
into the AV input.
1 Display the “Video Setup” screen.
2 Touch [Video Signal Setting].
3 Touch [Camera].
The pop-up menu appears.
4 Touch the item you want to set.
● Auto (default): Adjusts the video signal setting
automatically.
●
PAL: Sets the video signal to PAL.
●
NTSC: Sets the video signal to NTSC.
●
PAL-M: Sets the video signal to PAL-M.
●
PAL-N: Sets the video signal to PAL-N.
●
SECAM: Sets the video signal to SECAM.
Setting up the
video player
Registering your favorite menu items in shortcuts allows you to
quickly jump to the registered menu screen by a simple touch on
the “Favorites” screen.
p
Up to 12 menu items can be registered in the favorite menu.
Creating a shortcut
1 Display the “Settings” screen.
2 Touch the star icon of the menu item that you
want to add to the favorite menu.
The star icon for the selected menu is filled in.
To cancel the registration, touch the star icon in
the menu column again.
Selecting a shortcut
1 Display the “Favorites” screen.
2 Touch the desired menu item.
Removing a shortcut
1 Display the “Favorites” screen.
2 Touch and hold the favorite menu column you
want to remove.
The selected menu item is removed from the “Favorites” screen.
You can also remove a shortcut by touching the
star icon in the registered menu column.
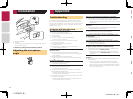
AUX
4821
Full
6/10
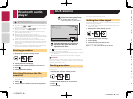
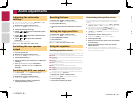
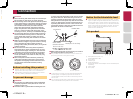
2
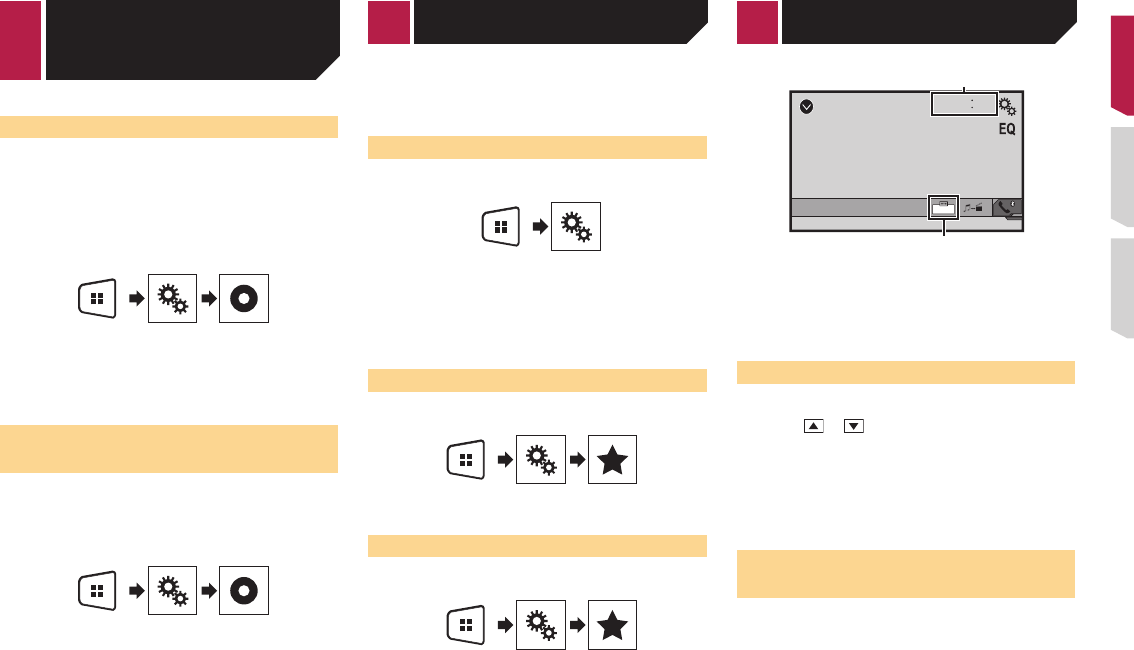
1
1 Clock display
Displays the time and date setting screen
Setting the time and date on page 29
2
Screen display mode key
Changes the wide screen mode
Changing the wide screen mode on page 29
Setting the time and date
1 Touch the current time on the screen.
2 Touch or to set the correct time and
date.
You can operate the following items: Year, month, date, hour,
minute.
p
You can change the time display format to “12hour” (default)
or “24hour”.
p
You can change the order of date display format: Day-month-
year, Month-day-year.
Changing the wide screen
mode
You can set the screen size for the video and JPEG/BMP images.
p
The default setting is “Full”, and for JPEG/BMP images is
“Normal”.
p
When there are touch panel keys on the screen, images are
displayed with the “Full” mode regardless of your setting.
1 Touch the screen display mode key.
p The appearance of this key changes according to the current
setting.
2 Touch the desired mode.
● Full
< CRD4837-B >
Favorite menu
Common operations
< CRD4837-B > 29