1-8
OPERATIONS
Power On/Off
Power On
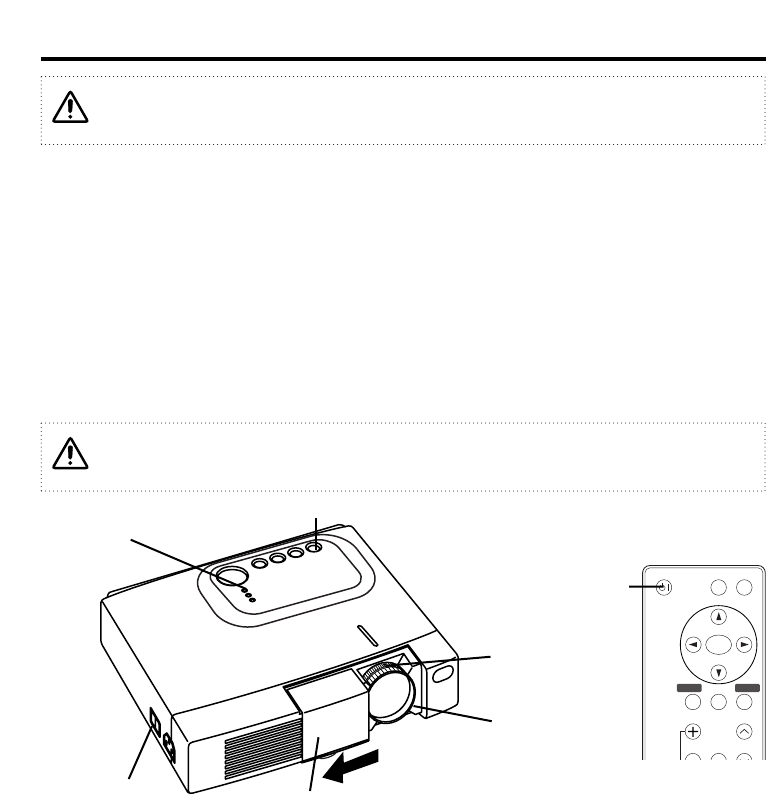
1. Confirm that power cord is connected properly.
2. Push "I" of the power switch. Standby mode is set up and power source indicator burns in the
orange.
3. Push a control panel or "STANDBY/ON" of the remote controller. A warm-up is started and
power source indicator goes on and off in green.
4. When power source on is completed, power source indicator finishes blinking, and burns in
green. Open a Slide lens door.
5. Adjust picture size using the projection lens ZOOM knob.
6. Adjust focus using the projection lens FOCUS ring.
Power Off
1.Push a control panel or "STANDBY/ ON" of the remote controller for about one second. The
ramp of projector disappears and cooling of the ramp is started. Power source indicator goes on
and off in the orange during ramp cooling. It is ineffective even if power source indicator pushes
"STANDBY/ ON" button during the blinking.
2. When ramp cooling is completed, STANDBY mode is set up and power source indicator stops
blinking, and burns in the orange. Confirm this, and push the "O"side of the power switch.
Don't make power switch OFF when power source indicator burns in the orange except for the
emergency. The time when power source indicator is green and power source OFF during the
blinking shorten the life of projector lamp.
3. Power source indicator disappears when power source OFF is completed. Close without
forgetting a lens door.
Power Switch
Slide Lens door
STANDBY/ON Button
POWER Indicator
VIDEO
STANDBY/ON
POSITION
FREEZE
MAGNIFY
VOLUME
MENU
SELECT
RGB
MENU RESET
STANDBY/
ON Button
ZOOM knob
FOCUS ring
Read the "SAFETY INSTRUCTIONS" of this calligraphy and the separate volume well
surely and use it for the safety before the use after attention.
Make the power source of the computer ON before projector when using a RS-232
communications function.


