


Page 4 Installation Instructions
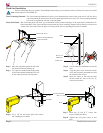
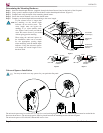
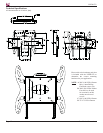
Step 3. Use an electronic studfinder to locate the
stud.
Step 4. Align the plate to the stud and visually
verify the flat panel placement now that
the stud has been located.
Step 5. Once the center of the stud has been
located, mark the wall at the two (2)
screw hole locations.
Wood Stud Installation
Stud
Electronic
Studfinder
Mark
Center Line
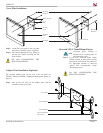
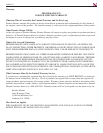
Step 6. Use a 1/8” bit and create pilot holes where
the 2 markings were made.
1/8” Bit
Pilot Hole
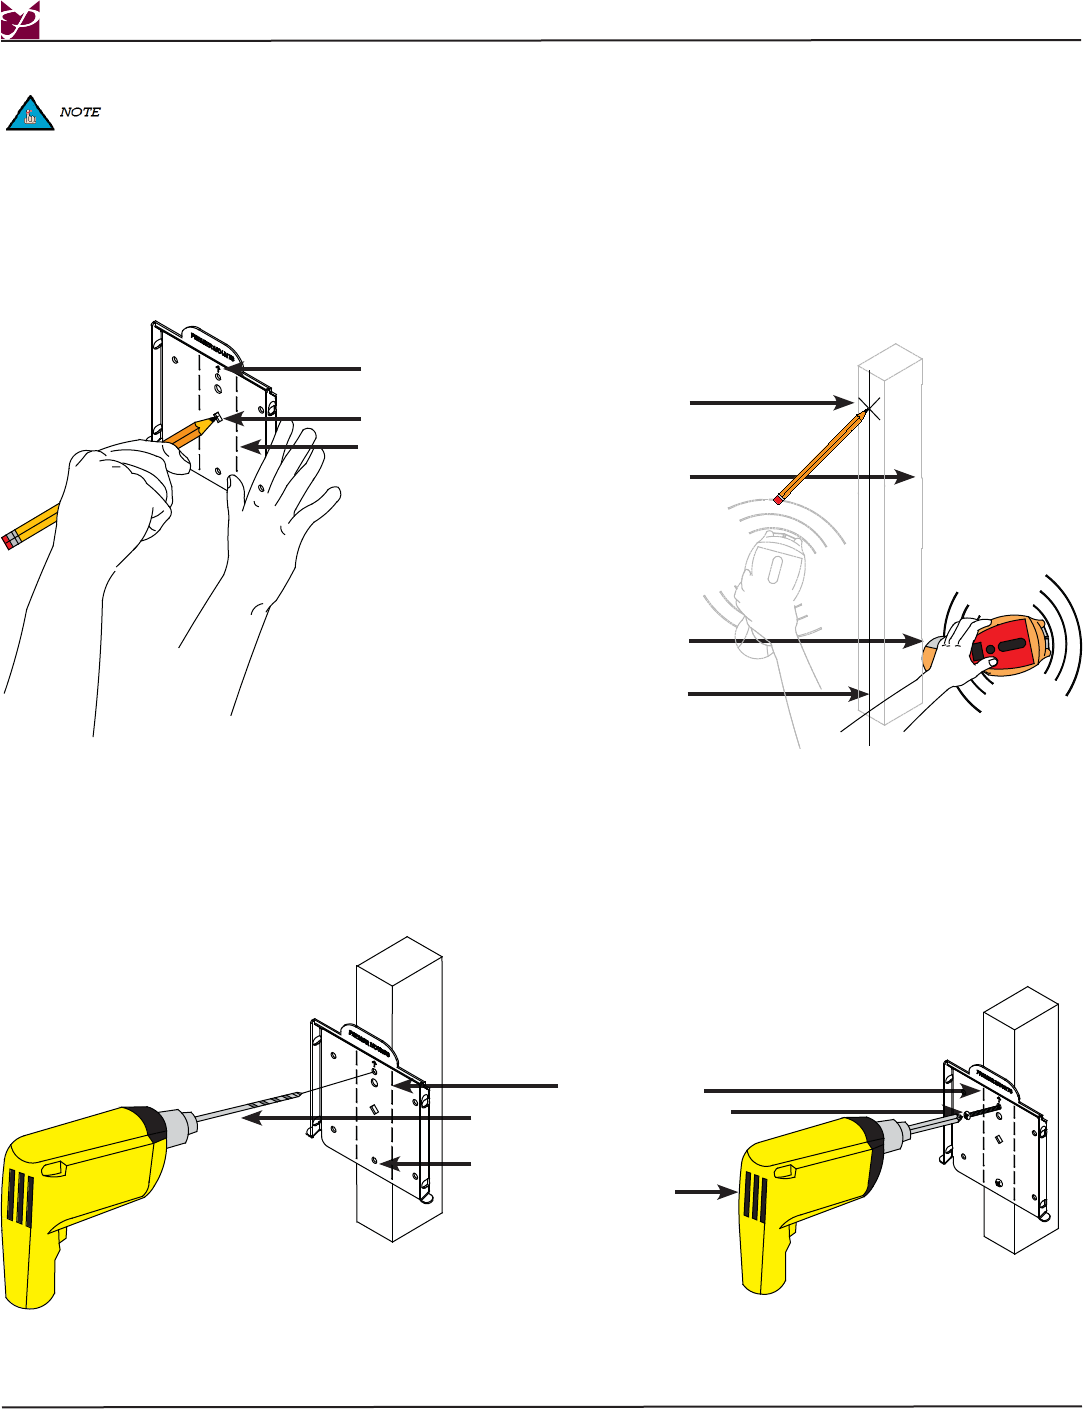
Step 7. Insert two (2) #10 X 2” screws into
the pre-drllied pilot holes.
Step 8. Tighten the wall plate screws at this
time.
Drill
#10 x 2” Screws
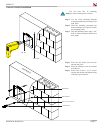
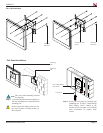
Step 1. Place the wall plate against the wall with
the directional arrow pointing up.
Step 2. Use a pencil to make a mark in the center
of the visual centering diamond. This will
be the center position of the flat panel.
Visual Centering Diamond
Directional Arrow
LPFM1532
Visual Stud Guide - The visual stud guide will allow you to determine exactly where both edges of the wood stud is within the wall.
Once both edges of the wood stud have been located, the visual centering diamond will be directly over the exact
center of the wood stud. Once the plate is in this position, the two mounting holes may be marked.
Visual Centering Diamond - The visual centering diamond will allow you to determine the center of the wood stud. It will also allow
you to determine the exact center for the flat panel placement on the wall. The visual centering diamond
will work in conjunction with the visual stud guide.
Visual Stud Guide
Visual Stud Guide
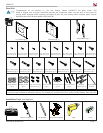
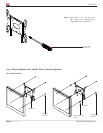
Prior to installation, the two (2) M6 x 75mm Phillips head locking screws must be removed. These two screws are located
on the bottom of the LPFM1532.